
How To Replace Faded Jeep Hood & Tailgate Badges: DIY Guide
 Reading Time: 13 minutes
Replacing faded Jeep hood and tailgate emblem badges is usually a simple adhesive-removal job. In most cases, you can remove the old badges with heat, fishing line, plastic trim tools, and a paint-safe adhesive remover. Then clean the surface, measure the original position, and install the new Jeep emblems on clean, dry paint.
The main caution is vehicle variation. Some Jeep badges use adhesive only, while others may include locating pins, clips, or holes in the body panel. Check the owner’s manual, factory parts information, or the replacement badge before pulling hard.
This guide applies to Jeep vehicles sold in the United States, including common models such as the Wrangler, Grand Cherokee, Cherokee, Compass, Renegade, Gladiator, and Wagoneer. Always confirm the correct badge size, placement, and mounting method for your model year.
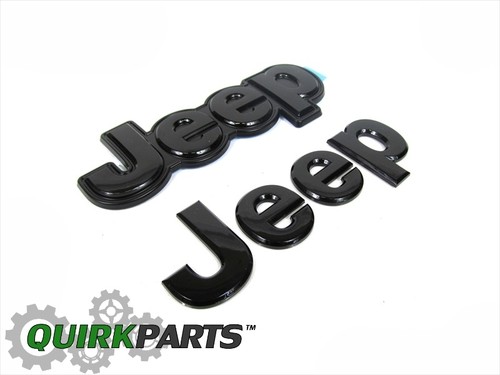
What You Need Before Replacing Jeep Badges
You need a few basic tools and supplies to replace Jeep hood and tailgate emblems without damaging the paint.
Tools and materials
- Correct replacement Jeep hood or tailgate badges
- Fishing line, dental floss, or plastic cutting wire
- Plastic trim-removal tool
- Hair dryer or low-temperature heat gun
- Painter’s tape
- Measuring tape or ruler
- Masking paper or cardboard
- Automotive adhesive remover labeled safe for painted surfaces
- Clean microfiber towels
- Isopropyl alcohol
- Nitrile gloves
- Eye protection
- Automotive surface cleaner
- Optional: paint-safe clay bar
- Optional: painter’s tape or a badge alignment template
Use a plastic trim tool instead of a screwdriver. A metal tool can chip the paint or leave a deep mark in the clear coat.
A hair dryer is often enough. If you use a heat gun, keep it on the lowest useful setting and keep it moving. Excess heat can soften trim, damage plastic, discolor paint, or affect nearby clear coat.
Check the replacement badge first
Before removing the original emblem, compare the old and new parts.
Check:
- Overall length and height
- Letter spacing
- Adhesive backing
- Locating pins or clips
- Curved shape
- Part number
- Model-year fit
- Left or right orientation
- Hood or tailgate application
A badge that looks similar may not fit the same Jeep model. Some aftermarket emblems have different letter spacing or adhesive coverage. Others may be made for a flat panel while the Jeep panel has a curve.
Know whether the badge is adhesive-mounted
Most exterior emblem replacements use automotive adhesive tape. However, do not assume every Jeep badge is held in place the same way.
Look for:
- Small gaps around the badge
- Visible mounting pins
- Clips behind the emblem
- Holes in the body panel
- A badge that does not lift evenly when warmed
If the emblem has pins or clips, pulling it sideways may damage the panel or break the mount. Remove the interior trim, if needed, and release the fasteners from behind according to the vehicle’s service information.
How to Remove a Faded Jeep Hood or Tailgate Emblem
The safest removal method is to soften the adhesive, cut through it, and lift the badge without prying against the paint.
1. Wash and dry the panel
Clean the hood or tailgate before starting. Dirt trapped under a tool or piece of fishing line can scratch the paint.
Use car wash soap and water. Rinse well, then dry with a clean microfiber towel. Do not begin removal on a dusty or muddy panel.
Work in a shaded area. The panel should be cool enough to touch. Direct sun can heat the paint and make adhesive remover evaporate too quickly.
2. Mark the original badge position
Use painter’s tape to mark the top, bottom, and outer edges of the old badge.
You can also take clear photographs from straight in front of the panel. Include a ruler in one photo if possible.
Record:
- Distance from the panel edge
- Distance from a body seam
- Distance from a nearby lamp or handle
- Height from the lower or upper edge
- Spacing between separate letters
This step matters because adhesive-backed badges do not allow much repositioning after contact. A small error can be easy to see on a large, flat tailgate.
3. Warm the adhesive
Warm the badge for about 30 to 60 seconds with a hair dryer. Move the dryer across the entire badge instead of holding it in one place.
The goal is to make the adhesive more flexible, not hot. Test the badge with a gloved finger. It should feel warm, but the surrounding paint should not become uncomfortably hot.
If the badge is still firmly attached, warm it again in short intervals.
4. Cut behind the emblem
Slide fishing line or dental floss behind one end of the badge. Use a gentle sawing motion to cut through the adhesive.
Keep the line close to the panel. Do not pull sharply toward yourself, because that can make the badge snap back or allow the line to rub against the paint.
For a long hood emblem:
- Start at one corner.
- Work slowly across the badge.
- Rewarm sections that resist.
- Keep the line level with the panel.
- Support the badge as it comes free.
A plastic cutting wire can work well on thick adhesive, but use light pressure. The line should cut the adhesive, not the paint.
5. Lift the badge with a plastic tool
When most of the adhesive has been cut, gently lift the badge with a plastic trim tool.
Do not twist the tool against the panel. If one area remains stuck, stop and cut that section with more line. Prying is the most common way to damage the clear coat during emblem removal.
6. Remove leftover adhesive
Roll loose adhesive into small sections with your gloved fingers or a clean microfiber towel. Then apply a small amount of automotive adhesive remover to the towel, not directly onto the panel.
Rub gently until the residue softens. Wipe the area clean as you work.
Always follow the remover’s label. Test it first on a hidden painted area, such as the underside of the tailgate lip. Do not let solvent sit on the paint longer than the product instructions allow.
Avoid gasoline, lacquer thinner, acetone, razor blades, and abrasive pads. These products can stain, dull, or scratch automotive paint.
7. Clean the mounting area
After the adhesive is gone, wash the area again. Follow with isopropyl alcohol on a clean, lint-free cloth if the replacement badge manufacturer allows it.
The surface must be:
- Clean
- Dry
- Free of wax
- Free of polish
- Free of silicone
- Above the minimum application temperature listed for the adhesive
Do not apply a new badge over wax or ceramic coating unless the badge maker specifically approves it. The new adhesive needs direct contact with a properly prepared surface.
How to Install the New Jeep Hood or Tailgate Badge
Install the new badge with a dry test fit first. Once the adhesive touches the paint, correction becomes difficult.
1. Test-fit the badge without removing the liner
Place the new badge over the old location. Keep the adhesive liner in place.
Check:
- Alignment with body lines
- Distance from the panel edge
- Spacing from nearby badges
- Letter orientation
- Contact with curved areas
- Clearance from the hood or tailgate edge
For separated letters, use the original markings or create a simple template. A piece of masking paper can help transfer the spacing from the old badge.
2. Create an alignment guide
Use painter’s tape to form an “L” guide along two sides of the badge. You can also place short tape marks at the center and ends.
Do not cover the adhesive area with tape. The tape should act as a visual stop, not as part of the mounting surface.
For a long badge, use a straight edge or a flexible ruler. Compare the badge to a body seam rather than relying only on the panel edge. Body panels can have curves that make an edge look uneven.
3. Remove the adhesive liner
Peel the liner back slowly. Avoid touching the exposed adhesive with your fingers.
If the badge contains several letters on one carrier, keep the carrier straight. Do not bend it sharply unless the product instructions allow bending.
4. Set the badge once
Place the badge inside the alignment marks. Apply light pressure at the center, then press toward the ends.
Press each letter or section firmly for the time stated by the badge manufacturer. A clean microfiber cloth can help spread pressure across the surface.
Do not slide the badge after it touches the paint. Sliding can move the adhesive, create weak spots, or leave a visible adhesive edge.
5. Allow the adhesive to bond
Keep the panel dry and avoid washing the Jeep for the period specified by the adhesive or replacement badge instructions.
Do not test the badge by pulling on it. A badge may feel secure before the adhesive reaches its full bond strength.
Cold weather, high humidity, wax residue, and poor cleaning can reduce adhesion. If the installation must be done outdoors in cold U.S. weather, move the Jeep into a warmer garage when possible and follow the adhesive maker’s temperature limits.
How to Align Jeep Badges Correctly
Accurate alignment depends on measurements, not visual judgment alone. The hood and tailgate can make a badge appear crooked because of curves, shadows, and body seams.
Useful alignment methods
| Method | Best use | Main limitation |
|---|---|---|
| Painter’s tape marks | Quick replacement in the same position | Old badge may already be crooked |
| Ruler measurements | Repeatable placement | Requires a clear reference point |
| Paper template | Separate letters or complex spacing | Template must be made accurately |
| Photograph with ruler | Record before removal | Camera angle can distort scale |
| Body seam reference | Long badges on curved panels | Seam may not be perfectly level |
Measure from two fixed points whenever possible. For example, measure from the tailgate edge and a nearby lamp. A single measurement can allow the badge to rotate slightly.
If the original badge is already faded but still straight, tape around its edges before removal. This preserves the original placement better than memory.
When to use a template
A template helps when:
- The replacement comes as separate letters
- The old badge has fallen off
- The panel has no clear reference line
- You are replacing several badges
- The new badge has a different carrier shape
- You want both sides of the Jeep to match
Make the template from thin cardboard or masking paper. Mark the top edge, centerline, and fixed reference points. Test the template on the Jeep before applying adhesive.
What good alignment looks like
After installation, stand several feet behind or in front of the Jeep. Check the badge from normal viewing height.
Look for:
- A consistent gap from the panel edge
- A level relationship to nearby trim
- Even letter spacing
- Full contact with the panel
- No lifted corners
- No visible adhesive beyond the badge
Do not judge alignment from one close angle. View the Jeep from both sides and from several feet away.
Troubleshooting Jeep Emblem Replacement Problems
Most problems come from incorrect badge fit, leftover adhesive, poor alignment, or weak surface preparation.
The old badge will not release
Likely causes:
- The adhesive is cold
- A hidden section is still attached
- The badge uses clips or pins
- The replacement method is wrong for that panel
Warm the area again and use fishing line behind the remaining stuck section. Do not increase force immediately. If the badge lifts only at one point or you feel a hard stop, check for clips or locating pins.
The paint looks dull after removal
Adhesive remover may leave a film, or the old badge may have protected the paint from sunlight and weather.
Wash the area and inspect it under good light. A mild automotive polish may reduce light residue or a visible outline, but do not polish aggressively. If the clear coat is damaged, stop and seek advice from an automotive paint professional.
A “ghost” outline can also result from different paint exposure under and around the old badge. This may not disappear with cleaning.
The new badge will not stick
Check for:
- Wax or polish on the surface
- Adhesive remover residue
- Water or condensation
- Cold panel temperature
- Dust under the badge
- Incorrect or damaged adhesive backing
- A curved badge on a flat-panel application
- Paint damage or flaking
Remove and replace contaminated adhesive rather than pressing it harder. Do not reuse a badge after pulling it off unless the manufacturer says its adhesive can be reused.
The badge is crooked
If you notice the error immediately, lift the badge carefully before pressing it firmly. Once the adhesive has been pressed down, removal may damage the adhesive or paint.
If the badge is fully bonded, removing and replacing it may be the only clean correction. Do not try to rotate it by force.
The badge has lifted corners
A lifted corner usually means the surface was dirty, the panel was too cold, the badge was bent, or the adhesive did not contact the paint evenly.
Pressing the corner down may work only if the adhesive is still clean and flexible. If dirt has entered beneath it, replace the adhesive or the badge according to the manufacturer’s instructions.
OEM, Aftermarket, and Custom Jeep Emblems
Choose a replacement badge based on fit, mounting method, finish, and return policy rather than appearance alone.
OEM Jeep badges
An original-equipment badge is usually the safest choice when exact fit, finish, and factory placement matter. Verify the part number by VIN or model-year catalog because Jeep badges can change between trims and production years.
OEM does not automatically mean the old installation method will be identical. Confirm whether the part includes adhesive, clips, pins, or a carrier.
Aftermarket replacement badges
Aftermarket badges may offer different finishes, such as black, matte, gloss, chrome, or colored coatings. Before buying, confirm:
- Exact Jeep model and year
- Hood or tailgate location
- Badge dimensions
- One-piece or separate-letter design
- Adhesive type
- Surface shape
- Installation instructions
- Warranty or return terms
Some aftermarket kits include generic double-sided tape. That tape may not have the same thickness, edge seal, or temperature rating as the original adhesive.
Painted or custom badges
Custom-painted badges can match other exterior parts, but their finish may be more sensitive to solvents and abrasion. Use only cleaning products approved for the badge’s coating.
If the badge has a raised clear coat, textured finish, or delicate printed design, avoid aggressive rubbing during adhesive removal.
Common Mistakes to Avoid
Avoid these errors when replacing Jeep hood and tailgate emblems:
- Prying with a screwdriver
- Using a razor blade on painted panels
- Heating one spot for too long
- Pulling the badge away before cutting the adhesive
- Skipping the dry test fit
- Trusting a crooked old badge as the only guide
- Applying new adhesive over wax
- Touching exposed adhesive
- Washing the Jeep immediately after installation
- Assuming every Jeep badge uses the same mounting system
- Using solvent without testing it first
- Pressing a badge onto wet or cold paint
The most damaging mistake is rushing the removal. Adhesive work rewards slow pressure and repeated warming. If the badge resists, find out why before applying more force.
When to Get Professional Help
A professional detailer or body shop is the better choice when the badge is mounted with clips behind a panel, the paint is already damaged, or the vehicle has a wrap or ceramic coating that may be affected by solvents.
Get help if:
- The paint lifts with the adhesive
- The panel is dented under the badge
- Mounting holes are exposed
- The badge location is unclear
- The new badge does not match the vehicle
- The old emblem leaves a deep color difference
- You need precise placement on multiple panels
A professional can also correct paint outlines with controlled polishing or paint repair. Do not use abrasive methods on peeling clear coat.
Frequently Asked Questions
Can I replace Jeep badges without removing the tailgate trim?
Often, yes, when the emblem uses adhesive only. If the badge has clips, pins, or nuts behind the panel, tailgate trim removal may be required. Check the replacement part and vehicle-specific service information first.
Can I use dental floss to remove a Jeep emblem?
Yes. Dental floss can cut through soft emblem adhesive when used with a gentle sawing motion. Fishing line is often stronger and may work better on thick or aged adhesive.
Will removing a Jeep badge damage the paint?
It should not damage sound factory paint when you use moderate heat, fishing line, plastic tools, and a paint-safe remover. Risk increases when the paint is already peeling, repainted, cracked, or exposed to excessive heat.
How long does it take to replace a Jeep hood or tailgate badge?
A simple one-piece badge may take about 30 to 60 minutes, including cleaning and alignment. Separate letters, stubborn adhesive, clips, or paint correction can take longer.
Can I install a new Jeep badge over the old adhesive?
No. Remove the old adhesive and clean the panel first. New adhesive applied over residue may sit unevenly and may not bond securely.
Should I replace all Jeep badges at the same time?
Not always. Replace only the faded or damaged badges if the remaining badges still match. Replacing a complete set can create a more consistent finish, especially when the original badges have weathered at different rates.
Final Recommendation
To replace faded Jeep hood and tailgate emblem badges successfully, confirm the correct part, photograph and measure the original position, soften the adhesive, cut it away with fishing line, and clean the paint before installation. Use a dry test fit and alignment marks before exposing the new adhesive.
The safest approach is slow removal and careful preparation. If the badge has pins, clips, damaged paint, or unclear mounting hardware, stop before prying and check Jeep service information or consult a qualified automotive professional.
Useful reference points: consult the official U.S. Jeep/Mopar owner-manual portal for model-specific information, and follow the instructions and surface limits printed by the adhesive or badge manufacturer.


