
Jeep Cherokee XJ: Fix Sagging Leaf Springs On A Budget
 Reading Time: 15 minutes
A sagging rear suspension is common on older Jeep Cherokee XJ models in the United States. The rear leaf springs may flatten from age, heavy cargo, towing, rust, or repeated off-road use. The safest budget fix is usually to replace both rear leaf packs or combine sound replacement springs with a small shackle lift. An add-a-leaf can cost less, but it may create a harsh ride and will not repair cracked or badly fatigued springs.
This guide explains how to diagnose the problem, choose a low-cost repair, install the parts, and check the Jeep after the work. It applies to the two-door and four-door Jeep Cherokee XJ sold in the USA, but exact fastener sizes and torque values vary by model year.

What Causes a Jeep Cherokee XJ Rear Suspension to Sag?
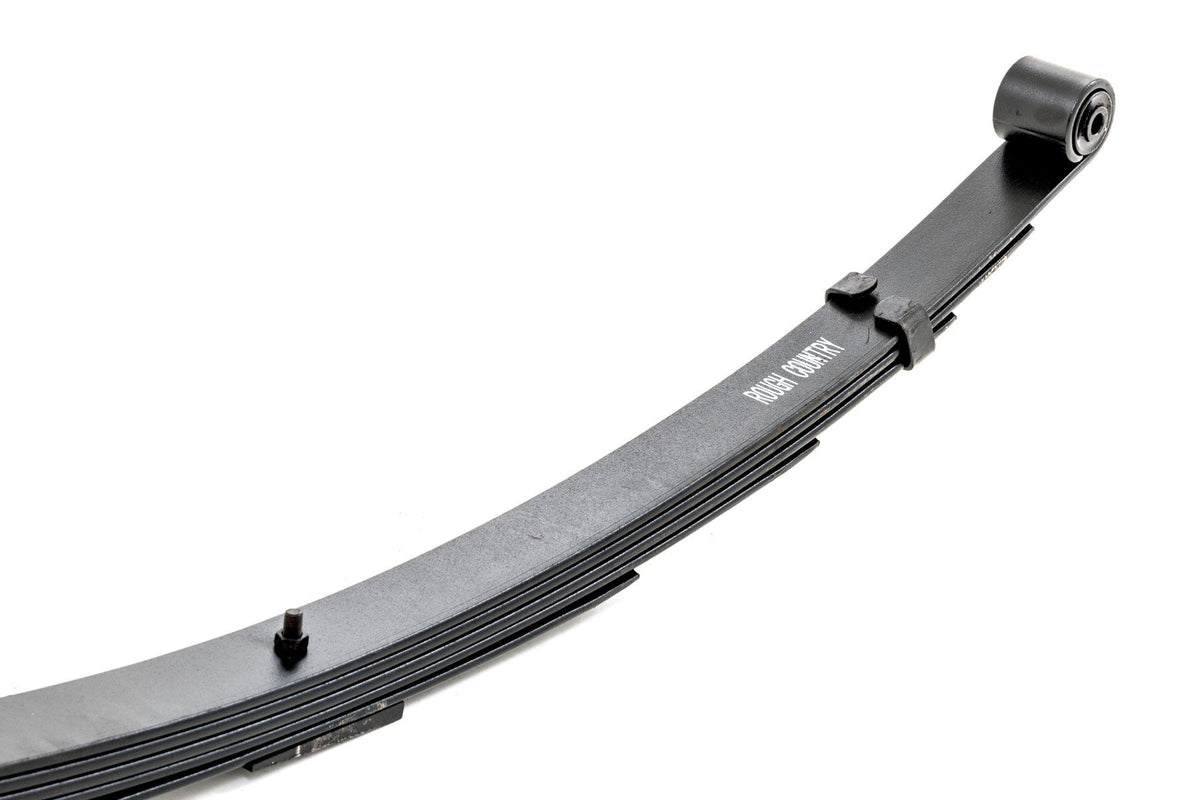
The XJ uses a leaf spring pack at each rear corner. Each pack contains several steel leaves that flex under the vehicle’s weight. Over time, the leaves can lose their original arch.
Common causes include:
- Age-related spring fatigue
- Constant heavy cargo
- Repeated towing
- Rust between the leaves
- overloading the rear cargo area
- Broken or cracked spring leaves
- Worn spring eye bushings
- Bent shackles or spring hangers
- Previous use of poor-quality lift parts
- Unequal wear from a damaged or overloaded side
A sagging spring does more than lower the back of the Jeep. It can reduce suspension travel, change the rear shackle angle, cause the axle to sit too close to the bump stops, and make the Jeep handle poorly when loaded.
A small amount of left-to-right height difference is normal on an old vehicle. A major difference, a visibly flat spring, or a spring that curves upward near the center needs closer inspection.
What “budget boost” means on an XJ
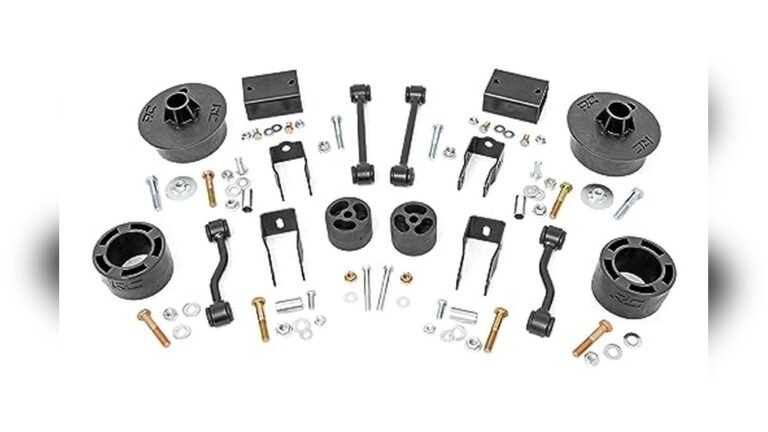
A budget boost is a low-cost suspension lift. On the front of an XJ, the term often means coil spacers. The rear suspension does not use coil springs, so the rear needs a different method.
For the rear of a Cherokee XJ, a budget lift may use:
- Longer rear shackles
- Add-a-leaf springs
- Replacement leaf packs with extra arch
- Lift blocks
- A combination of replacement springs and shackles
These parts do not all solve sagging in the same way. A spacer-like part can raise the body, but it cannot restore a weak spring.
Check the Cause Before Buying Parts
Measure and inspect the rear suspension before ordering a lift. This prevents you from treating a bad spring as if it were only a height problem.
Park the Jeep on a level surface. Remove heavy tools, camping gear, spare parts, and other cargo from the rear. Set the tire pressures evenly and make sure the fuel level is similar on both measurements.
Measure from the center of the rear wheel hub straight up to the lower edge of the fender opening. Record the left and right measurements. This is more useful than measuring from the ground because tire size and tire pressure can change the result.
Then inspect each side for the following symptoms:
| Symptom | Likely cause | Best first action |
|---|---|---|
| Both sides sit low | Tired leaf packs or long-term overload | Replace both leaf packs |
| One side sits much lower | Broken spring, damaged shackle, or uneven pack | Inspect closely and repair the fault |
| Spring has a flat or reverse curve | Severe fatigue | Replace the spring pack |
| Visible crack or broken leaf | Structural damage | Do not drive until repaired |
| Rear axle sits too close to bump stops | Low or collapsed springs | Replace springs and inspect bump stops |
| Clunk over bumps | Loose U-bolts, bushings, or shackle hardware | Inspect and repair before lifting |
| Rear of Jeep feels harsh after an add-a-leaf | Spring rate is too high | Remove the AAL or use a complete spring pack |
| Jeep leans after a lift | Unequal spring condition or body issue | Recheck both sides and the frame |
Look at the spring eyes, the center pin, the rebound clips, and the spring leaves. Search for deep rust, missing clips, crushed bushings, or a leaf that does not contact the rest of the pack.
Also inspect the rear frame rails and spring hangers. Rust near the shackle mounts is a serious concern on an older XJ. A lift will not make a weak mount safe.

Choose the Best Budget Fix
The best repair depends on whether the original leaf packs are still healthy. If the leaves are flat, cracked, or badly rusted, use complete replacement packs rather than trying to lift them with shackles alone.
Option 1: Replace both rear leaf packs
This is the best long-term fix for most sagging XJs. New leaf packs restore spring height and support without placing all the work on a longer shackle or a single add-a-leaf.
Choose this option when:
- Both springs are visibly flat
- One or more leaves are cracked
- The Jeep carries regular cargo
- The spring eye bushings are worn
- You want a predictable ride
- The Jeep will be driven on public roads and trails
Replace the left and right springs as a pair. Mixing one old spring with one new spring can leave the Jeep uneven.
A replacement pack may provide stock height, mild lift, or a heavier spring rate. Do not choose a heavy-duty pack only because it is cheap. A stiff pack can reduce comfort, limit traction on rough trails, and create more stress in the body and mounts.
Option 2: Add-a-leaf springs
An add-a-leaf, often called an AAL, fits inside the existing leaf pack. It increases spring rate and usually adds some height.
An AAL may work when:
- The original springs still have a reasonable arch
- The leaves are not cracked or deeply rusted
- You need a low-cost, mild lift
- The Jeep carries a moderate load
An AAL is not a complete repair for a worn-out spring. It may raise the vehicle while leaving the old leaves fatigued. The ride can also become stiff, especially with a short AAL.
A full-length AAL usually spreads the load better than a short AAL. Follow the spring maker’s instructions for the correct position, center pin, and rebound clips.
Option 3: Longer rear shackles
A longer shackle can raise the rear of an XJ at a low parts cost. It also changes the angle through which the spring moves.
A modestly longer shackle may be reasonable when:
- The original springs are still in good shape
- You want only a small height increase
- The shackle will not contact the body
- The spring eye bushings and mounts are sound
Do not use a long shackle to hide a collapsed leaf pack. The rear may look higher while the spring remains weak.
Check the shackle angle at ride height. A shackle that stands nearly vertical, folds backward too far, or approaches inversion can limit suspension movement. It can also transfer more force into the rear frame.
Option 4: Lift blocks
A lift block sits between the rear axle and the leaf spring. It is usually inexpensive, but it raises the axle without improving spring condition.
Blocks can increase axle wrap. Axle wrap occurs when the axle housing tries to rotate against the leaf springs during acceleration or braking. The result can include wheel hop, driveline vibration, spring damage, or broken components.
Avoid lift blocks on a street-driven XJ with weak springs. Never stack blocks. Never use a block if the center pin does not properly locate the axle and spring. For a sagging suspension, replacement springs are a better use of the budget.
Budget option comparison
| Repair | Helps sagging springs? | Ride effect | Main risk | Best use |
|---|---|---|---|---|
| Stock-height replacement packs | Yes | Similar to stock | Parts cost | Best general repair |
| Mild lift replacement packs | Yes | May be firmer | Extra clearance may require checks | Repair plus small lift |
| Full-length AAL | Sometimes | Usually firmer | Old pack remains in service | Sound springs needing mild lift |
| Short AAL | Limited | Often harsh | Uneven stress in the pack | Low-cost temporary lift |
| Longer shackles | No, by themselves | Similar until travel changes | Bad shackle angle | Small lift with healthy springs |
| Lift blocks | No | May increase axle wrap | Wheel hop and driveline stress | Usually poor choice for a sagging XJ |
| Re-arching old springs | Temporary at best | Varies | Springs may sag again | Specialist repair only |

Parts and Tools You Need
Gather all parts before taking the Jeep apart. Rusted XJ hardware can turn a short job into a longer repair.
Typical parts include:
- Two rear leaf spring packs
- Four new spring eye bushings, if not included
- Two new U-bolt sets
- New spring center pins, if required
- New shackle bushings or shackles
- New spring eye bolts if the old bolts are damaged
- Replacement shock hardware if the old hardware is unusable
- New bump stops if the originals are damaged
Use U-bolts made for the axle tube diameter and spring plate design. Do not reuse stretched, deeply rusted, or damaged U-bolts. U-bolts clamp the axle to the springs, so this is not a place to use random hardware.
Useful tools include:
- A floor jack with enough capacity
- Heavy-duty jack stands
- Wheel chocks
- Socket and wrench sets
- Breaker bar
- Torque wrench
- Penetrating oil
- Pry bar
- Hammer
- Safety glasses and gloves
- Saw or cutting tool for seized bolts
- Spring compressor only if the spring maker requires one
Do not rely on a hydraulic jack to support the Jeep. Support the unibody at approved, strong points and support the axle separately while removing the springs.
Before starting, find the factory service information for your exact model year. Use the spring manufacturer’s torque instructions when they differ from the Jeep service information.
How to Replace Sagging XJ Rear Leaf Springs
Work on one side at a time if possible. Keep the other side assembled as a reference, but support the axle securely before removing any spring hardware.
1. Prepare the Jeep
Park on a hard, level surface. Put the transmission in Park or in first gear for a manual transmission. Set the parking brake, then place wheel chocks in front of and behind the front tires.
Loosen the rear wheel lug nuts slightly. Raise the rear of the Jeep with a floor jack and place jack stands under strong support points. Lower the Jeep onto the stands and shake it gently to confirm it is stable.
Remove the rear wheels.
2. Inspect the brake and shock system
Support the rear axle with a second jack. The axle must not hang freely after the springs are removed.
Check the brake hose, parking-brake cables, and shock absorbers. Make sure none of them will be stretched as the axle moves. Disconnect only the parts needed for safe spring removal.
Do not allow the brake hose to carry axle weight. If the new springs or shackles provide more travel, verify that the hose still has slack at full droop.
3. Remove the U-bolts
Apply penetrating oil to the U-bolt nuts. Remove the nuts and the lower spring plate.
Cutting may be safer than forcing badly rusted U-bolts. Keep sparks away from fuel lines, brake lines, wiring, and dry debris. Wear eye protection.
Never reuse U-bolts that are bent, stretched, or heavily corroded.
4. Remove the spring eye and shackle bolts
Support the spring with a jack. Remove the front spring eye bolt and the rear shackle bolts.
Some XJ bolts seize inside the spring eye bushing sleeve. If the bolt will not move, do not keep applying force until the body mount begins to bend. Cut the bolt or sleeve carefully and replace the damaged hardware.
Inspect the front spring hanger and rear shackle mount after the spring is out. Look for cracks, torn metal, and rust holes.
5. Compare the new spring pack
Before installation, compare the new pack with the old one.
Confirm:
- The front and rear eyes are in the correct positions
- The center pin is in the correct location
- The spring width matches the original
- The spring arch is appropriate for the Jeep
- The bushings fit the mounting bolts
- The spring maker’s load rating suits your use
Some packs use a center pin head that points into the axle spring perch. Follow the maker’s instructions. Incorrect pin direction can prevent the axle from locating correctly.
6. Install the spring
Place the new spring into the front hanger and rear shackle. Install the bolts and nuts, but leave them loose enough for the bushings to settle.
Keep the spring supported. Do not force the spring eye into place with a pry bar against thin body metal.
If you are using longer shackles, confirm that both shackles face the same direction and have matching hardware. The shackle must move freely without touching the body.
7. Refit the axle and U-bolts
Lower the axle carefully onto the spring center pin. Make sure the pin sits in the locating hole in the spring perch.
Install the spring plate and new U-bolts. Tighten the nuts in a cross pattern. Use the correct torque from the vehicle service information or U-bolt manufacturer.
Do not guess at U-bolt torque. The correct value depends on the bolt diameter, grade, thread condition, spring plate, and manufacturer.
8. Tighten spring bolts at ride height
Rubber spring bushings should usually be tightened with the suspension near normal ride height. Tightening them while the axle hangs can preload the bushings and reduce their life.
Reinstall the wheels. Lower the Jeep until it rests at normal ride height, then tighten the spring eye and shackle hardware to the correct specification.
If the spring maker specifies a different method for polyurethane or greasable bushings, follow those instructions.
9. Perform the first inspection
Check both sides for:
- Correct spring seating
- Equal shackle direction
- Brake hose clearance
- Parking-brake cable clearance
- Shock clearance
- U-bolt thread engagement
- Tire-to-body clearance
- Bump-stop clearance
- Loose tools or parts
Pump the brake pedal before moving the Jeep if any brake work was performed. The pedal should feel firm. Do not drive if it feels soft.

Check Lift Height, Ride Quality, and Driveline Behavior
A successful repair should restore a level stance without creating new problems. Measure the hub-to-fender height again on level ground.
The Jeep may sit slightly higher at first. Springs can settle after use, especially if the parts are new. Recheck the height after several normal drives and compare both sides.
A small rear lift can change the rear pinion angle. Watch for:
- Vibration during acceleration
- Vibration at highway speed
- A new humming or whining sound
- Clunks when shifting from Drive to Reverse
- A shudder under load
- Reduced driveshaft slip-yoke engagement
Do not add shims automatically. First confirm that the springs are seated correctly and that the axle is properly located. If vibration remains, measure the driveline angles and follow the driveshaft or spring manufacturer’s guidance.
A mild rear spring lift may also require a check of:
- Rear shock length
- Brake hose length
- Parking-brake cable routing
- Rear sway-bar link angle
- Bump-stop engagement
- Tire clearance
- Headlight aim if the Jeep sits differently front to rear
The rear axle on an XJ does not use the same alignment adjustments as an independent rear suspension. However, a shifted axle, bent spring, damaged mount, or incorrect spring installation can change the vehicle’s thrust direction. If the Jeep pulls or travels sideways, have the suspension and alignment checked.
What to Do If the Budget Repair Fails
If the Jeep still sags after installing an add-a-leaf, the original spring pack may be too weak. A second lift part will not restore damaged steel. Replace the complete leaf packs.
If one side remains low after replacing both springs, inspect:
- A broken or bent spring
- A damaged shackle
- A crushed bushing
- A bent spring hanger
- Frame rust
- Unequal cargo or fuel conditions
- A body or unibody problem
- Incorrect spring orientation
If the ride is too harsh, the spring rate may be too high. Short add-a-leaf springs and heavy-duty replacement packs can make an empty XJ uncomfortable. A softer, stock-height replacement pack may work better for a daily driver.
If the Jeep develops wheel hop after using lift blocks, remove the blocks and inspect the springs. Wheel hop can damage the spring packs and driveline.
Stop driving and arrange a proper inspection if you find:
- A cracked leaf
- A broken center pin
- A torn spring hanger
- A spring shackle touching the body
- A loose axle
- A damaged brake hose
- Severe driveline vibration
- A brake pedal that does not feel firm

Common Mistakes to Avoid
Replacing only the low side
A single new spring can leave the Jeep uneven because the old spring on the other side has a different age, rate, and amount of fatigue. Replace rear springs in pairs.
Using long shackles on dead springs
A long shackle raises the body but does not restore spring strength. It can also create a poor shackle angle and increase stress on the frame.
Reusing old U-bolts
U-bolts stretch during tightening. Reusing them can reduce clamping force and allow the axle to move.
Tightening rubber bushings with the axle hanging
This can twist the bushing at normal ride height. Tighten the hardware with the suspension in its normal loaded position unless the manufacturer gives different instructions.
Ignoring the unibody mounts
The XJ has a unibody, not a separate full-length frame. Rust around the spring hangers and shackle mounts can compromise the repair.
Choosing spring rate by lift height alone
A two-inch lift spring can be soft or stiff. Spring rate, load rating, arch, and intended use matter as much as advertised height.
Adding blocks to fix weak springs
Blocks add height but do not repair fatigue. They may increase axle wrap and driveline stress.
Key Takeaways
- Inspect the leaf packs, shackles, bushings, U-bolts, and unibody mounts before buying parts.
- Replace both rear leaf packs if they are flat, cracked, badly rusted, or tired.
- Use an add-a-leaf only when the original springs remain structurally sound.
- A modest longer shackle can provide a small lift, but it cannot repair a weak spring.
- Avoid stacked or tall lift blocks on a sagging XJ.
- Use new U-bolts and the correct torque specifications.
- Check brake lines, shocks, bump stops, tires, shackles, and driveline vibration after the repair.
- Stop driving if the axle is loose, a spring is cracked, or a brake component is damaged.
Frequently Asked Questions
Can a budget boost fix sagging Jeep Cherokee XJ leaf springs?
It depends on the condition of the springs. Replacement leaf packs can fix sagging. A modest shackle lift may raise a Jeep with healthy springs. An add-a-leaf may help a mildly tired pack, but it will not reliably repair cracked, flat, or badly fatigued leaves.
Are longer shackles safe on a Jeep Cherokee XJ?
Shorter, modest-length shackles can be safe when the springs, bushings, mounts, and frame are sound. The shackle must retain a useful operating angle and must not contact the body. Excessively long shackles can reduce suspension control and stress the unibody mounts.
How much lift can an XJ rear shackle provide?
The result depends on the shackle length and the original shackle angle. The body does not rise by the full increase in shackle length because the shackle moves through an arc. Measure the final ride height instead of relying only on the advertised lift.
Should I use lift blocks on the rear of an XJ?
Lift blocks are generally a poor solution for sagging leaf springs. They do not restore spring strength and can increase axle wrap. If the original springs are weak, replace the springs instead.
Do I need new shocks after replacing rear leaf springs?
Not always. Reuse the shocks only if they are in good condition and have enough compressed and extended travel for the new ride height. A lifted suspension can overextend a stock shock, so check travel before driving.
Does a rear XJ lift require an alignment?
A rear solid axle does not have the same alignment adjustments as a front-wheel-drive independent rear suspension. However, a damaged spring, shifted axle, bent mount, or incorrect installation can change the vehicle’s thrust direction. Have the Jeep inspected if it pulls, dog-tracks, or wears tires unevenly.
Can I drive with one broken rear leaf?
No. A broken leaf can change axle location and suspension control. It can also damage the tire, brake line, or spring mount. Repair the suspension before driving on public roads.
Conclusion
The most reliable budget repair for a sagging Jeep Cherokee XJ rear suspension is a matched pair of replacement leaf packs. If the original packs are still sound, a full-length add-a-leaf or modest shackle lift may provide a lower-cost lift. Avoid using blocks or long shackles to hide badly fatigued springs.
Start with a careful inspection, replace worn hardware, tighten the spring bushings at ride height, and check every related component after installation. The next practical step is to measure the hub-to-fender height, inspect both spring packs and their mounts, and choose the repair based on spring condition rather than lift height alone.