
How to Choose Practical Accessories for a Jeep Road Trip: A Compatibility Checklist
 Reading Time: 4 minutes
Preparing a Jeep for a road trip goes beyond checking tires and fluids. Inside the cabin, the accessories you rely on for navigation, device power, and trip recording need to fit your interior layout without getting in the way of driving controls. Focusing on three practical essentials—phone holders, charging accessories, and action-camera mounts—helps keep your cabin organized on both highways and rough backroads.
1. Check Vehicle Model, Year, and Mounting Position
Interior geometry varies across the Jeep lineup and even between different model years of the same vehicle. A dashboard recess, air vent design, or grab-handle diameter can change after a model-year refresh, which directly affects how aftermarket gear attaches.
When browsing an online store such as HoMEdemic at https://homedemic.com/ across categories like car accessories for convenience, action-camera mounts and power gear, or protective phone cases and screen protectors, start by comparing each item’s mounting base against your cabin surfaces:
- Dashboard and windshield: Many Jeep dashboards use textured plastic that resists standard flat adhesives unless paired with a mounting disc or recessed tray bracket. Before using a suction mount on smooth windshield glass, check local rules and choose a position that leaves the road, mirrors, and vehicle sensors unobstructed.
- Air vents and grab handles: Check whether your model year uses circular rotating vents or horizontal slats before picking a vent clip, and measure the diameter of any roll bar or grab handle before ordering a tube clamp.
2. Choosing Phone Holders and Action-Camera Mounts
Once you pick a mounting position, verify that the cradle or bracket matches your device dimensions:
- Phone holders: Measure your phone’s width and thickness with its protective case on, then compare those numbers against the holder’s minimum and maximum jaw opening and bottom foot depth. If using a magnetic mount, confirm your case thickness will not weaken the grip on bumpy roads.
- Action-camera mounts: Check the camera or housing’s mounting interface, such as GoPro-style mounting fingers or a 1/4-inch-20 thread, and confirm any required adapter. Make sure the suction base or bar clamp is rated to support the total weight of your camera setup—whether you mount the camera body directly or pair it with a protective housing and external battery pack—without drooping over uneven pavement.
3. Verifying Charging Compatibility
Running GPS navigation, music, and cameras quickly drains batteries on long drives. Before buying charging accessories, check your cabin’s available power outlets:
- Port types and output: Identify whether your dash and console offer 12V auxiliary sockets, USB-A ports, or USB-C ports. Match your car charger’s wattage and charging protocol (such as USB Power Delivery) to the input requirements of your phones and camera chargers.
- Cable length and battery draw: Choose a cable length that reaches your mount without pulling tight or tangling near the pedals. Check your owner’s manual to see which 12V outlets stay powered when the engine is off so you can unplug adapters during overnight stops.
4. Control Access, Airbag Clearance, and Installation Instructions
Every cabin accessory must leave your driving controls and safety systems completely unobstructed:
- Access to controls: Sit in the driver’s seat and confirm that your mounted phone, camera, and cables do not block the infotainment screen, backup camera display, hazard button, climate knobs, or gear and transfer-case shifters. Set up navigation and recording while safely parked, and stop safely before adjusting mounts or cables.
- Airbag clearance: Check all airbag locations and deployment paths in the owner’s manual for your exact model and year, including the steering wheel, passenger dashboard, and the areas above the side windows where curtain airbags are fitted. Keep mounts, clamps, and cables clear of all airbag covers and deployment paths.
- Installation instructions: Follow the manufacturer’s setup guide step by step. Prepare the mounting surface using products approved by both the vehicle and mount manufacturers, then follow the specified drying and curing times before loading weight, and hand-tighten locking knobs without over-torquing plastic threads.
Quick Pre-Purchase Compatibility Checklist
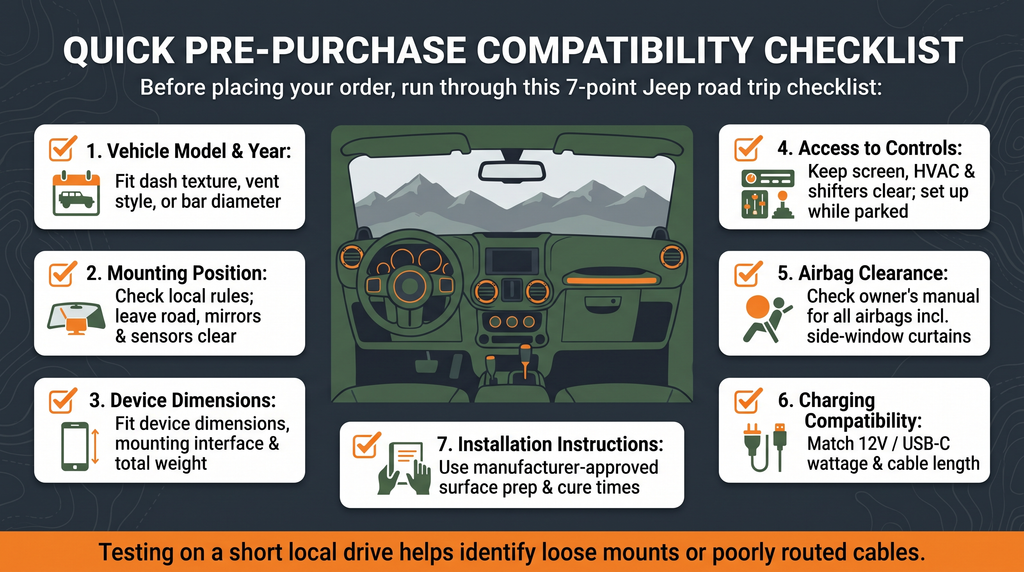
Before placing your order, run through this seven-point checklist:
- Vehicle model and year: Does the mount base fit your specific dashboard texture, vent style, or bar diameter?
- Mounting position: Have you checked local rules and chosen a position that leaves the road, mirrors, and vehicle sensors unobstructed?
- Device dimensions: Does the holder fit your device’s dimensions and mounting interface, and is the mount rated for its total weight?
- Access to controls: Are the touchscreen, hazard switch, HVAC knobs, and shifters completely easy to reach, with navigation and recording set up while safely parked?
- Airbag clearance: Have you checked all airbag locations and deployment paths in the owner’s manual for your exact model and year—including the areas above the side windows where curtain airbags are fitted—so mounts, clamps, and cables stay clear of all airbag covers and deployment paths?
- Charging compatibility: Do the adapter plugs, wattage ratings, and cable lengths match your Jeep’s outlets and devices?
- Installation instructions: Do you have the surface-preparation products approved by both the vehicle and mount manufacturers, along with the specified drying times, curing times, and tools noted in the manual?
Testing your mounts and charging cables on a short local drive before departure helps identify loose mounts or poorly routed cables, keeping your gear visible and within easy reach for the trip ahead.