
How To Remove Jeep Cherokee Doors: Easy DIY Guide
 Reading Time: 11 minutes
 For Jeep Cherokees sold in the United States, door-removal procedures vary significantly by generation. The classic 1984–2001 Jeep Cherokee XJ has doors that can be unbolted and removed, while the 2014–2023 Jeep Cherokee KL uses a more integrated design with wiring, hinge hardware, and safety components that require additional care. The Jeep Cherokee is not the same vehicle as the Jeep Wrangler, whose doors are specifically designed for frequent owner removal.
Before starting, identify your Cherokee’s generation, confirm the correct fasteners in a factory service manual, and have another person support the door. A Cherokee door is heavy, awkward to balance, and capable of damaging the hinges, wiring, paint, or your back if it falls.

Identify Your Jeep Cherokee Generation First
The safest removal method depends on the body generation, door construction, and electrical equipment installed on the vehicle.
| Jeep Cherokee generation | U.S. model years | General removal situation |
|---|---|---|
| Cherokee XJ | 1984–2001 | Doors can generally be removed by disconnecting wiring and unbolting the hinges |
| Cherokee KL | 2014–2023 | Doors can be removed, but the process involves wiring connectors, hinge hardware, alignment, and more safety considerations |
| Cherokee SJ/full-size Cherokee | Earlier U.S. models | Hardware and access differ; use the model-specific service manual |
The XJ is the model most often associated with removable Cherokee doors. Its doors are commonly removed for body repair, hinge replacement, rust repair, trail repairs, or restoration work. The KL door assembly is more modern and may include power locks, power windows, speakers, side-impact protection, and other components that make careless removal more likely to cause damage.
Do not use a Cherokee door-removal guide for a Jeep Grand Cherokee or Jeep Wrangler. Those vehicles use different door, hinge, wiring, and restraint systems.
Tools and Preparation
Gather the tools and assistance before opening the door. The exact fastener type can vary by model year and trim level, so compare your tools with the fasteners on the vehicle rather than assuming one tool fits every Cherokee.
You may need:
- Ratchet and metric sockets
- Torx bits or sockets, depending on the hinge hardware
- Combination wrenches
- Trim-panel removal tools
- Screwdrivers
- Penetrating oil for corroded hinge bolts
- Painter’s tape or masking tape
- A padded work stand, moving blanket, or sturdy folding table
- Torque wrench for reinstallation
- Plastic bags and labels for fasteners
- A second person to hold the door
Park on a level, stable surface. Set the parking brake and place the transmission in Park, or in first gear for a manual transmission. Keep the vehicle supported by its wheels unless the service procedure specifically requires otherwise.
Before disconnecting a battery, check whether the vehicle has an aftermarket alarm, radio security code, or other equipment that could be affected. On a KL, disconnecting the negative battery cable may be appropriate before unplugging door wiring, but follow the service manual’s battery and restraint-system instructions. Avoid probing yellow airbag connectors.
Use masking tape around the hinge and striker areas to help protect the paint. Take clear photographs of the hinge position, wiring routing, and any shims before removing parts. These photographs are especially useful when reinstalling a door.
How to Remove Doors From a Jeep Cherokee XJ
On most 1984–2001 Cherokee XJ models, removal involves disconnecting the electrical harness, releasing the door check strap, supporting the door, and removing the hinge fasteners.
1. Open the door and support its weight
Have a helper hold the door from the outer edge while you work. Place a padded stand beneath the lower edge of the door, but do not lift or press against the door skin with a bare metal jack or stand.
Protect the rocker panel and fender with blankets. The door should remain close to its normal height until the hinge fasteners are nearly removed.
2. Disconnect the door wiring
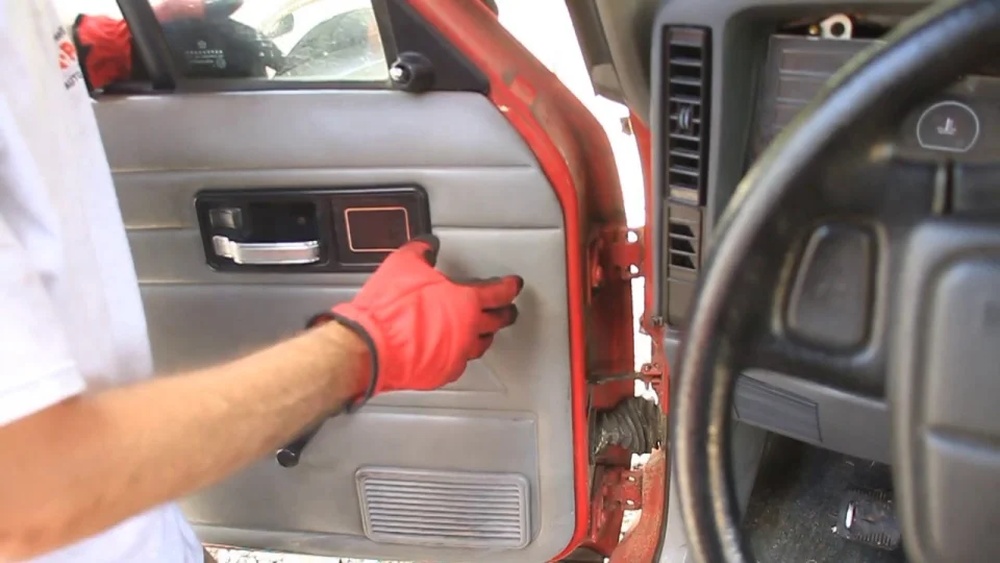
Power windows, power locks, speakers, and mirrors may route through the front door and the A-pillar area.
For an XJ:
- Locate the door harness connection near the front door jamb or kick-panel area.
- Remove any trim needed to access the connector.
- Release the connector lock without pulling on the wires.
- Feed the harness clear of the hinge area.
- If the vehicle has manual windows and no powered equipment, confirm that no wiring remains attached before continuing.
Do not cut the wiring. If a connector is stuck, clean the area and release its locking tab rather than prying aggressively against the terminals.
3. Remove or release the door check strap
The door check strap limits how far the door opens. Depending on the XJ year and configuration, it may be secured to the body with a bolt or fastener accessible through the door jamb.
Remove the retaining fastener or release the strap as designed. Do not allow the door to swing freely after the check strap is disconnected.
4. Mark the hinge position
Use a marker or strips of masking tape to outline the hinge position against the door or body. This does not guarantee perfect alignment, but it gives you a useful reference during installation.
If the hinge uses shims, record their location and thickness. Do not discard or mix them.
5. Remove the hinge bolts
With the helper holding the door, loosen the hinge fasteners gradually. Keep at least one fastener engaged on each hinge until the door is fully supported.
Remove the remaining hinge bolts while the helper controls the door. Lift the door away from the vehicle and place it on a padded, stable surface with the exterior panel protected.
Do not drag the door across concrete. The lower edge, latch area, and mirror can be damaged even if the visible outer panel appears undamaged.
6. Protect the exposed hinge and wiring areas
Cover exposed connectors and keep loose hardware in labeled containers. If the vehicle will be driven without the door, consider the legal and practical consequences first. Door removal can affect weather protection, side-impact protection, mirrors, occupant restraint assumptions, and visibility.
The XJ door is successfully removed when the wiring is fully free, no hinge fasteners remain attached, the door has been placed safely, and no hinge or body metal has been bent.

How to Remove Doors From a Jeep Cherokee KL
The 2014–2023 Cherokee KL requires a more cautious approach than the older XJ. The door may contain power-window and lock wiring, speakers, side-impact components, and other equipment. The door is not intended to be removed and reinstalled casually like a factory-removable Wrangler door.
Use the following as a planning sequence, not a substitute for the exact factory service procedure for your model year.
1. Disconnect electrical power according to the service information
If the procedure requires battery disconnection, switch off the ignition, remove the key or keep the key fob away from the vehicle, and follow the service manual’s waiting period before unplugging connectors.
Do not disconnect or test yellow airbag-related wiring unless the factory procedure specifically directs you and you understand the required precautions. Side-impact sensors and restraint-system wiring require special care.
2. Remove access trim carefully
The wiring connection may be located behind a kick-panel, door-jamb trim, or rubber conduit. Use plastic trim tools to release clips without cracking the panel.
Photograph the connector orientation and wire routing. Release the connector lock before separating the plug. Never pull a door from the vehicle while the harness is still attached.
3. Support the door before loosening the hinges
A KL door can become unstable as soon as its hinge fasteners are loosened. Use a padded support and a helper positioned at the outer edge.
Do not place a jack directly against the painted door shell. If a support is necessary, cushion it broadly under a strong lower structural area and use only enough pressure to carry the door’s weight.
4. Remove the hinge fasteners in a controlled sequence
Mark the hinge location and note any shims or adjustment hardware. Loosen the fasteners gradually, leaving enough hardware engaged to prevent sudden movement.
Once the helper has full control, remove the remaining hinge hardware and carry the door away from the vehicle. Keep the door upright if possible to reduce the risk of striking the mirror, latch, or trim.
5. Store the door safely
Place the door on a padded stand or on its protected outer surface only if the stand is stable and will not contact the mirror or trim. Keep the connectors dry and protected from dirt.
If you are removing a KL door for collision repair, side-impact damage, or airbag-related work, professional body-repair assistance is advisable. A door may look straight while its reinforcement, latch, hinge mounting, or restraint components remain compromised.
Reinstalling a Jeep Cherokee Door
Reinstallation is not complete when the bolts are merely tight. The door must align correctly, latch securely, operate smoothly, and reconnect electrically without warning lights or inoperative equipment.
Use this order:
- Set the door onto the hinges with a helper supporting its weight.
- Install the hinge fasteners loosely.
- Align the door with the surrounding fender, rocker panel, roofline, and rear door.
- Confirm that the latch engages the striker without forcing the door upward or downward.
- Tighten the hinge hardware using the factory torque specification.
- Reconnect the wiring and reinstall all trim.
- Reconnect the battery if it was disconnected, following the vehicle’s required procedure.
- Test the door before closing it repeatedly.
Check the following:
- The door gap is reasonably even.
- The door does not sag when opened.
- The latch closes fully on the striker.
- The inside and outside handles work.
- The power window operates without binding.
- Power locks, speakers, mirrors, and courtesy lights work where equipped.
- No airbag or restraint warning appears on the instrument panel.
- The door does not contact the fender, rocker, roof, or adjacent door.
Use the manufacturer’s service information for the exact hinge, striker, check-strap, and electrical connector torque specifications. Applying a guessed torque value can strip threads or leave a critical fastener loose.

Door Alignment Problems After Removal
A door that will not align after installation usually has a support, hinge-position, latch, or striker problem. Avoid correcting poor alignment by forcing the door closed.
| Symptom | Likely cause | Recommended check |
|---|---|---|
| Door sits low at the rear | Hinge position shifted or hinge worn | Support the door, inspect hinge movement, and realign before tightening |
| Door requires slamming | Striker moved, latch misaligned, or weatherstrip displaced | Check hinge alignment first, then inspect striker position |
| Door rubs the fender | Door is too far forward or outward | Compare gaps and adjust with the proper hinge procedure |
| Door rattles | Loose hinge, check strap, latch, or trim | Inspect fasteners and latch engagement |
| Window binds | Door frame or regulator alignment problem | Stop operating the window and inspect before damaging the regulator |
| Electrical functions fail | Connector not seated, pin damage, or wiring trapped | Recheck connector locks and harness routing |
| Airbag warning appears | Restraint-system connector issue or fault | Do not erase the warning without diagnosing the cause |
A hinge adjustment can change both door gaps and latch engagement. Make small changes, tighten the fasteners, and retest after each adjustment. If the hinge mounting area is bent or the door has collision damage, alignment may require body-shop equipment.
Common Mistakes to Avoid
Several shortcuts create unnecessary damage or safety problems.
Treating the Cherokee like a Wrangler
Wrangler doors are designed for owner removal and commonly use dedicated removable-door hardware. Cherokee doors do not generally offer the same quick-release arrangement. Do not assume that a Cherokee door can be removed by pulling a simple hinge pin.
Removing hinge bolts without a helper
The door can rotate suddenly once the final fastener is removed. A second person should control the door throughout the final stage.
Leaving the wiring connected
Pulling the door away while the harness is attached can tear wires, break connector locks, or damage terminals inside the body.
Using an impact tool on corroded hardware
An impact tool can round a fastener, break a bolt, or damage the hinge mounting area. Apply penetrating oil, use the correct bit, and work stubborn hardware gradually.
Losing hinge shims
Shims can affect door height, depth, and body gaps. Photograph and label every shim before removal.
Driving without considering the consequences
A missing door can reduce weather protection and expose occupants to additional hazards. It may also leave the vehicle without a properly positioned side mirror or create equipment and visibility issues under state law. Check the requirements where the vehicle is registered before driving on public roads.
Ignoring restraint-system warnings
A warning light after door work should be diagnosed, not simply cleared. The restraint system may include side-impact sensors or wiring near the door and pillar areas.

When Professional Help Is the Better Choice
A competent home mechanic can often remove an XJ door for repair when the hardware is accessible and the door is undamaged. Professional help is the safer choice when:
- The hinge bolts are seized or the mounting metal is rusty.
- The door was involved in a collision.
- The door contains side-impact or restraint-system components that require diagnosis.
- The vehicle has an airbag warning light.
- The door will not align after careful adjustment.
- You do not have a safe way to support the door.
- The vehicle must be returned to factory body alignment.
- A powered window, lock, mirror, or speaker stopped working after removal.
For collision repairs, the visible door gap is not the only concern. A repair facility can inspect the hinge pillars, latch reinforcement, intrusion beam, wiring, and restraint components.

Frequently Asked Questions
Can I remove Jeep Cherokee doors without removing the hinges?
Usually not. Cherokee doors are generally secured to the vehicle through hinge hardware rather than the quick-release pins commonly associated with Jeep Wrangler doors. The exact fasteners depend on the Cherokee generation and year.
Do I need to disconnect the battery before removing a Cherokee door?
Disconnecting the battery may be appropriate when working with powered door wiring or restraint-related components, particularly on newer Cherokees. Follow the model-specific service procedure and never probe airbag connectors casually.
How heavy is a Jeep Cherokee door?
The weight varies by generation, trim, glass, power equipment, mirror, and internal reinforcement. It is heavy enough that one person should not attempt to catch or hold it during final bolt removal. Use a helper regardless of the exact weight.
Can I drive a Jeep Cherokee with the doors removed?
That depends on equipment, visibility, occupant protection, and the laws where the vehicle is registered. A removed door may eliminate a required mirror or expose occupants to hazards. Check applicable state requirements before using the vehicle on public roads.
Why will my Jeep Cherokee door not close after I reinstalled it?
The most common causes are shifted hinge alignment, a displaced striker, a damaged latch, or a door that is not fully supported during tightening. Do not force the door shut. Recheck the hinge position, gaps, latch, and striker in that order.
Where can I find the correct torque specifications?
Use the factory service information for the exact model year and body generation. Owner’s manuals generally do not provide every body-repair torque value. Mopar’s official owner-information resources and manufacturer service-information systems are more appropriate starting points than a generic torque chart.
Final Checklist
Before considering the job finished, verify that:
- The correct Cherokee generation procedure was used.
- All wiring connectors are fully seated and locked.
- Hinge bolts and check-strap fasteners are tightened to factory specifications.
- The door gaps are even and the door does not sag.
- The latch and striker engage securely.
- Windows, locks, mirrors, speakers, and courtesy lights work.
- No restraint-system warning is present.
- All trim, weather seals, and wiring clips are back in place.
- The vehicle is legal and safe to drive with the door installed or removed.
For most owners, the Jeep Cherokee XJ door-removal process is manageable with a helper, proper support, and careful labeling. The newer Cherokee KL requires more caution because its wiring and safety systems are more complex. When the model year or fastener arrangement is uncertain, verify the procedure in factory service information before loosening the first hinge bolt.