How To Take Backseat Out Of Jeep Wrangler: Easy Removal
 Reading Time: 11 minutes
 Introduction
Removing the rear seat from a Jeep Wrangler is usually a straightforward garage project for U.S. owners, but the exact process depends on the Wrangler’s generation, body style, and seat design. A two-door Wrangler has a different rear-seat arrangement from a four-door Unlimited, and older YJ, TJ, and JK models may use different fasteners from newer JL models.
In most cases, you will fold the rear seat forward, expose the mounting hardware, remove the retaining bolts or release the seat latches, and lift the seat out through the rear door or tailgate. Plan on using a socket set, protecting the trim and flooring, and storing the hardware so the seat can be reinstalled correctly.
Always confirm the procedure and tightening specifications in the owner’s manual for your model year. Do not drive with passengers in the cargo area, and do not operate the Wrangler with a seat or seat-belt component improperly reinstalled.
Before Removing the Wrangler’s Rear Seat
Prepare the Jeep and identify the seat configuration before loosening any hardware.
Confirm the Wrangler generation and body style
The rear-seat removal method can vary among these common U.S. Wrangler generations:
| Wrangler generation | Approximate U.S. model years | Typical rear-seat considerations |
|---|---|---|
| YJ | 1987–1995 | Older, simpler rear-seat mounting arrangements; hardware can be rusted |
| TJ | 1997–2006 | Folding rear seat with model-specific brackets and fasteners |
| JK | 2007–2018 | Two-door and four-door versions use different seat layouts |
| JL | 2018–present | Rear bench and folding mechanisms vary by two-door, Unlimited, and trim configuration |
The 2018 model year includes both JK and JL Wranglers, so identify the vehicle rather than relying only on the year.
Gather the tools
You may need:
- A socket and ratchet set
- A short extension
- A breaker bar for tight or corroded bolts
- A trim tool or flat plastic tool
- Work gloves
- A flashlight
- Penetrating oil for visibly corroded fasteners
- A blanket, moving pad, or cardboard sheet
- A small container or labeled bag for bolts and washers
The exact socket size is not universal across Wrangler generations and seat designs. Common fasteners may require a metric socket, but verify the fit before applying force. A properly fitting six-point socket is less likely to round a stubborn bolt than an undersized or worn tool.
Choose a safe work area
Park on a level surface, shift the transmission into Park or first gear, set the parking brake, and switch off the ignition. Remove loose objects from the rear floor and cargo area.
If you will disconnect any electrical connector, follow the owner’s manual instructions for that specific Wrangler. Do not probe yellow airbag wiring or disconnect safety-system connectors casually. Many rear seats are mechanically mounted without electrical connections, but equipment can vary by year and trim.
How to Remove the Back Seat From a Jeep Wrangler
The general sequence is to fold the seat, expose the mounts, remove the fasteners, and lift the seat out. Use the model-specific notes below when the universal steps do not match your Jeep.
1. Open the rear access points
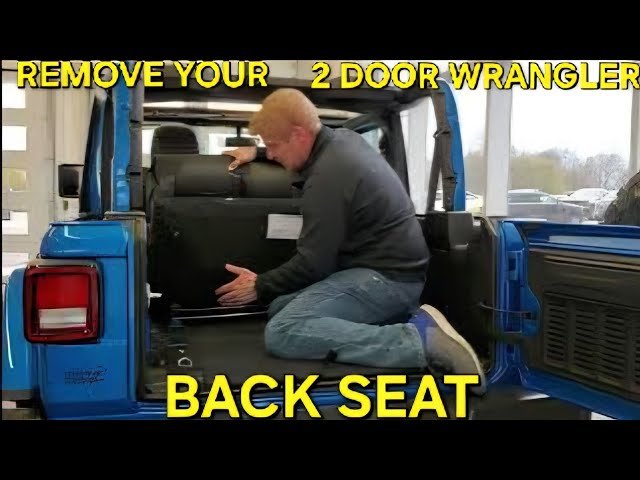
open the rear doors and tailgate. On a two-door Wrangler, move the front seats forward as needed to create space for handling the rear bench.
Remove cargo mats or floor coverings that block the seat mounts. Keep the hardware visible until you know which pieces belong to each mounting point.
2. Fold the rear seat forward
Use the seatback release strap, handle, or lever to fold the rear seatback toward the front seats. Some Wrangler seats also have a tip-and-fold or tumble function that raises the seat cushion and seatback together.
Do not force a release strap. If the seat will not fold, look for a second release handle or a latch on the opposite side. Dirt, a trapped seat belt, or pressure from the seatback can prevent the mechanism from releasing.
3. Locate the mounting bolts or latches
Inspect the floor and seat brackets with a flashlight. Depending on the Wrangler, the rear seat may be held by:
- Front and rear floor bolts
- Hinged brackets
- Removable pins or latch mechanisms
- A combination of fixed brackets and quick-release mounts
Some bolts are hidden under carpet, plastic covers, or folded seat sections. Lift only the trim necessary to access the fastener, and avoid prying directly against painted body panels.
4. Relieve pressure on the mounts
Before removing the final fastener, support the seat and slightly move or lift it to take weight off the mounting points. A seat that is pushing sideways against a bolt can make the hardware difficult to remove.
For a removable bench, a second person should stabilize the seat while you remove the last bolt. Wrangler rear seats are bulky and awkward rather than extremely heavy, and their brackets can catch on the floor or door opening.
5. Remove the retaining hardware
Use the correctly sized socket and turn each fastener counterclockwise. If a bolt is tight:
- Confirm that the socket is fully seated.
- Apply penetrating oil to exposed threads if corrosion is present.
- Allow the penetrant time to work.
- Use steady pressure rather than sudden impacts.
- Stop if the bolt head begins to deform.
Do not use an impact tool near plastic trim, seat-belt components, or wiring unless you have clear access and know the fastener specification. If a captive nut spins inside the body, stop and obtain model-specific repair guidance rather than continuing to force the bolt.
Leave one fastener loosely engaged until the seat is supported. Remove the final fastener only after the bench or seatback cannot fall.
6. Lift the seat out of the Wrangler
With the fasteners removed or the latches released, lift the seat vertically enough to clear the brackets. Rotate it carefully and guide it through the rear door or tailgate opening.
Protect the side panels, door seals, and painted surfaces with a blanket. Do not drag the seat across the floor because the brackets can scratch the body and damage carpet or drain plugs.
Place the seat on a clean, dry surface. Keep the bolts, washers, spacers, and brackets together in a labeled bag. Hardware that looks similar may not be interchangeable.
Model-Specific Notes for Two-Door and Four-Door Wranglers
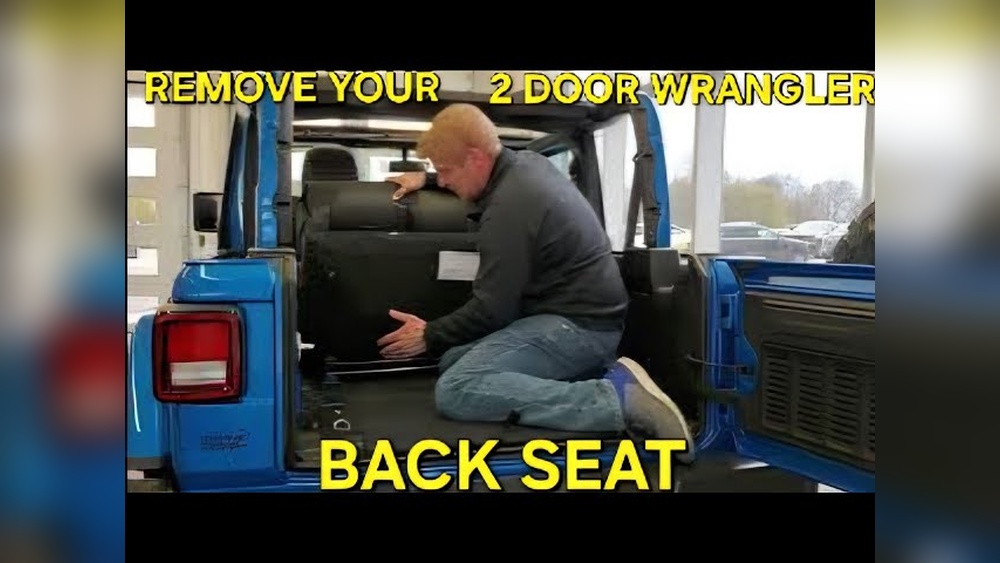
The most important variable is whether your Jeep is a two-door Wrangler or a four-door Wrangler Unlimited.
Two-door Wrangler
Two-door models have less interior room, so seat handling is usually the main challenge. The front seats may need to move forward, and the rear seat may need to be folded or tumbled before it can pass through the door opening.
A practical sequence is:
- Fold the rear seatback.
- Release the tumble or tip mechanism if equipped.
- Remove accessible mounting bolts or pins.
- Support the seat while releasing the remaining mount.
- Angle the seat through the rear opening without forcing it against the roll-bar trim.
On some two-door configurations, the seat can be folded for cargo space without being fully removed. If you only need additional room temporarily, confirm whether folding or tumbling meets your needs before removing the hardware.
Four-door Wrangler Unlimited
The Unlimited has a larger rear passenger area and typically provides more room to maneuver the seat. However, the rear bench may have separate folding sections or multiple mounting points.
Remove only the fasteners associated with the seat section you intend to take out. Do not assume that removing one side releases the entire bench. Check for mounting points near the center and outer floor areas.
When handling a split-fold seat, keep the sections in their original orientation. Mixing left- and right-side brackets can make reinstallation difficult.
JK Wrangler
JK seats commonly use floor-mounted fasteners and folding mechanisms that may be partly concealed by the seat position. Older JK hardware can be dirty or corroded, especially in Wranglers that have been exposed to water, mud, or road salt.
Inspect the floor after removal for:
- Rust around mounting holes
- Damaged threads
- Missing washers
- Water intrusion
- Cracked or bent brackets
JL Wrangler
JL seat and restraint arrangements can differ by trim and body style. Avoid assuming that a JL seat uses the same removal sequence or bolt locations as a JK.
If the seat has wiring, sensors, or an unusual connector, stop and consult the JL owner’s manual or a qualified technician before disconnecting anything. Never pull on wiring to move a seat.
What to Do After the Rear Seat Is Removed
Inspect the mounting area and protect the open floor before using the additional cargo space.
Inspect the floor and hardware
Check each mounting point for:
- Cross-threaded or stretched bolts
- Corrosion
- Bent seat legs
- Damaged latch mechanisms
- Loose captive nuts
- Torn carpet or trim
- Unplugged or damaged wiring
Clean dirt from the mounting holes with a soft brush. Do not enlarge holes, substitute random bolts, or modify seat brackets. The seat is part of the vehicle’s occupant-restraint system, so its mounting points must remain structurally sound.
Protect the exposed floor
If the seat will remain out, use a fitted cargo mat or another non-slip floor covering designed for the Wrangler. Keep the original brackets and hardware installed only as the factory design permits; do not leave loose bolts under the carpet or cargo load.
Avoid loading cargo so high that it obstructs rear visibility or interferes with the tailgate. Secure heavy items so they cannot strike occupants during sudden braking.
Reinstall the seat when passengers need it
To reinstall the rear seat:
- Place the seat in its original position.
- Align every bracket and mounting hole before tightening.
- Start all bolts by hand.
- Confirm that washers, spacers, and brackets are correctly positioned.
- Tighten the fasteners to the torque specification in the owner’s manual.
- Test the fold, tumble, and latch functions.
- Check that the seat belts extend, retract, and latch normally.
Starting all bolts by hand helps prevent cross-threading. Do not tighten one bolt fully while the remaining brackets are misaligned.

Troubleshooting Rear Seat Removal Problems
Most problems come from hidden fasteners, seat tension, corrosion, or a latch that has not fully released.
| Symptom | Likely cause | Recommended response |
|---|---|---|
| Seatback will not fold | Release strap not fully pulled, belt trapped, or latch under tension | Move the seat slightly while operating the release; check both sides |
| Bolt will not turn | Corrosion, damaged threads, or incorrect socket | Use the correct six-point socket and penetrating oil; stop if the head rounds |
| Seat lifts but will not come out | A second bolt, pin, or hook remains engaged | Reinspect the entire bracket and floor area |
| Trim will not move | Hidden retaining clip or fastener | Use a plastic trim tool and avoid excessive prying |
| Electrical connector is present | Seat-related wiring or sensor equipment | Consult the model-specific manual before disconnecting |
| Seat will not latch after installation | Bracket misalignment, debris, or incorrect hardware | Remove pressure, realign the seat, and verify every bracket |
If a bolt breaks, a captive nut spins, or a seat-belt component is damaged, stop the project. A repair involving structural mounting points or restraint hardware should be handled with model-specific instructions or by a qualified automotive technician.
Common Mistakes to Avoid
Avoid these mistakes when taking the rear seat out of a Jeep Wrangler:
- Using the wrong socket: A loose socket can round the fastener.
- Removing the final bolt without supporting the seat: The bench can shift or fall.
- Forcing a fold mechanism: Find the correct release rather than bending the latch.
- Mixing hardware: Keep bolts and washers organized by location.
- Ignoring corrosion: Rust around a mounting point can indicate a larger floor or bracket problem.
- Pulling on wiring: Disconnect connectors only as directed by the vehicle documentation.
- Using unapproved replacement bolts: Seat fasteners must match the required size, strength, and design.
- Skipping torque specifications: Tightening “by feel” does not verify the correct clamp load.
- Driving with passengers in the cargo area: Removing the seat does not create a legal or safe passenger position.
- Leaving the seat-belt system incomplete: Verify that belts and buckles work after installation.
The main safety boundary is simple: if the task involves seat-belt pretensioners, airbag wiring, damaged mounting points, or unknown restraint-system connectors, do not improvise.
Can You Drive a Wrangler Without the Rear Seat?
You can use a Wrangler with the rear seat removed only when the vehicle remains compliant with applicable federal, state, and local requirements and no passenger is carried in the vacant cargo area. Requirements can vary by state, vehicle inspection rules, and the vehicle’s original configuration.
Removing the rear seat can also affect:
- Available passenger seating
- Seat-belt requirements
- Insurance or inspection questions
- Cargo security
- Airbag or restraint-system warning indicators, if equipped
- The vehicle’s original safety configuration
For a temporary cargo conversion, retain the seat and mounting hardware so the Wrangler can be returned to its original configuration. If a warning light appears after the work, do not simply erase the code; determine whether a connector or restraint component was disturbed.
Frequently Asked Questions
How long does it take to remove a Jeep Wrangler rear seat?
A straightforward removal may take about 20 to 60 minutes for someone familiar with basic hand tools. Rust, concealed hardware, limited access, or an unfamiliar seat mechanism can make the job take longer.
Do I need to disconnect the Jeep battery?
Not always. Many rear seats are mechanically mounted and have no electrical connection. If your Wrangler has wiring at the seat, follow the owner’s manual before disconnecting anything. Do not disconnect yellow restraint-system wiring without the correct procedure.
What size socket removes Jeep Wrangler rear-seat bolts?
There is no single socket size for every Wrangler generation, body style, and seat design. Use the owner’s manual or verify the fastener directly with a properly fitting metric socket. Avoid forcing an SAE socket onto a metric fastener.
Can I remove only one side of a split rear seat?
Often, yes, if the seat is designed as a split-fold or split-removable arrangement. Remove only the fasteners for the intended section and verify that the remaining seat is still securely mounted and functional.
Can I store the removed seat outside?
Store it indoors or under a dry, ventilated cover. Protect the upholstery from moisture and keep brackets from contacting abrasive surfaces. Do not stack heavy items on the seat or seatback.
Key Takeaways
- The exact procedure depends on the Wrangler generation, trim, and two-door or four-door body style.
- Fold or tumble the rear seat, expose the mounting points, and remove the bolts, pins, or latches.
- Support the seat before removing the final fastener.
- Use the correct socket and do not force corroded or damaged hardware.
- Reinstall every bracket and fastener using the owner’s manual torque specification.
- Never carry passengers in the cargo area after removing the rear seat.
- Stop and seek qualified help if wiring, seat-belt components, or damaged mounting points are involved.
Conclusion
To take the back seat out of a Jeep Wrangler, fold or tumble the seat, locate all mounting hardware, remove the fasteners with the correct tools, and lift the seat out carefully. The process is usually manageable for a careful DIY owner, but the details differ across YJ, TJ, JK, JL, two-door, and Unlimited models.
Before driving the Wrangler again, verify that the seat, brackets, seat belts, and any related connectors are correctly installed. Use the model-specific owner’s manual for torque values and restraint-system instructions, and treat damaged or corroded mounting hardware as a repair issue rather than something to work around.