How To Put Hardtop On Jeep: Easy Step-By-Step Guide
 Reading Time: 13 minutes
 Introduction
For Jeep Wrangler owners in the United States, putting a hardtop back on the vehicle is a two- or three-person job that requires careful alignment, clean weather seals, and the correct factory fasteners. The general process is similar for many Jeep Wrangler models, but bolt locations, electrical connectors, freedom panels, and torque specifications differ between the TJ, JK, JL, and 4xe versions.
The safest approach is to use the owner’s manual for your exact model year, prepare a level work area, and never force the hardtop into position. A hardtop that appears seated but is not fully aligned can leak, rattle, damage the seals, or loosen while driving.
This guide explains how to install a Jeep Wrangler hardtop, what tools you need, how to handle model differences, and how to check the installation before returning to the road.
Identify Your Jeep Hardtop and Prepare the Work Area
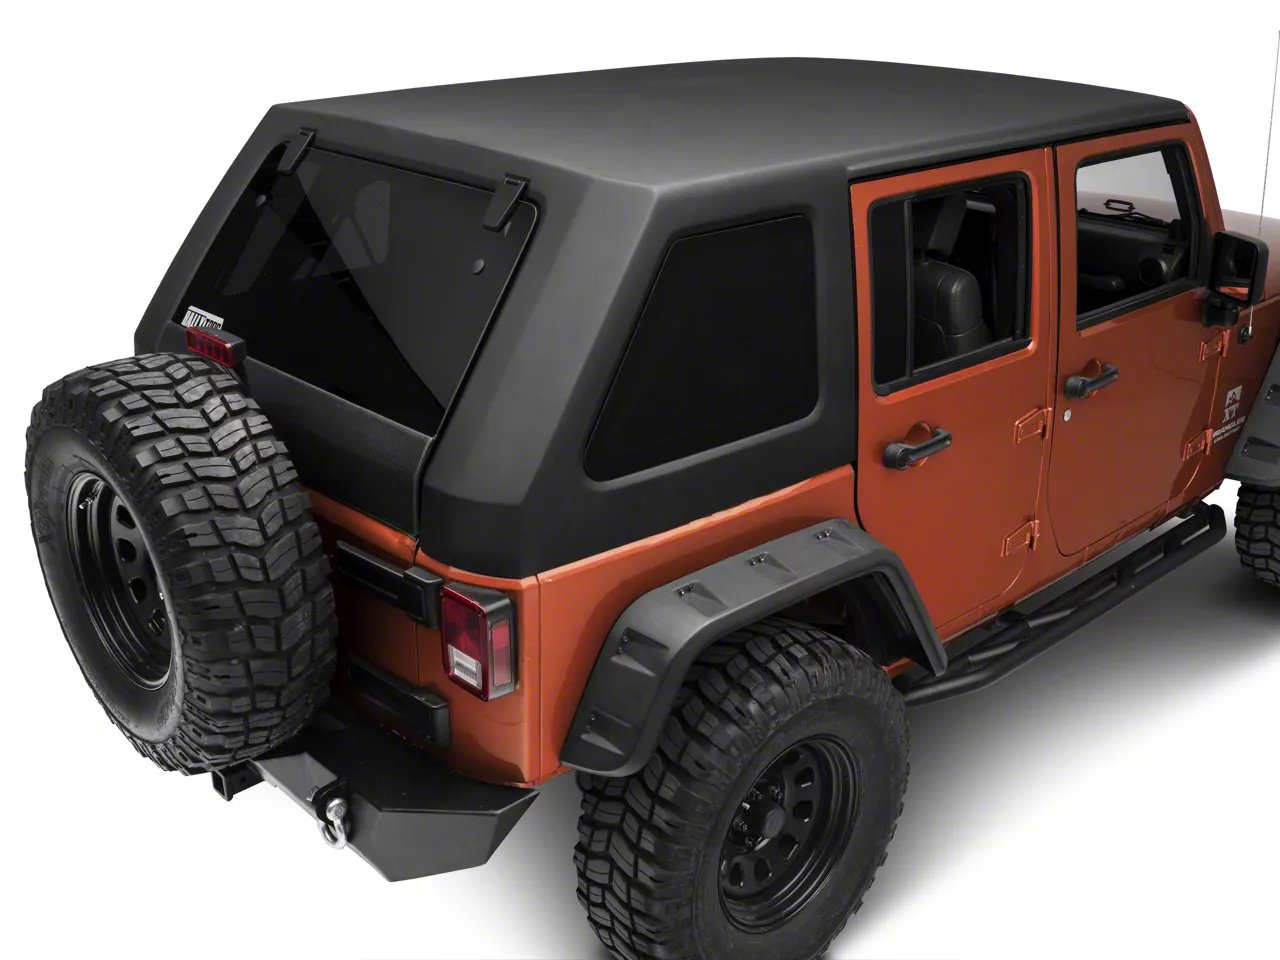
Before installing the roof, confirm which Wrangler generation you have. Jeep hardtops are not universally interchangeable, even when they look similar.
| Jeep model | Approximate model years | Important considerations |
|---|---|---|
| Wrangler TJ | 1997–2006 | Older mounting points and hardware; follow the vehicle-specific service information |
| Wrangler JK | 2007–2018 | Rear side bolts, rear mounting bolts, electrical connection, and windshield-area alignment vary by configuration |
| Wrangler JL | 2018–present | Different hardtop design and fasteners from the JK; Freedom panels and electrical connections require careful handling |
| Wrangler 4xe | 2021–present | Similar body installation to the JL, but follow all high-voltage vehicle safety instructions and avoid disturbing orange electrical components |
| Gladiator JT | 2020–present | Uses a removable hardtop but is not the same installation as a Wrangler roof |
The most reliable source for bolt locations and tightening specifications is the official Jeep owner’s manual or factory service information for your vehicle. Mopar provides owner information through its official owner resources, but the instructions can vary by year and equipment package.
Prepare the work area
Park the Jeep on a level, firm surface with the transmission in Park or in gear if equipped with a manual transmission. Set the parking brake and keep the ignition off.
You should also:
- Remove loose items from the hardtop and cargo area.
- Open the doors or tailgate as needed for access.
- Ensure the windshield frame is in its normal upright position.
- Check that the hardtop mounting surfaces are free of dirt, ice, tools, and old sealant.
- Have a padded stand or approved hardtop cart ready if the roof is not being installed immediately.
- Keep children and bystanders away from the lifting path.
- Arrange at least two strong adults to lift and guide the roof.
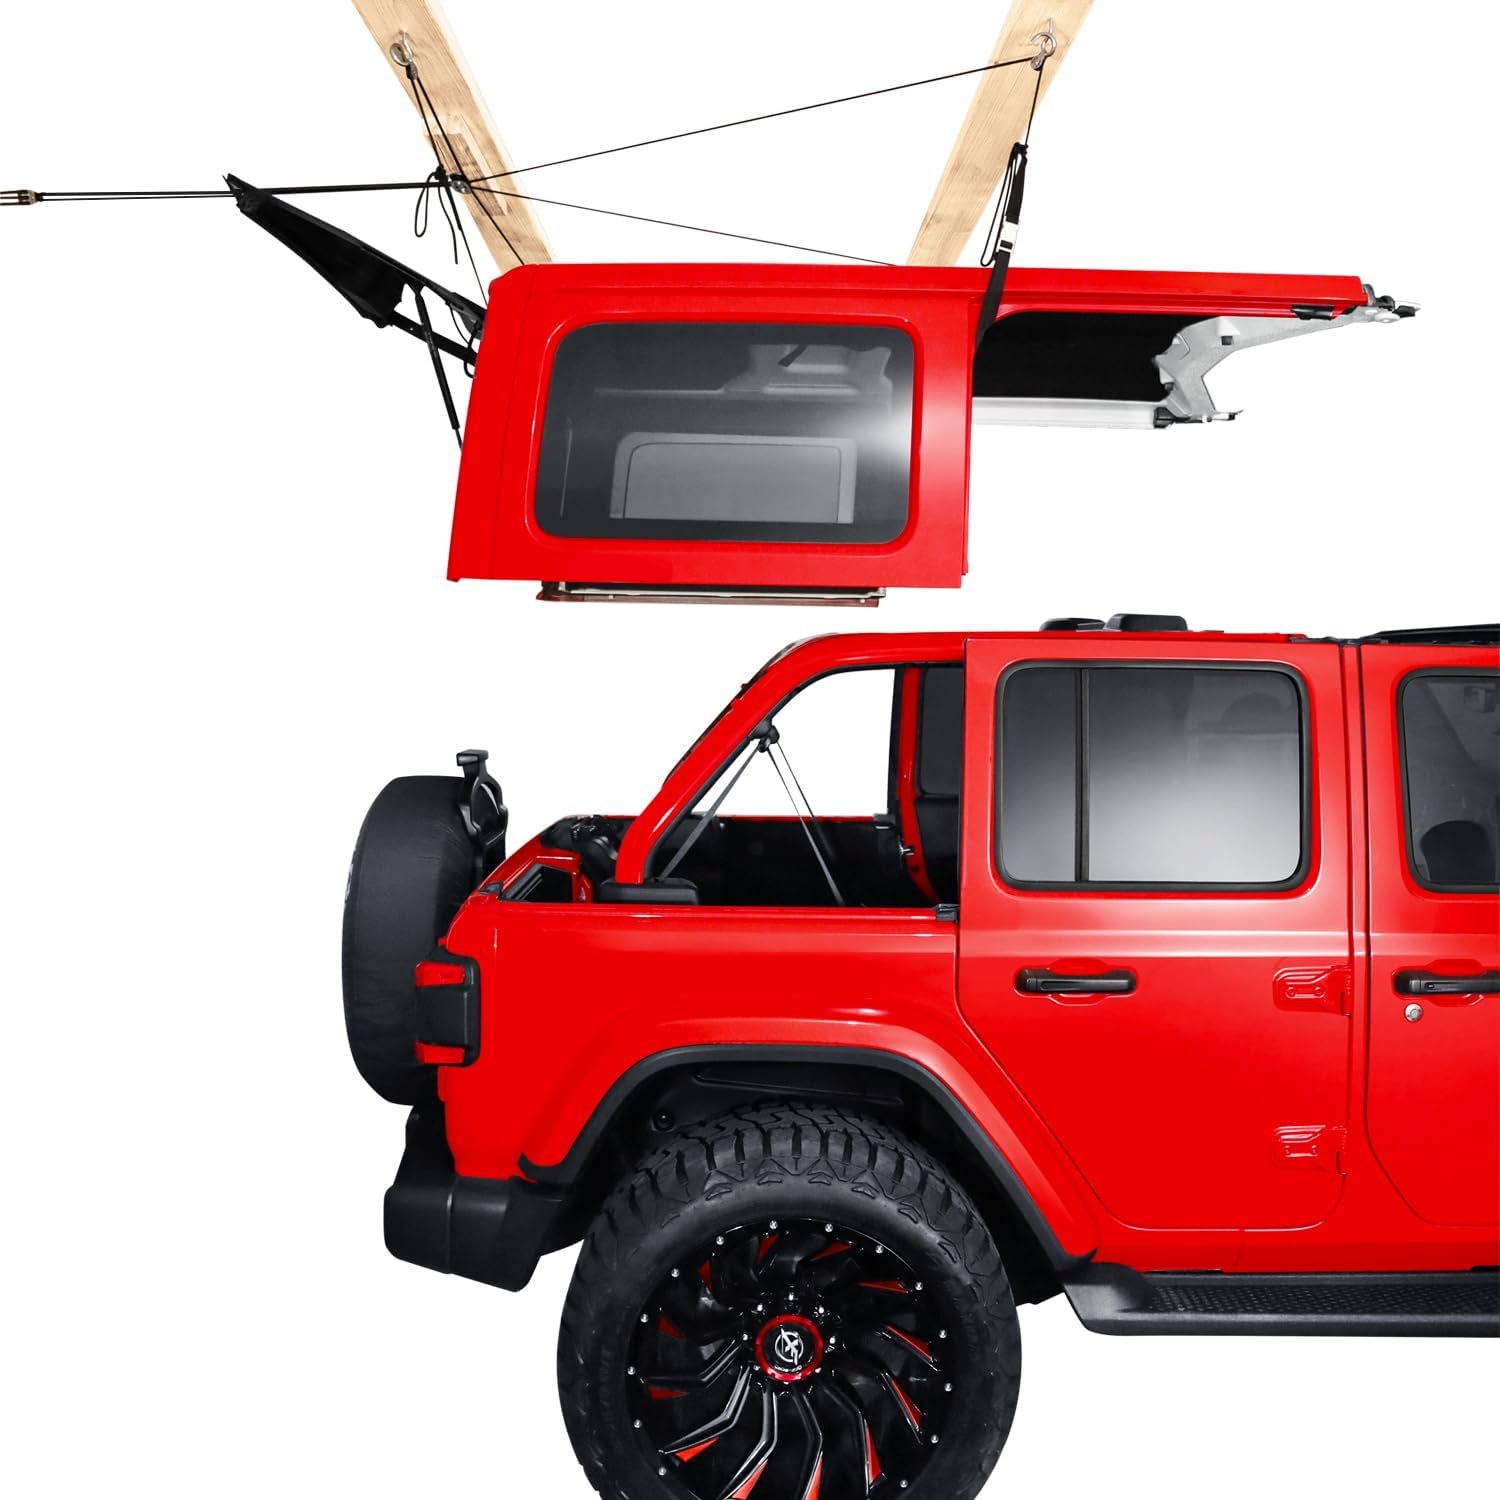
A hardtop is wide, awkward, and difficult to control even when it is not exceptionally heavy. Do not try to lift a full-size Wrangler hardtop alone. A shop-rated hardtop hoist can reduce lifting effort, but it must be installed and used according to its instructions.

Gather the Tools and Parts
The exact tool size depends on the Jeep’s generation and hardware. Use the tools specified in the owner’s manual rather than assuming that every Wrangler uses the same fastener.
Commonly required items include:
- Correct-size socket and ratchet
- Short extension
- Torque wrench with the required range
- Trim tool for removing plastic covers, if necessary
- Clean microfiber cloths
- Mild automotive soap and water
- Silicone-safe rubber seal conditioner, if recommended by the seal manufacturer
- Work gloves with a secure grip
- Protective blankets or a padded hardtop stand
- Flashlight
- Replacement factory fasteners if any are damaged or missing
Do not substitute random bolts based only on thread size. Hardtop fasteners need the correct length, shoulder design, washer arrangement, and corrosion resistance. A bolt that is too long can contact interior or body components; a bolt that is too short may not provide adequate thread engagement.
Inspect before lifting
Examine the roof before placing it on the Jeep. Look for:
- Cracks around mounting holes
- Damaged locating pins
- Torn or displaced rubber seals
- Broken plastic trim
- Missing washers or fasteners
- Bent brackets
- Damaged rear glass or defroster wiring
- Dirt or debris trapped in the sealing channels
Also inspect the Jeep’s body-side mounting points. If a threaded insert spins, a nut plate is loose, or a mounting bracket is bent, stop and repair the problem before installing the roof.
Do not apply grease, adhesive, or silicone sealant to the weather seals unless the vehicle or seal manufacturer specifically recommends it. Excess product can prevent the roof from seating correctly and may contaminate the rubber.
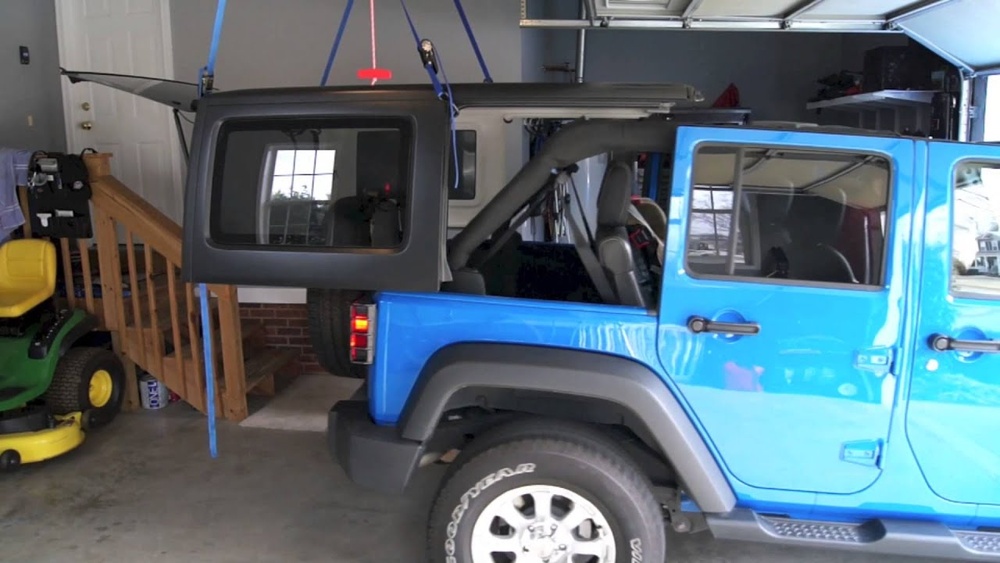
How to Put a Hardtop on a Jeep Wrangler
The following procedure is a general installation sequence for a removable Wrangler hardtop. Use the model-specific instructions for the exact fastener locations, wiring connection, and torque values.
1. Remove or stow the soft top and other roof hardware
If the Jeep has a soft top installed, lower or remove it according to the soft-top instructions. The hardtop must sit directly on its intended body seals and mounting points.
Remove any accessories that interfere with the roof, such as:
- Roof racks
- Aftermarket light brackets
- Hardtop storage brackets
- Certain rear cargo accessories
- Removable freedom panels, if the manufacturer’s instructions require them to be installed separately
For a factory Wrangler hardtop, do not remove hardware that is part of the windshield frame or body unless the service procedure specifically calls for it.
2. Position the hardtop for lifting
Place the hardtop on padded supports with the exterior facing upward and the front of the roof clearly identified. Check that the supports contact strong, flat areas and do not press against the rear glass, wiper, defroster terminals, or removable panels.
Before lifting, identify:
- The front windshield header area
- Rear mounting tabs or locating pins
- Side mounting holes
- Electrical connector location
- Any washer-fluid hose or rear-wiper connection
- Freedom panel seams and latches
Briefly review the lifting route. The roof should move from its storage position to the Jeep without striking the doors, windshield, roll bars, rear glass, or body sides.
3. Lift the roof with two or more people
Have one person stand on each side of the hardtop, with a third person guiding from the rear or front when available. Lift using the strongest accessible areas of the hardtop structure, not the wiper arm, glass, seals, removable panels, or plastic trim.
Keep fingers away from:
- The gap between the hardtop and body
- Locating pins and mounting holes
- Door openings
- The windshield header
- The rear corners of the roof
Move slowly and keep the roof level. Do not slide the hardtop across painted body panels because the mounting tabs or debris can scratch the finish.
4. Lower the rear mounting points into position
Guide the rear of the hardtop onto the Jeep first when the vehicle’s installation design calls for rear locating pins or tabs. Lower the roof gradually until the rear mounting points rest in their body-side locations.
Do not tighten any bolts yet. The roof must remain loose enough to move slightly while the front and side mounting points are aligned.
If a pin will not enter its hole, lift the roof slightly and inspect for:
- A folded weather seal
- A misplaced wire or hose
- Debris in the mounting hole
- A shifted body seal
- A hardtop bracket that is not centered
Never use a bolt to pull a severely misaligned roof into position.
5. Align the front header and windshield seal
With the rear resting in position, guide the front edge of the roof toward the windshield header. The front weather seal should contact the windshield frame evenly across its width.
Check both corners. A common installation error is having one corner seated while the opposite corner remains raised. This can create wind noise and water leaks.
If the roof has removable Freedom panels, make sure the surrounding seals are not pinched or rolled. Do not close a panel latch against a seal that is folded over.
6. Connect the rear electrical and fluid connections
Reconnect the factory electrical connector for the rear wiper, washer, and defroster where equipped. Some Jeep configurations may also use a washer-fluid connection or additional wiring.
Before connecting anything:
- Confirm the ignition is off.
- Match the connector to the correct factory socket.
- Inspect for bent pins, moisture, or damaged locking tabs.
- Route the harness through its original clip or channel.
- Keep the wiring away from bolt threads and moving hinges.
Do not cut, splice, or bypass a connector simply because the plug is difficult to reach. If the connector does not fit, verify that the roof and vehicle are compatible.
7. Install the fasteners by hand
Start every hardtop bolt or nut by hand. Leave all fasteners loose until the roof is fully aligned.
A useful tightening sequence is:
- Start the front or windshield-area fasteners as specified for the model.
- Start the rear mounting fasteners.
- Start the side fasteners.
- Confirm the seals and locating points remain seated.
- Snug the hardware gradually in an alternating pattern.
- Tighten the fasteners to the exact factory torque specification.
The correct order can differ between Wrangler generations. The key principle is to distribute pressure gradually rather than fully tightening one corner first.
Avoid impact guns unless the factory procedure explicitly permits them and the tool is set to prevent over-tightening. Over-tightening can strip threads, deform the hardtop, crush rubber seals, or damage body inserts.
8. Reinstall Freedom panels and accessories
If your Wrangler uses removable front roof panels, install them according to the model-specific instructions. Check that each panel sits flush with the neighboring seal and that every latch closes without unusual force.
Reinstall any removed trim covers, sun visors, roof-rack components, or other factory hardware. Aftermarket accessories may have separate installation requirements and should not interfere with the roof’s factory mounting points.

Check the Installation Before Driving
A hardtop is correctly installed when it sits evenly, the mounting hardware is fully tightened, the seals are continuous, and the electrical functions operate normally.
Perform these checks before driving:
Visual and physical checks
- Confirm the front edge is evenly seated against the windshield frame.
- Confirm both rear corners sit at the same height.
- Look along each side seal for gaps, folds, or pinched rubber.
- Verify that no wiring or hose is trapped under the hardtop.
- Confirm every required fastener is installed.
- Check that the rear glass and wiper move freely.
- Close the doors and tailgate normally.
- Make sure no interior trim is being pushed out of place.
The doors should close without the roof forcing them outward or rubbing abnormally. A small amount of normal seal compression is expected, but the roof should not shift when gently pushed by hand.
Electrical checks
With the vehicle stationary, test the equipment installed on your Jeep:
- Rear wiper
- Rear washer
- Rear defroster
- Interior lights or wiring affected by the roof, if applicable
If a system does not work, turn the ignition off and recheck the connector, fuse, and wiring routing. Do not drive with loose wiring near the tailgate or rear glass.
Water-leak check
After the installation, inspect for leaks using a gentle stream of water. Do not use a high-pressure nozzle directly against the seals, because pressure can force water past an otherwise correctly seated gasket.
Start at the front corners and work across the side and rear seams. Have someone sit inside with a flashlight and observe the seals. Dry the interior afterward.
A leak at one corner commonly points to:
- A folded weather seal
- Uneven hardtop alignment
- A missing or loose fastener
- A damaged gasket
- A bent mounting point
- A body or hardtop seam problem
Do not assume that tightening every bolt will fix a leak. Excessive tightening can make the problem worse.
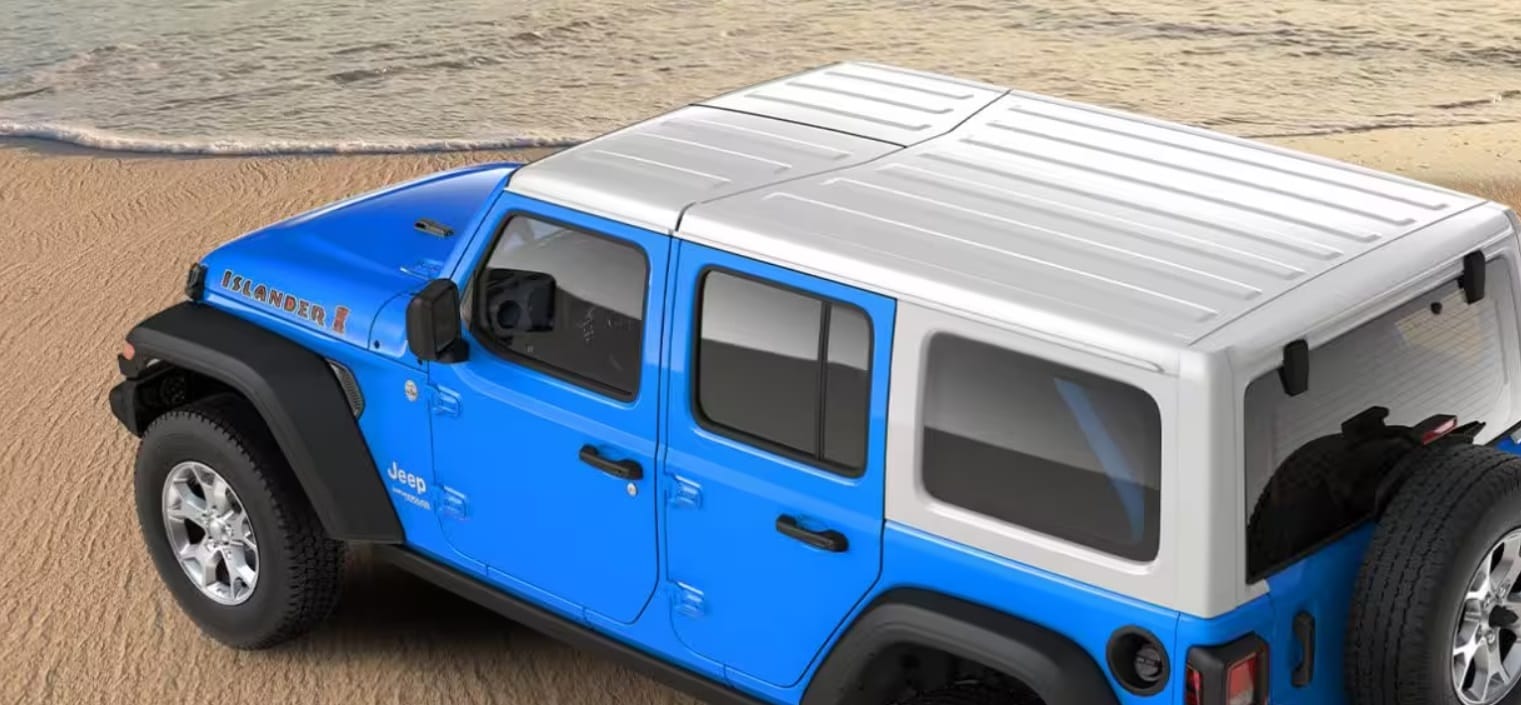
Troubleshoot Common Hardtop Installation Problems
The hardtop will not sit flush
Likely causes:
- A rear locating pin is not aligned.
- The windshield frame is not in the correct position.
- A seal is folded underneath the roof.
- A wiring harness or hose is trapped.
- The hardtop is not designed for that Jeep model or year.
- An aftermarket accessory is interfering with the mounting surface.
What to do:
Loosen or remove the fasteners, lift the roof slightly, and inspect the mounting surfaces. Do not draw the roof down with excessive bolt force.
One corner is higher than the other
Likely causes:
- The roof was lowered unevenly.
- One rear mounting point is outside its locating hole.
- A seal has rolled over.
- The hardtop or body mounting bracket is damaged.
What to do:
Have the helpers lift the roof evenly while you inspect the high corner. Realign the locating points before tightening anything.
There is wind noise after installation
Likely causes:
- A front seal is not evenly compressed.
- A Freedom panel is not latched correctly.
- A side seal is folded or contaminated.
- The roof is not centered.
- A removable panel or trim piece is loose.
What to do:
Inspect the seals with the doors and panels open. Look for a continuous contact pattern rather than relying only on sound during a test drive.
Water enters near the front doors
Likely causes:
- The windshield header seal is misaligned.
- The side seal is pinched.
- The front corner fasteners are unevenly tightened.
- The door glass or door seal has a separate alignment issue.
What to do:
Test the roof seam with a low-pressure stream of water. If the roof seals look correct, inspect the door and glass seals separately.
A hardtop bolt will not start
Likely causes:
- The roof is carrying side load against the bolt.
- The wrong fastener is being used.
- The threaded insert is damaged.
- The hardtop is not fully seated.
- The threads are dirty or cross-threaded.
What to do:
Remove the bolt and start it again by hand after relieving pressure on the roof. If it still will not thread smoothly, stop. A damaged insert may require body or mechanical repair.
The rear wiper or defroster does not work
Likely causes:
- The electrical connector is not fully locked.
- A fuse has failed.
- A connector pin is bent.
- The wiring is pinched or damaged.
- The vehicle or hardtop configuration is not compatible.
What to do:
Turn off the ignition, inspect the connector, and check the relevant fuse using the owner’s manual. Seek professional diagnosis if the connector or wiring is damaged.

Safety Boundaries and Mistakes to Avoid
Avoid these common mistakes when installing a Jeep hardtop:
- Do not install it alone. The roof can shift suddenly and cause injury or vehicle damage.
- Do not lift by the glass, rear wiper, or removable roof panels.
- Do not use random replacement bolts.
- Do not force a misaligned hardtop down with an impact wrench.
- Do not drive with missing fasteners.
- Do not ignore a loose electrical connector.
- Do not place the hardtop directly on concrete or asphalt.
- Do not leave the roof supported only by a hydraulic jack or improvised blocks.
- Do not operate a hardtop hoist above people or vehicles unless it is designed and rated for that use.
- Do not assume a JK and JL hardtop use the same hardware or seals.
If a mounting insert spins, the hardtop is cracked, a bolt is cross-threaded, or the roof remains misaligned after careful repositioning, stop the installation and contact a Jeep dealer or qualified repair facility.
For a Wrangler 4xe, do not disturb orange high-voltage wiring or components. The removable roof installation does not require handling those systems.

Storage and Seasonal Reinstallation Tips
Store the hardtop on a purpose-built cart or a stable padded stand. Keep the roof supported at strong structural areas rather than resting its weight on the rear glass, wiper assembly, seals, or removable panels.
During storage:
- Keep the hardtop indoors or protected from prolonged weather exposure.
- Avoid stacking heavy objects on top of it.
- Store bolts and small hardware in a labeled container.
- Keep Freedom panels upright or in the orientation recommended by Jeep.
- Do not place the panels face-down on rough surfaces.
- Clean and dry seals before long-term storage.
- Inspect seals and mounting points before the next installation.
If the hardtop is removed and installed repeatedly, inspect the seals, threaded inserts, and fasteners each time. Repeated over-tightening can damage mounting hardware even when the roof appears properly installed.
Key Takeaways
- Installing a Jeep Wrangler hardtop is normally a two- or three-person job.
- Confirm whether the Jeep is a TJ, JK, JL, 4xe, or another model before beginning.
- Use the factory fasteners and the exact torque specifications for that model year.
- Keep all fasteners loose until the roof is aligned and the seals are seated.
- Reconnect the rear wiper, washer, and defroster wiring before driving.
- Perform a visual inspection and gentle water test after installation.
- Stop if a bolt will not thread, a mounting insert spins, or the hardtop cannot sit evenly.
FAQs
Can one person install a Jeep Wrangler hardtop?
It is not recommended. A Wrangler hardtop is wide and awkward to control, and a solo installation increases the risk of dropping it, damaging the body, or causing an injury. Use at least two people or a properly rated hardtop hoist.
Do Jeep JK and JL hardtops fit each other?
Do not assume they do. The JK and JL use different body designs, mounting systems, seals, and hardware. Confirm compatibility with the hardtop manufacturer or Jeep-specific parts information before attempting installation.
Should I tighten the hardtop bolts before all of them are started?
No. Start every required fastener by hand first, leaving the hardware loose enough for alignment. Tightening one area fully before the other mounting points are engaged can pull the roof out of position.
Why does my Jeep hardtop leak after installation?
The most common installation-related causes are a folded seal, uneven alignment, a missing or loose fastener, or a damaged gasket. Check the seal and mounting points before applying more tightening force.
Can I use silicone on Jeep hardtop seals?
Only use a product specifically recommended for the seal material and application. Many seals need to remain clean and correctly positioned; excess silicone can attract dirt, interfere with seating, and make future repairs difficult.
What should I do if a hardtop bolt will not thread?
Remove the bolt, relieve pressure on the hardtop, and inspect the bolt and threaded insert. Start the fastener by hand. If it still does not thread smoothly, do not force it; the threads or mounting insert may need repair.
Conclusion
To put a hardtop on a Jeep Wrangler, prepare a level workspace, use at least two people, lower the roof carefully onto its locating points, connect the factory wiring, and tighten the correct fasteners gradually to the model-specific specification. The installation is complete only after the seals are even, the roof is secure, the doors and tailgate operate normally, and the rear electrical functions work.
Before driving, verify the instructions for your exact Jeep model and model year in the official owner’s manual. If the roof cannot be aligned without force or a mounting fastener is damaged, have the installation inspected by a qualified Jeep technician.


