
Jeep Cherokee Washer Reservoir: Replace A Cracked One
 Reading Time: 13 minutes
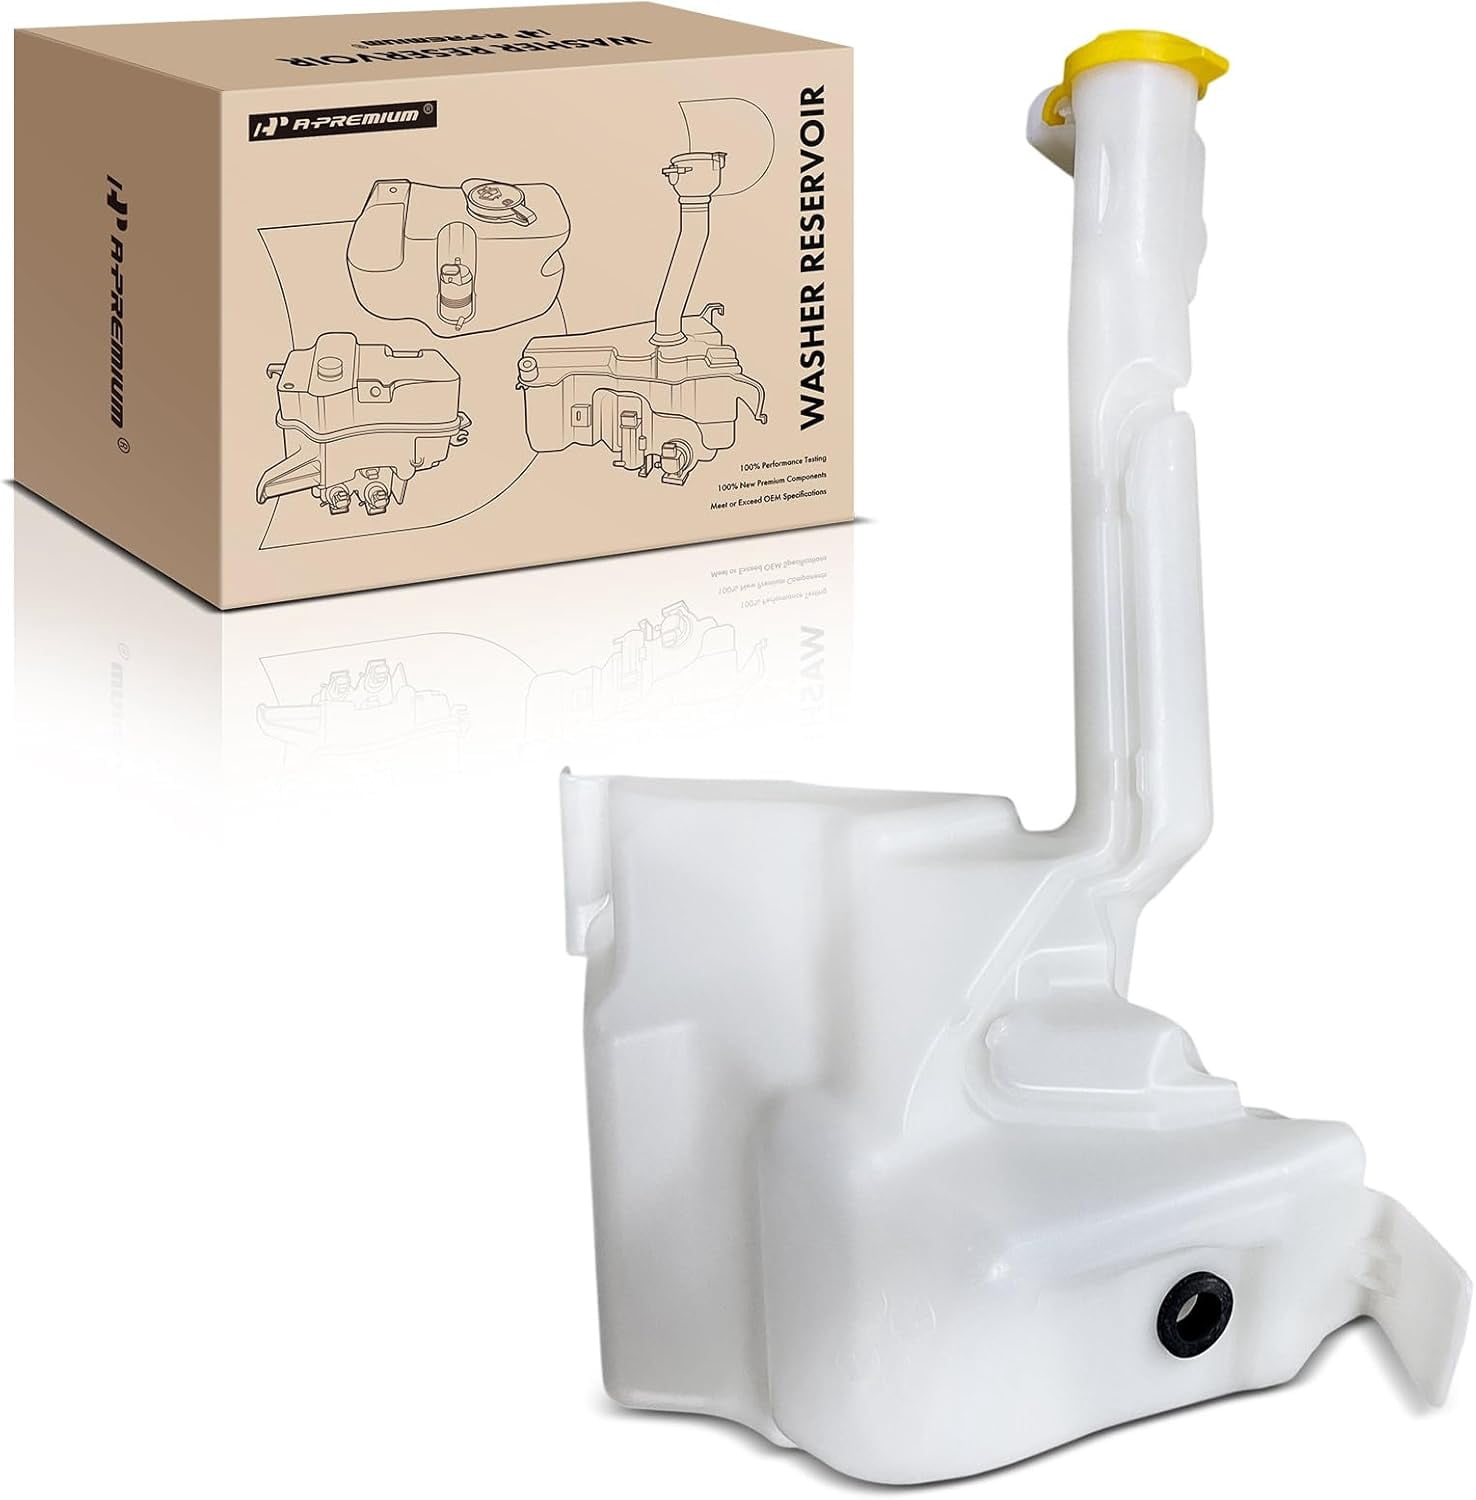
A cracked windshield washer reservoir on a Jeep Cherokee should be replaced, not patched. The repair usually involves draining the fluid, removing the reservoir’s fasteners, disconnecting the pump and hose, installing a vehicle-specific replacement, and testing the washer system.
The exact location and removal steps depend on the Cherokee generation. The 2014–2023 Jeep Cherokee (KL) may place the reservoir behind the front fender liner or bumper area. Older Cherokee models, such as the XJ, use a different layout. Always match the replacement reservoir to the vehicle’s model year, engine, body style, and pump opening.
Introduction
A leaking washer reservoir can leave you without spray when road salt, mud, or bugs cover the windshield. In the United States, this can become a serious visibility issue during winter driving, rain, and long highway trips.
This guide explains how to replace a cracked windshield washer reservoir on a Jeep Cherokee. It also covers pump transfer, hose inspection, electrical checks, common mistakes, and signs that the reservoir is not the only failed part.

What You Need Before Starting
Gather the correct reservoir and basic hand tools before removing any parts. Most Jeep Cherokee repairs need common tools, but the exact socket size and fastener type vary by year.
Parts
- Vehicle-specific windshield washer fluid reservoir
- New rubber pump grommet, if the old grommet is hard or damaged
- New washer pump, if testing shows the pump leaks or does not work
- New hose or hose connectors, if the hose is cracked
- Washer fluid rated for your local climate
Use the vehicle identification number, or VIN, to confirm the part. A reservoir may look similar but have a different shape, filler neck, sensor opening, or pump location.
Tools
- Socket set and ratchet
- Screwdrivers
- Trim clip removal tool
- Pliers
- Flashlight
- Drain pan or clean container
- Shop towels
- Jack and jack stands, if wheel or splash-shield access is needed
- Safety glasses and gloves
Do not work under a Jeep supported only by a jack. Park on level ground, apply the parking brake, and use jack stands at approved support points when lifting the vehicle.
Before You Buy the Part
Check these details:
| Part detail | Why it matters |
|---|---|
| Model year | Reservoir shape and mounting points can change |
| Cherokee generation | XJ, KJ, KK, and KL parts are not automatically interchangeable |
| Engine and trim | Some layouts use different brackets or nearby components |
| Headlamp washer system | Certain vehicles may have extra pump ports or fluid capacity |
| Fluid-level sensor | The replacement must have the correct sensor opening if equipped |
| Pump opening | The rubber seal and pump must fit the reservoir |
| Filler neck | The neck may be separate, attached, or routed through the fender |
The safest choice is an original-equipment part or a replacement that lists the exact Cherokee application. Do not rely only on a picture from an online listing.
How to Confirm the Reservoir Is Cracked
Confirm the leak before ordering parts. Washer fluid can run along the body and make a hose, pump, or filler neck look like the source.
Fill the reservoir with a small amount of washer fluid. Do not fill it completely while it is leaking. Use a flashlight to inspect the reservoir, pump seal, hose connections, and filler neck.
Common signs include:
- Fluid dripping from the bottom of the reservoir
- A visible split in the plastic tank
- Fluid leaking only when the reservoir is filled
- A puddle near the front wheel or bumper
- A low-fluid warning soon after filling
- A washer pump that runs but produces no spray
A leak around the pump often means the rubber grommet has failed. A dry reservoir with no pump sound may indicate a fuse, wiring, switch, or failed pump instead.
Quick Leak Test
- Turn the ignition off.
- Add a small amount of washer fluid.
- Wait several minutes.
- Look below the reservoir and around the pump.
- Check the hose where it leaves the tank.
- Mark the fluid level with a piece of tape.
- Recheck the level after 10 to 15 minutes.
Do not use plain water in freezing weather. Water can freeze in the tank, pump, and hoses. Use a windshield washer fluid with a freeze rating suitable for your state and season.

Step-by-Step: Replace the Jeep Cherokee Washer Reservoir
The following method applies in principle to many Jeep Cherokee models. Access can differ, so use the factory service information for your exact year before removing body panels or electrical connectors.
1. Park and Prepare the Jeep
Park the Jeep on a level surface. Turn the ignition off and remove the key or switch off the ignition system.
Open the hood and identify the washer reservoir. Follow the filler neck to the tank if the reservoir is not easy to see. On some Cherokees, the tank is partly hidden behind the wheel-well liner or front bumper area.
Let the engine and nearby parts cool if the Jeep was recently driven. Wear gloves and safety glasses.
2. Drain the Washer Fluid
Place a drain pan below the reservoir. If the tank has a large crack, allow the fluid to drain into the pan.
If the fluid does not drain on its own, remove the pump after disconnecting its electrical connector. Pulling the pump from the tank may release the remaining fluid. Keep the fluid off painted surfaces and clean any spill at once.
Do not pour used washer fluid onto the ground or into a storm drain. Store it in a labeled container and follow your local household hazardous-waste rules. Keep it away from children and pets.
3. Remove the Access Panels
Many Cherokee models need one or more of these parts moved:
- Inner fender liner
- Lower splash shield
- Front bumper cover
- Filler-neck trim
- Wheel and tire
Remove only the parts needed to reach the reservoir. Mark the location of different clips and screws as you work. Plastic clips can break when pried at the wrong angle, especially in cold weather.
If wheel removal is required, use a properly rated jack stand. Do not place tools or body parts under an unsupported vehicle.
4. Disconnect the Electrical Connector
Find the washer pump mounted in the reservoir. Press the connector lock and pull the plug straight from the pump.
Do not pull on the wires. If the connector is dirty, inspect it for corrosion, bent terminals, or moisture. A cracked reservoir can allow fluid to reach the connector and cause a poor connection.
Some vehicles may have a separate level sensor. Disconnect it in the same way. Take a photo before removal so each connector returns to the correct location.
5. Disconnect the Washer Hose
Trace the hose from the pump toward the hood nozzles. Remove the hose from the pump or tank fitting.
Twist the hose gently before pulling it free. Old plastic hose can become stiff and split. If the end is damaged, cut back only the brittle section and use the correct replacement hose or connector.
Cap or place the hose in a clean container to prevent leftover fluid from spilling into the engine bay.
6. Remove the Reservoir Fasteners
Support the reservoir with one hand while removing its mounting bolts, nuts, screws, or clips. A reservoir may also sit in a bracket or slide into a locating tab.
Keep the fasteners in order. Some may have different lengths. Pull the tank out carefully, watching for the filler neck, wiring, hose, bumper, and fender liner.
Do not force the tank past a body panel. If it will not move, look for a hidden fastener or bracket.
7. Transfer the Pump and Sensor, If Needed
Compare the old reservoir with the replacement before transferring parts. Check the pump opening, mounting points, filler neck, and sensor port.
If the pump will be reused:
- Remove the pump retainer or pull the pump from its rubber grommet.
- Remove the old grommet if it is swollen, brittle, or torn.
- Lubricate the new grommet lightly with clean washer fluid.
- Press the grommet fully into the replacement reservoir.
- Push the pump into the grommet until it seats evenly.
- Reconnect the hose after the tank is installed.
Do not use petroleum grease on rubber washer-system seals. It can damage some rubber compounds. Do not hammer the pump into place.
If the level sensor transfers to the new tank, inspect its seal. Replace the seal if it is hard, flattened, or damaged.
8. Install the Replacement Reservoir
Place the new tank into the original position. Align its tabs and brackets before tightening any fastener.
Install all fasteners by hand first. Then tighten them evenly. Do not overtighten plastic mounting points. The correct torque depends on the model and fastener, so use the Jeep service manual when a torque value is specified.
Reconnect:
- Washer pump electrical connector
- Fluid-level sensor connector, if equipped
- Washer hose
- Filler neck
- Ground or retaining straps, if used
Make sure the hose does not rub against a tire, sharp bracket, exhaust part, or moving suspension component.
9. Reinstall the Wheel-Well and Body Panels
Replace the splash shield, fender liner, bumper parts, clips, and screws in the reverse order of removal.
Check that the fender liner does not pinch the washer hose. Confirm that the wheel turns freely and that no panel touches the tire.
If the wheel was removed, install it according to the vehicle owner’s manual. Tighten the lug nuts with a torque wrench to the specified value.
10. Fill and Test the System
Add the correct washer fluid. Do not fill above the filler neck or force fluid into a vent.
Turn the ignition on and test the washer system. The pump may need a few seconds to move fluid through an empty hose. Use short spray cycles rather than holding the switch continuously.
Inspect the reservoir, pump, hose, and nozzles while the system runs. Then fill the tank to the desired level and check again for leaks.
A successful repair has these signs:
- The fluid level stays steady
- No fluid drips from the tank or pump
- The pump runs with a normal electric sound
- Fluid reaches both spray nozzles
- The hose does not leak
- The level warning works, if the Jeep has that feature

What to Do If the Washer System Still Does Not Work
A new reservoir will not correct every washer problem. Use the symptom to narrow the cause.
| Symptom | Likely causes | Best next check |
|---|---|---|
| Pump is silent | Fuse, wiring, switch, connector, or failed pump | Check the fuse and voltage at the pump |
| Pump runs but no fluid sprays | Empty hose, blocked nozzle, disconnected hose, or failed pump impeller | Inspect the hose and nozzle |
| Fluid leaks around the pump | Damaged grommet or pump body | Replace the grommet or pump |
| Fluid leaks from the hose | Split hose or loose connection | Replace the damaged section |
| One nozzle sprays weakly | Blocked nozzle or pinched hose | Inspect the nozzle and hose |
| Fluid level warning stays on | Sensor, connector, or wiring fault | Check the sensor and connector |
| New tank does not fit | Wrong model, trim, or body style | Confirm the VIN and part number |
Checking a Silent Pump
Check the washer-system fuse using the owner’s manual. If the fuse is blown, replace it only with the specified rating.
If the new fuse blows again, stop testing. A short circuit may exist in the pump, wiring, or connector. Repeatedly installing fuses can damage wiring or create a fire risk.
A qualified technician can test for voltage at the pump connector while the washer switch is activated. Avoid probing connectors in a way that spreads or damages the terminals.
Checking Weak or Missing Spray
If the pump runs, inspect the hose from the reservoir to the hood. Look for a kink, split, loose connection, or pinched section under the fender liner.
A blocked nozzle can sometimes be cleared with compressed air applied from the nozzle side, using low pressure. Do not push a large needle deep into the nozzle. It can damage the spray opening or force debris farther into the line.
Never use engine coolant, household glass cleaner, or dish soap in the washer reservoir. These products may foam, damage paint or rubber parts, or fail to protect the system from freezing.

Common Mistakes to Avoid
The most common errors involve wrong parts, damaged clips, and poor sealing at the pump.
Installing a Similar-Looking Reservoir
A reservoir from another Cherokee year may have different mounting points or pump openings. Verify the part number and VIN before installation.
Reusing a Bad Pump Grommet
A hard or flattened grommet can leak even when the new tank is sound. Replace the grommet if it no longer grips the pump tightly.
Forgetting the Hose Routing
A hose trapped between the fender liner and body can kink or rub through. Route it as it was originally installed.
Overfilling During the First Test
Start with a small amount of washer fluid. This makes it easier to find a leak before the entire tank drains.
Using Water in Freezing Weather
Water can freeze and expand. It may crack the reservoir, split the hose, or damage the pump.
Ignoring Fluid on Electrical Connectors
Washer fluid around a connector can cause corrosion. Dry the connector and inspect the terminals before reconnecting it.
Working Under a Vehicle Without Support
A jack is for lifting, not for supporting a vehicle during a repair. Use jack stands on a firm, level surface.

Replacement Cost and Repair Time
The cost depends on the Cherokee generation, part source, pump condition, and access required.
A simple reservoir replacement may take about one to two hours for a do-it-yourself repair. A job that requires bumper or wheel-well removal may take longer. A repair shop may charge more because of labor time, diagnostic work, and the use of original-equipment parts.
The main cost factors are:
- Reservoir price
- Pump and grommet replacement
- Washer hose or nozzle damage
- Wheel or bumper removal
- Local labor rate
- Required clips and fasteners
Treat online price estimates as examples, not fixed quotes. Confirm the exact part and labor cost for the vehicle’s VIN.
When to Use a Repair Shop
A do-it-yourself replacement is reasonable if the reservoir is accessible and you can safely support the vehicle. Use a professional technician when:
- The replacement requires bumper or fender removal you are not comfortable doing
- The electrical connector is damaged
- The fuse blows again
- The reservoir location is unclear
- The vehicle has several electrical faults
- The Jeep has been in a front-end collision
- You cannot safely lift or support the vehicle
A collision can move brackets or damage the washer hose behind the bumper. Replacing only the tank may not solve the full problem.
Key Takeaways
- Replace a cracked Jeep Cherokee washer reservoir instead of trying to seal it permanently.
- Confirm the leak source before buying parts.
- Match the reservoir to the Cherokee’s exact model year and VIN.
- Replace a damaged pump grommet during the repair.
- Inspect the hose, connector, fuse, and nozzles before assuming the tank is the only fault.
- Use freeze-protected washer fluid in cold weather.
- Test for leaks before reinstalling every access panel.
Frequently Asked Questions
Can I repair a cracked Jeep Cherokee washer reservoir with epoxy?
A temporary patch may slow a small leak, but it is not a dependable repair. Washer fluid, vibration, temperature changes, and movement at the mounting points can cause the patch to fail. Replacement is the better long-term option.
Do I need to replace the washer pump with the reservoir?
Not always. Reuse the pump if it works correctly, has no crack, and seals tightly in the new tank. Replace it if it leaks, remains silent with proper power, or has a damaged housing.
Why does my Jeep Cherokee washer pump run but no fluid comes out?
The hose may be disconnected, blocked, kinked, or frozen. The pump may also have a damaged internal impeller. Check the hose and nozzles before replacing electrical parts.
How do I know which washer reservoir fits my Jeep Cherokee?
Use the VIN or a parts catalog that lists the exact model year, generation, engine, and trim. Compare the mounting tabs, pump openings, filler neck, and level-sensor port before installation.
Can I use tap water in the washer reservoir?
Use proper windshield washer fluid instead. Tap water may freeze, leave mineral deposits, and provide less cleaning power. In cold U.S. climates, choose fluid with a freeze rating suitable for the expected temperature.
Final Check After the Repair
After the first drive, inspect the reservoir and hose area again. Road vibration can reveal a loose fastener, pinched hose, or poorly seated pump grommet.
If the tank holds fluid, the pump runs, and both nozzles spray evenly, the replacement is complete. If the system still fails, diagnose the fuse, wiring, pump, hose, and nozzles separately rather than replacing more parts without testing.
For exact fastener locations and torque values, use the owner’s manual or a factory service manual for the specific Jeep Cherokee year. Official Jeep owner information is available through the Jeep Owners site, and genuine replacement parts can be checked through the Mopar Parts catalog.


