How to Remove Jeep Tail Lights a Step by Step Guide: Easy & Quick Tips
If you own a Jeep, knowing how to remove the tail lights can save you time and money when it’s time for repairs or upgrades. Whether you want to replace a broken bulb, install new LED lights, or simply perform maintenance, this step-by-step guide will walk you through the entire process with clear and simple instructions.
You don’t need to be a mechanic or have special tools—just follow along, and you’ll have your Jeep tail lights off and ready in no time. Keep reading to discover how easy it is to handle this task yourself and avoid costly visits to the shop.
Tools Needed
Removing Jeep tail lights requires a few simple tools. Having the right tools makes the task easier and faster. Each tool plays a specific role in the removal process. Prepare them before starting to avoid interruptions.
Socket Wrench Set
A socket wrench set helps remove bolts holding the tail light assembly. Different bolt sizes need various sockets. Choose the correct size to avoid stripping bolts. A ratchet handle speeds up the process.
Flathead Screwdriver
A flathead screwdriver helps pry off covers or clips gently. Use it carefully to avoid damage to plastic parts. It also assists in disconnecting electrical connectors.
Phillips Screwdriver
Some Jeep tail lights use Phillips screws. This screwdriver is essential for loosening or tightening those screws. It fits the cross-shaped screw heads perfectly.
Trim Removal Tool
This plastic tool removes trim pieces without scratching the vehicle. It is safer than using metal tools on delicate surfaces. It helps access hidden screws or clips easily.
Gloves
Wearing gloves protects your hands from sharp edges. It also keeps the tail light lenses clean from fingerprints. Use gloves for safety and cleanliness during the job.
Reasons To Remove Tail Lights
Removing Jeep tail lights is a common task for many Jeep owners. There are several reasons why you might need to take out your tail lights. Understanding these reasons helps prepare you for the process.
Tail lights can get damaged from accidents or wear over time. Sometimes, the bulbs inside burn out and need replacement. Other times, owners upgrade to newer or brighter tail lights for better visibility. Removing tail lights is also necessary for cleaning or fixing electrical issues.
Repairing Damaged Tail Lights
Tail lights often get cracked or broken from bumps or collisions. A damaged tail light affects safety and can lead to traffic tickets. Removing the tail light allows you to replace the broken parts quickly.
Replacing Burnt-out Bulbs
Burnt-out bulbs cause tail lights to stop working. This reduces your visibility to other drivers at night. Removing the tail lights is the first step to changing the bulbs and restoring safety.
Upgrading To Aftermarket Lights
Many Jeep owners want brighter or stylish tail lights. Upgrading improves the look and function of the vehicle. Removing stock tail lights is necessary to install new aftermarket ones.
Fixing Electrical Problems
Tail lights may flicker or not work due to wiring issues. Removing them lets you check and repair the electrical connections. This restores proper light function and prevents hazards.
Cleaning And Maintenance
Dirt and moisture can build up inside tail light assemblies. Removing them allows a thorough cleaning. Regular maintenance helps tail lights last longer and work better.
Accessing The Tail Light Assembly
Accessing the tail light assembly is the first step to removing Jeep tail lights. This process involves opening the rear part of your Jeep and clearing any panels that cover the tail light area. Proper access ensures you can safely and easily remove the tail light without damage.
Opening The Tailgate Or Rear Panel
Start by opening the tailgate or rear panel of your Jeep. This gives you direct access to the tail light area. Make sure the vehicle is parked and turned off for safety. Open the tailgate fully to avoid any obstacles while working. You may need to remove any cargo or items blocking the rear space.
Removing Interior Covers Or Panels
Look inside the rear area for plastic covers or panels hiding the tail light assembly. These covers protect the wiring and bulbs. Use a flathead screwdriver or trim removal tool to gently pry off the panels. Be careful not to break any clips or tabs. Once removed, you will see the tail light housing and mounting bolts clearly.

Credit: www.youtube.com
Removing Fasteners
Removing fasteners is the first key step to take off Jeep tail lights. These fasteners hold the tail light assembly firmly in place. Removing them carefully avoids damage to the light or vehicle body. This step requires attention and the right tools to work smoothly. Follow each instruction to find and remove fasteners properly.
Locating Screws And Bolts
Look closely around the tail light area. Screws and bolts usually sit near the edges of the light. Some may be hidden under small covers or trim pieces. Check inside the tail light housing if accessible. Use a flashlight to see clearly in tight spots. Mark each fastener location before unscrewing. This helps keep track of all parts.
Using The Right Tools To Unscrew
Choose tools that fit the screws or bolts exactly. Common tools include a Phillips screwdriver, flathead screwdriver, or socket wrench. A mismatched tool can strip the fastener head and cause damage. Turn the tool gently counterclockwise to loosen each fastener. Keep tools steady to avoid slipping. Place removed screws and bolts in a safe container.
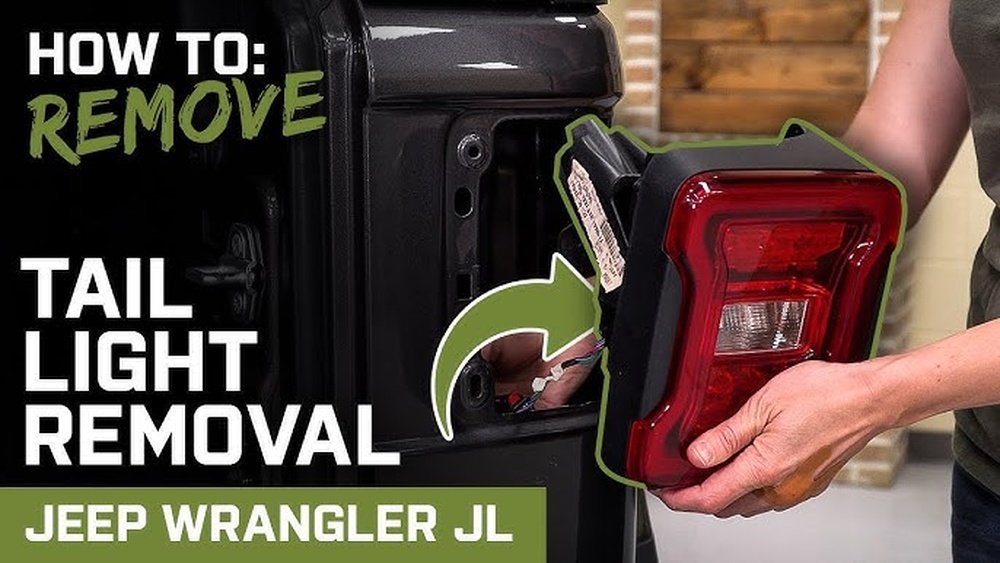
Detaching The Tail Light
Detaching the tail light is a key step in removing Jeep tail lights safely. This process requires care to avoid damage to the light assembly and wiring. Follow each step carefully to ensure a smooth removal.
Pulling The Assembly Gently
Begin by holding the tail light assembly firmly. Pull it straight out towards you. Avoid twisting or bending the assembly. Use steady, gentle force to loosen it from the vehicle. If it feels stuck, check for any remaining screws or clips. Do not rush this step to prevent cracks or breaks.
Handling Wiring Connectors
Locate the wiring connectors behind the tail light. These connectors power the light bulbs. Press the release tab on the connector to unlock it. Pull the connector straight apart without pulling on the wires. Keep the connectors clean and free from dirt. Proper handling prevents damage to the electrical system.
Disconnecting Electrical Connectors
Disconnecting the electrical connectors is a crucial step in removing Jeep tail lights. This process ensures the tail light assembly separates safely from the vehicle’s wiring. Careful handling prevents damage to both connectors and wires. Take your time to avoid mistakes that could cause electrical issues later.
Releasing Connector Tabs
Locate the connector tabs that hold the wiring plug in place. These tabs secure the connection firmly. Press or lift the tab gently to release the connector. Avoid using excessive force to prevent breaking the tabs. Once the tab is released, pull the connector straight out. This detaches the wiring without damaging the plug or socket.
Avoiding Wire Damage
Hold the connector, not the wires, when pulling it apart. Pulling on wires can cause them to break or loosen. Inspect the wires for any signs of wear or damage before disconnecting. Use your fingers or a small tool to carefully separate the connector. Keep the wires away from sharp edges or hot surfaces. Protecting the wires ensures the tail light will work correctly after reinstallation.
Replacing Or Repairing Bulbs
Replacing or repairing bulbs in your Jeep tail lights ensures safety and clear visibility. Old or faulty bulbs reduce light output and can lead to traffic violations. Keeping tail lights bright is crucial for safe driving at night or in bad weather. Follow these simple steps to remove old bulbs and install new ones correctly.
Removing Old Bulbs
Start by accessing the tail light assembly of your Jeep. Gently twist the bulb socket counterclockwise to unlock it. Pull the socket out carefully to avoid damaging wires. Remove the old bulb by pulling it straight from the socket. Do not use excessive force to prevent breaking the bulb. Inspect the socket for corrosion or dirt before proceeding.
Installing New Bulbs
Choose the correct replacement bulb for your Jeep model. Hold the new bulb by the base, avoiding touching the glass. Insert the bulb firmly into the socket until it clicks into place. Align the socket with the tail light housing. Twist it clockwise to lock securely. Test the bulb by turning on your Jeep’s lights before reassembling the tail light.

Credit: www.ledfactorymart.com
Reinstalling Tail Light Assembly
Reinstalling the tail light assembly on your Jeep is a crucial step after maintenance or upgrades. Proper reinstallation ensures your tail lights function correctly and keep you safe on the road. Take your time to align the parts and secure everything firmly.
Reconnecting Electrical Plugs
Start by reconnecting the electrical plugs carefully. Match the connectors by shape and color to avoid mistakes. Press the plugs until you hear a click, confirming they are locked. Loose connections can cause tail lights to fail or flicker.
Securing Fasteners Properly
Next, secure the fasteners that hold the tail light assembly in place. Use the correct screws or bolts and tighten them evenly. Avoid over-tightening, which can crack the plastic housing. Check all fasteners to ensure the tail light is stable and flush against the Jeep body.
Installing Aftermarket Tail Lights
Installing aftermarket tail lights can enhance your Jeep’s look and improve visibility. This process requires careful attention to detail to ensure proper fit and function. Follow each step closely for a smooth installation.
Compatibility Considerations
Choose tail lights that match your Jeep model and year. Confirm the size and shape fit your vehicle’s tail light housing. Check the electrical connections for compatibility with your Jeep’s wiring system. Using incompatible parts can cause electrical issues or poor fit. Verify the tail lights meet local road safety standards. This step helps avoid future problems and ensures proper performance.
Adjusting Fit And Wiring
Test the fit of the new tail lights before securing them. Slight adjustments may be needed for a snug fit. Use the original mounting points or brackets to avoid damage. Connect the wiring harness carefully, matching each wire color. Secure all connections to prevent loose wires and shorts. Test the tail lights by turning on your Jeep’s lights. Confirm brake lights, turn signals, and reverse lights work correctly. Make final adjustments if any light functions are not working properly.

Credit: bulletproofdiesel.com
Troubleshooting Common Issues
Troubleshooting common issues after removing or replacing Jeep tail lights is essential. Small problems can affect safety and performance. Knowing how to fix these issues saves time and frustration. Below are two frequent problems and how to handle them effectively.
Tail Light Flickering
Flickering tail lights often signal a loose connection. Check the wiring harness for any loose or damaged wires. Ensure the bulb is seated correctly in the socket. A faulty bulb can also cause flickering, so try replacing it. Corrosion on contacts may disrupt power flow; clean with electrical contact cleaner. Lastly, inspect the tail light fuse to confirm it is intact and properly seated.
Fitment Problems
Fitment problems occur when the tail light does not align properly with the vehicle body. Verify that all mounting screws or clips are present and tightened. Sometimes, aftermarket tail lights have slight size differences; compare with the original. Adjust the tail light gently to fit within the housing grooves. Avoid forcing it, as this can crack the lens or break clips. Using the correct tail light model for your Jeep ensures the best fit.
Safety Tips
Safety is the first priority when removing Jeep tail lights. Taking simple precautions prevents injury and damage. Follow these safety tips closely before starting the work.
Disconnecting Battery
Always disconnect the vehicle’s battery before handling tail lights. This stops electrical shocks and short circuits. Use a wrench to remove the negative terminal first. Secure the cable away from the battery post. This step protects both you and the Jeep’s electrical system.
Working In A Well-lit Area
Choose a bright, well-lit workspace for the task. Good lighting helps you see screws and connectors clearly. It also reduces the chance of mistakes. Avoid working in dim or dark places to keep the job safe and easy.
Frequently Asked Questions
How Do I Safely Remove Jeep Tail Lights?
First, disconnect the Jeep’s battery to prevent electrical issues. Then, use the correct tools to unscrew bolts carefully. Gently pull the tail light assembly outward and unplug the wiring harness to fully remove the tail light.
What Tools Are Needed To Remove Jeep Tail Lights?
You typically need a ratchet or screwdriver, usually a Phillips or Torx bit. A trim removal tool helps prevent damage. Gloves and safety glasses are also recommended to protect your hands and eyes.
How Long Does It Take To Remove Jeep Tail Lights?
Removing Jeep tail lights usually takes about 10 to 15 minutes. The process is straightforward if you have the right tools and follow step-by-step instructions carefully.
Can I Replace Jeep Tail Light Bulbs Myself?
Yes, replacing Jeep tail light bulbs is simple. After removing the tail light assembly, twist the bulb socket counterclockwise, remove the old bulb, and insert the new one before reassembling.
Conclusion
Removing Jeep tail lights is straightforward with clear steps. Use the right tools and work carefully. Take your time to avoid damaging any parts. Follow each step as shown in the guide. This method saves money and keeps your Jeep in good shape.
Now, you can confidently remove and replace tail lights yourself. Keep this guide handy for future repairs or upgrades. Simple and safe—tail light removal is easier than you think.