How to Fix Rear View Mirror Ball Joint: Quick & Easy Guide
Is your rear view mirror wobbling or refusing to stay in place? A loose rear view mirror ball joint can be frustrating and even dangerous while driving.
But don’t worry—you don’t need to rush to the mechanic or spend a fortune. You can fix it yourself with just a few simple steps. In this guide, you’ll learn exactly how to tighten or reattach your rear view mirror ball joint so it stays steady and secure.
Keep reading, and you’ll have your mirror fixed in no time, making your drive safer and more comfortable.
Locate The Ball Joint Screw
To fix a loose or wobbly rear view mirror, the first step is to locate the ball joint screw. This screw controls the tightness of the mirror’s movement on its mount. Finding it allows you to adjust the mirror so it stays in the desired position. The screw is usually small and hidden under or near the mirror housing. Knowing its exact location helps you avoid damage while tightening or repairing the joint.
Check Underneath The Mirror
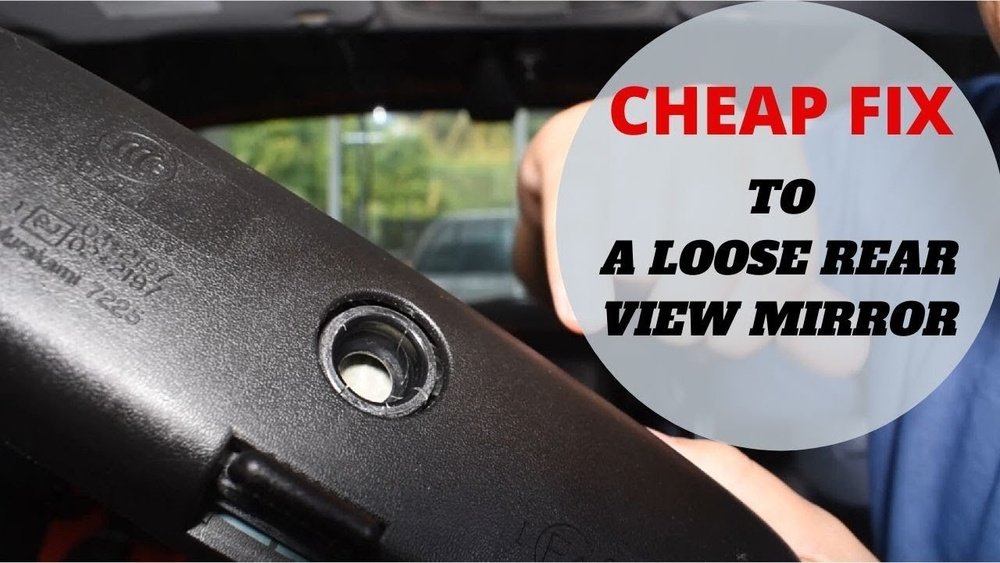
Look carefully under the mirror glass or at the base where the mirror attaches to the mount. The ball joint screw often hides beneath a small plastic cover or rubber cap. Gently pry off any covers using a flat tool or your fingernail. The screw should be visible once the cover is removed. Check all around the joint area if you do not see it immediately. Clean any dirt or dust to get a better view.
Identify Screw Type
Inspect the screw head to know which tool fits it. Common types include Philips, Torx, or Hex screws. Using the right screwdriver or bit prevents stripping the screw. Avoid forcing the wrong tool into the screw head. If unsure, test a few small screwdrivers until one fits snugly. Knowing the screw type helps in tightening it properly and avoids damage to the ball joint.

Credit: www.youtube.com
Tighten The Ball Joint
Tightening the ball joint of your rear view mirror is a simple fix to stop it from wobbling. A loose ball joint causes the mirror to move when driving. This reduces your ability to see clearly behind. Tightening it restores stability and safety.
Focus on the small set screw or the joint itself. Adjust it carefully for the best result. The right tools and proper care prevent damage and ensure a secure fit.
Use Appropriate Tools
Start by identifying the type of screw on the ball joint. Common types include Philips, Torx, or Hex screws. Use the correct screwdriver or wrench that fits the screw perfectly. This prevents stripping the screw head.
A small screwdriver set often works well for this task. Avoid using tools that are too big or too small. A snug fit allows precise tightening without slipping.
Avoid Overtightening
Turn the screw slowly and carefully. Stop tightening as soon as the mirror feels firm. Overtightening can crack plastic parts or damage the joint. It can also make the mirror hard to adjust later.
Test the mirror by moving it gently after tightening. If it stays in place without wobbling, the job is done. Tighten just enough to hold the mirror steady.
Adjust Mirror Movement
Adjusting the movement of your rear view mirror ball joint is key to ensuring clear visibility while driving. A mirror that moves too freely can be distracting and unsafe. Proper adjustment adds the right resistance, so the mirror stays put once positioned.
This process involves testing the mirror’s resistance and fine-tuning its position. Both steps help achieve smooth yet stable movement. Here’s how to do it carefully and effectively.
Test Resistance
Hold the mirror firmly and try to move it in different directions. Notice how much force it takes to shift the mirror.
If the mirror moves too easily and won’t stay in place, the ball joint is loose. If it feels too stiff, it might be over-tightened. Adjust the screw or base gently to find a balance.
Use a screwdriver to tighten or loosen the set screw near the ball joint. Turn the screw in small increments and test the movement each time.
Fine Tune Position
Once the resistance feels right, position the mirror for the best view of the road behind you.
Make small adjustments by moving the mirror slightly up, down, left, or right. Check your view after each move.
Ensure the mirror stays in the desired spot without wobbling or drifting. Repeat testing resistance if needed to keep the mirror stable.
Reglue Mirror Base
Regluing the mirror base is a key step to fix a loose or fallen rearview mirror. The base holds the mirror to the windshield securely. Using the right adhesive and preparing the surfaces well makes the repair last longer. Follow simple steps to place the mirror base correctly and safely. This method prevents the mirror from falling again while driving.
Choose Proper Adhesive
Select an adhesive made for rearview mirrors. Look for a special rearview mirror glue kit. These adhesives bond well with glass and metal. Avoid using super glue or regular epoxy. They do not hold well under heat or vibration.
Clean Mounting Surfaces
Remove old glue from the windshield and mirror base. Use rubbing alcohol and a clean cloth for best results. Scrape gently with a razor blade if needed. The surfaces must be dry and smooth before applying new glue.
Mark Exact Position
Place tape on the outside of the windshield. Mark the exact spot where the mirror base should go. This step helps to align the mirror perfectly. Accurate positioning avoids repeated adjustments later.
Apply Adhesive Correctly
Follow the instructions on the adhesive kit carefully. Apply a thin, even layer of glue to the mirror base button. Press it firmly against the marked spot on the windshield. Hold it steady for a few seconds to bond well.
Allow Proper Curing Time
Let the adhesive cure without disturbance. Most kits recommend waiting at least 24 hours. Avoid driving or moving the mirror during this time. Proper curing ensures a strong, lasting hold for your mirror base.
Fix Loose Mount On Windshield
A loose rearview mirror mount on the windshield can be distracting and unsafe. Fixing this issue restores your mirror’s stability. The process requires care to ensure the mirror stays firmly attached. Follow simple steps to remove old adhesive and reattach the base securely.
Remove Old Adhesive
Start by cleaning the area where the mirror base was attached. Use a razor blade or plastic scraper to carefully remove all old adhesive from the windshield. Avoid scratching the glass. Clean the spot with rubbing alcohol or glass cleaner to remove any residue. Let the surface dry completely before moving on.
Reattach Base Securely
Use a special rearview mirror adhesive kit designed for glass surfaces. Apply the adhesive to the metal mounting button, not directly on the windshield. Press the button firmly against the marked spot on the inside of the windshield. Hold it steady for a few minutes to ensure good contact. Allow the adhesive to cure for the recommended time, usually 24 hours, before reattaching the mirror. This ensures a strong, lasting bond and prevents future loosening.
Temporary Fixes
Temporary fixes for a loose or wobbly rear view mirror ball joint offer quick relief. These solutions help keep the mirror stable until a permanent repair is possible. They require few tools and minimal effort. Use these methods to prevent the mirror from moving too much while driving.
Use Cable Or Zip Tie
One simple fix is to use a cable or zip tie around the ball joint. Wrap the tie tightly where the mirror connects to the mount. This adds pressure and reduces wobbling. Cut off any excess tie for a clean look. This method works best for small movements. It helps hold the mirror steady during short trips.
Limitations Of Quick Fix
Temporary fixes do not last long. The cable or tie can loosen or break over time. These methods do not restore full strength to the ball joint. They only reduce movement but do not fix the root problem. Permanent repair or replacement is needed for safety. Avoid relying on temporary fixes for extended use.
Prevent Future Looseness
Preventing future looseness in your rear view mirror ball joint helps keep your mirror steady. A stable mirror improves safety and visibility while driving. Taking simple steps can extend the life of your mirror and reduce the need for repairs.
Regular Mirror Checks
Check your rear view mirror often for any signs of wobbling. Gently move the mirror to test its firmness. Early detection of looseness allows you to fix problems before they get worse. Make mirror checks part of your car maintenance routine. This habit keeps your mirror secure and reliable.
Avoid Excessive Force
Handle your rear view mirror with care when adjusting it. Do not push or pull too hard on the ball joint. Excessive force can loosen or break the joint. Use smooth and controlled movements to set the mirror position. Treating the mirror gently helps keep it tight and functional longer.

Credit: www.reddit.com

Credit: www.reddit.com
Frequently Asked Questions
How To Fix Ball Joint On Rear View Mirror?
Locate the set screw near the ball joint under the mirror. Tighten it gently using a Philips or Torx screwdriver. Avoid overtightening to prevent damage. If detached, clean the windshield and use a rearview mirror adhesive kit to reattach the mount securely.
How To Fix A Wobbly Rear View Mirror?
Locate the set screw near the mirror’s base or ball joint. Tighten it gently using a Philips or Torx screwdriver. Avoid overtightening plastic parts. If the mirror base detaches, clean and reglue it with rearview mirror adhesive. Use a zip tie for a temporary fix if needed.
How Can I Fix My Rear View Mirror?
Locate the set screw near the mirror base or ball joint and tighten it gently with a suitable screwdriver. For a fallen mirror, clean surfaces, apply rearview mirror adhesive, and press the mounting button firmly. Avoid overtightening and allow adhesive to cure fully before use.
How To Fix A Loose Plastic Ball Joint?
Locate the set screw near the ball joint under the mirror. Tighten it gently to secure the joint. Avoid overtightening plastic parts. If the base detaches, use a rearview mirror adhesive to reglue it firmly.
Conclusion
Fixing a rear view mirror ball joint takes patience and simple tools. Start by locating and gently tightening the set screw to reduce wobbling. If the mirror has fallen off, use the right adhesive and carefully follow the steps to reattach it.
Avoid forcing any parts to prevent damage. With these easy actions, your mirror will stay steady and safe while driving. Keep your workspace clean and take your time for the best results. This quick fix helps maintain clear visibility on the road.