How to Replace Body Mounts: Easy Steps for a Secure Fix
If your vehicle feels shaky or you hear unusual clunks when driving, worn-out body mounts might be the culprit. These small but crucial parts keep your vehicle’s body securely attached to the frame, absorbing vibrations and ensuring a smooth ride.
Ignoring damaged body mounts can lead to bigger problems and costly repairs down the road. But here’s the good news—you don’t have to be a professional mechanic to replace them yourself. In this guide, you’ll learn clear, step-by-step instructions on how to replace body mounts safely and effectively.
Keep reading, and by the end, you’ll have the confidence and know-how to get your vehicle back in top shape.
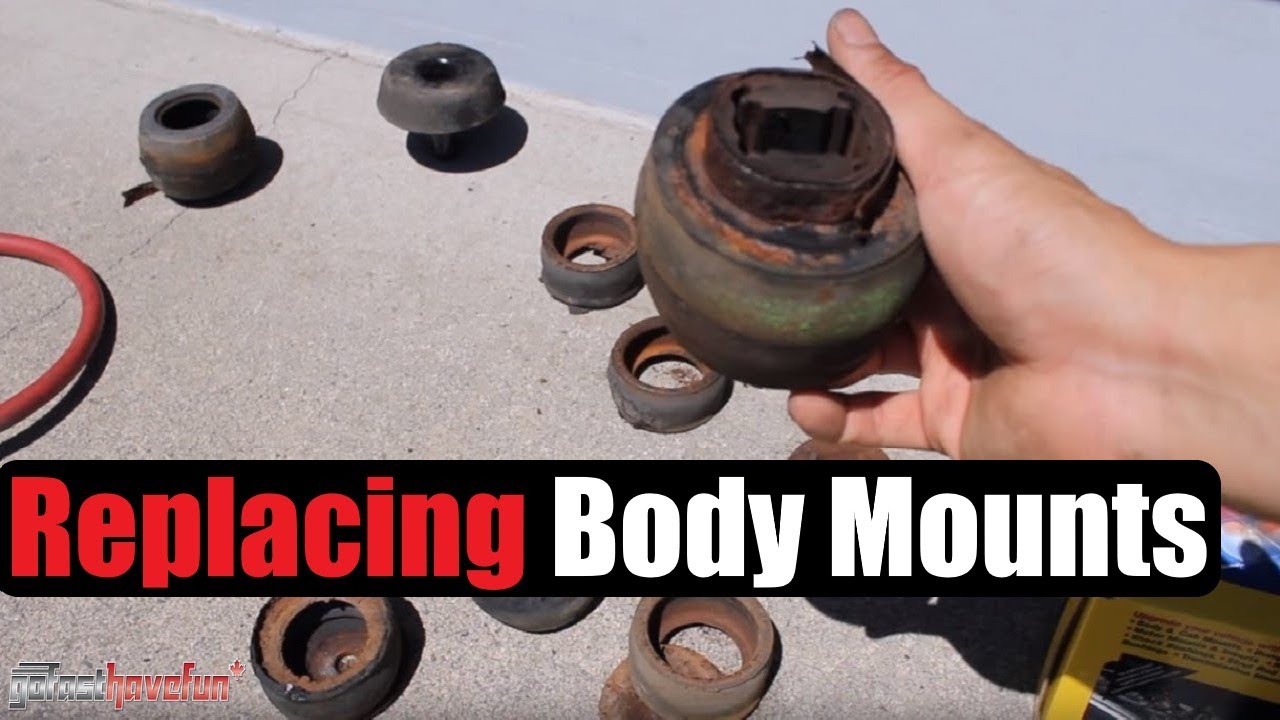
Credit: www.youtube.com
Signs Of Worn Body Mounts
Body mounts are vital parts that hold your vehicle’s body to its frame. Over time, these mounts wear out and cause problems. Recognizing the signs of worn body mounts helps you act before damage worsens. This section explains how to spot these signs clearly and simply.
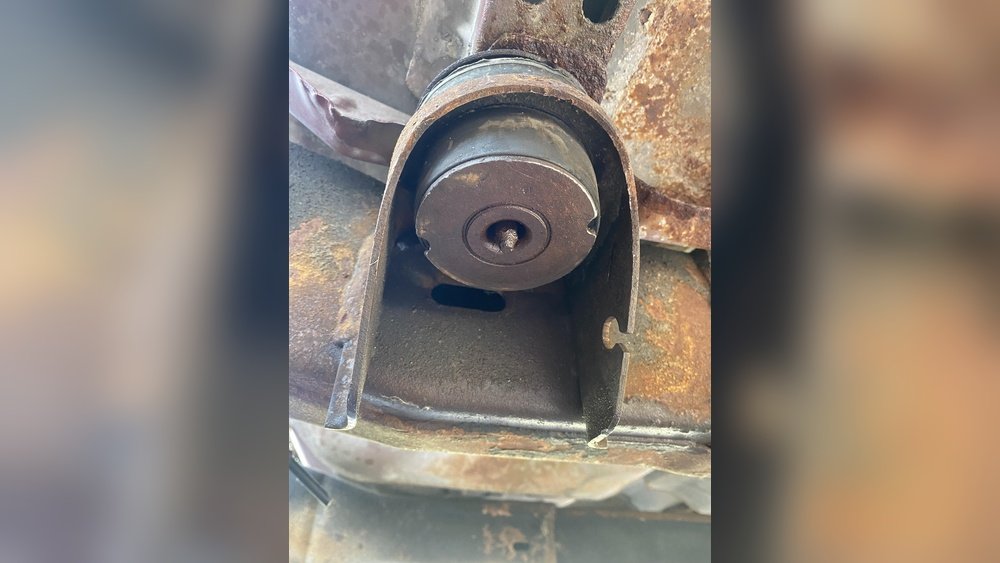
Visual Inspection Tips
Check under your vehicle with a flashlight for cracks or breaks on the mounts. Look for rust or missing chunks of rubber. Notice if the mounts look dry or brittle. Any damage means the mounts need replacing. Clean the area first for a better view. Take pictures to compare over time.
Common Symptoms
Feel unusual shaking or rattling inside the vehicle. Hear clunking noises when driving over bumps or rough roads. Notice uneven gaps between the body and frame. The doors or hood may not close properly. Steering might feel loose or less stable. These symptoms often point to bad body mounts.
Safety Concerns
Worn body mounts affect vehicle control and safety. They can cause the body to shift during driving, risking loss of control. Damaged mounts may lead to faster wear of other parts. Ignoring these signs can result in costly repairs or accidents. Fixing mounts timely keeps you and others safe on the road.
Tools And Equipment Needed
Replacing body mounts requires specific tools and equipment for a safe and effective job. Having the right items ensures the mounts are removed and installed correctly. This section lists essential tools that make the process easier and more precise.
Basic Hand Tools
Start with a sturdy socket set to fit various bolt sizes. Wrenches, both open-end and box-end, help reach tight spaces. A breaker bar is useful for loosening stubborn bolts. Screwdrivers may be needed to remove clips or covers. Always have a hammer and pry bar to separate parts gently if stuck.
Support Equipment
A hydraulic jack is vital to lift the vehicle safely. Use jack stands to securely hold the car in place. An engine support bar or hoist keeps the engine steady while mounts are replaced. Wood blocks protect the engine when using a floor jack. Safety goggles and gloves protect you during the work.
Torque Wrench Importance
A torque wrench ensures bolts are tightened to the correct specification. Over-tightening can damage parts, while under-tightening may cause loose mounts. This tool provides accuracy and peace of mind. Always check the vehicle manual for recommended torque values before tightening.
Preparing For Replacement
Preparing to replace body mounts is a key step for a smooth repair. Proper preparation ensures safety and easier access during the job. It helps avoid damage to the vehicle and injury. Follow these steps carefully before starting the replacement process.
Securing The Vehicle
Park the vehicle on a flat surface. Engage the parking brake firmly. Place wheel chocks behind the tires. This stops the vehicle from moving. Use jack stands to support the frame. Never rely only on a jack for support. Safety comes first to prevent accidents.
Supporting The Engine
Body mounts hold the vehicle’s body to the frame and support the engine. Before removing mounts, lift the engine slightly. Use an engine hoist, support bar, or floor jack with a wood block. Position the block carefully under the oil pan. This prevents engine damage. Supporting the engine relieves pressure on the mounts.
Clearing Access To Mounts
Check which mounts need replacing and where they are located. Some mounts are easy to reach. Others may require removing parts like the battery or starter. Clear any obstacles to gain good access. Keep bolts and parts organized during removal. Good access saves time and reduces frustration.
Removing Old Body Mounts
Removing old body mounts is a crucial step in the replacement process. These mounts secure your vehicle’s body to its frame. Over time, they wear out or get damaged. Removing them carefully prevents damage to the frame or body. Prepare your tools and workspace before starting. This ensures a smooth removal process and safety throughout.
Loosening Bolts
Start by loosening the bolts that hold the body mounts. Use a proper wrench or socket set. Apply steady pressure to avoid stripping the bolts. Spray a penetrating oil if bolts feel stuck. Let the oil sit for a few minutes. This helps break down rust and corrosion. Work on each bolt gently and patiently. Avoid sudden force that may damage the bolt or mount.
Handling Stubborn Fasteners
Some fasteners may be very tight or rusted in place. Use a breaker bar for extra leverage if needed. Heat the bolt area carefully with a heat gun or torch. Heat expands the metal and loosens the rust bond. Avoid overheating to protect surrounding parts. Tap the bolt lightly with a hammer to help break rust. Use penetrating oil again if the bolt still resists. Take your time and stay safe.
Removing Obstructions
Obstructions can block access to body mounts or bolts. Remove nearby parts like skid plates, brackets, or wiring harnesses. Clear the workspace to reach the mounts easily. Label parts to remember where they go. Sometimes, the mounts sit under body panels or crossmembers. Remove these parts carefully to avoid damage. Keeping the area clear speeds up the removal process.
Installing New Body Mounts
Installing new body mounts is a key step in restoring your vehicle’s stability and comfort. Proper installation ensures the body sits securely on the frame. This process requires attention to detail and the right tools.
New mounts must fit precisely to avoid vibrations and noise. Follow the correct steps for a safe and effective replacement.
Positioning The Mounts
Start by aligning the new body mounts with the frame holes. Each mount has a specific place. Incorrect positioning can cause damage and poor fit.
Use the old mounts as a guide. Make sure the rubber parts face the correct direction. Check for any debris or rust before setting the mounts.
Torque Specifications
Tighten the mount bolts to the manufacturer’s torque specs. Over-tightening can crush the mount, while under-tightening causes looseness. Use a torque wrench for accuracy.
Follow the recommended sequence for tightening bolts. This ensures even pressure and proper seating of the mounts.
Replacing In Pairs
Replace body mounts in pairs on the same side or axle. One worn mount means others may also be weak. Pair replacement balances the load and extends mount life.
Replacing mounts one by one can cause uneven stress and quick wear. Always check all mounts for signs of damage during replacement.
Troubleshooting Common Issues
Troubleshooting common issues during body mount replacement is essential for a smooth repair process. Problems like tight spaces, rust, and engine alignment can slow down or complicate your work. Knowing how to handle these challenges saves time and prevents damage. This section covers key troubleshooting tips to overcome these obstacles.
Difficult Access Areas
Some body mounts sit in hard-to-reach spots. Crawling under the vehicle often feels cramped and tight. Removing parts like the starter or sway bar may be necessary. Use the right tools such as a ratchet with extension bars. Patience is key. Take your time to avoid stripping bolts or hurting yourself. Lighting helps to see better in dark corners. A small flashlight or headlamp works well.
Dealing With Rust And Corrosion
Rust weakens bolts and mounts, making removal tough. Spray penetrating oil on rusty bolts and let it sit. Tap gently with a hammer to loosen corrosion. Use a wire brush to clean threads before unscrewing. If bolts remain stuck, try heat from a propane torch carefully. Replace any bolts or mounts that show heavy rust or cracks. This prevents future failures and ensures a secure fit.
Engine Alignment Tips
Proper engine alignment is crucial after replacing mounts. Misaligned engines cause vibrations and wear. Use an engine hoist or support bar to hold the engine steady. Check alignment with a straight edge or level across mounting points. Tighten bolts gradually in a crisscross pattern to keep the engine balanced. Double-check all mounts before lowering the vehicle. Correct alignment improves ride quality and extends mount life.
When To Seek Professional Help
Knowing when to seek professional help is key to a successful body mount replacement. Some tasks can be tricky and need expert skills. Choosing help can save time, money, and prevent damage to your vehicle.
Understanding your limits helps avoid costly mistakes and ensures safety. Here are signs that you should call a professional for the job.
Complex Mount Locations
Some body mounts are hidden deep under the vehicle. These mounts require removing parts like the starter or sway bar. Access is tight and may need special tools. Professionals have experience dealing with these hard-to-reach areas safely. They know how to avoid damage and finish the job correctly.
Lack Of Tools Or Experience
Replacing body mounts needs specific tools such as torque wrenches and engine support bars. Without these, the job becomes risky and hard to do right. Experience matters to handle stuck bolts and align parts properly. Professionals come prepared with the right tools and know-how to avoid common errors.
Safety Considerations
Supporting the engine safely is vital during replacement. Improper support can cause injury or damage. Professionals use proper equipment to secure the engine and vehicle. They follow safety rules to protect themselves and your car. If you feel unsure about safety, calling a pro is the best choice.

Credit: www.youtube.com
Maintenance Tips For Longevity
Maintaining your vehicle’s body mounts extends their life and keeps your ride smooth. Simple care steps prevent early wear and costly repairs. Focus on regular checks, gentle driving, and quality parts for best results.
Regular Inspections
Check body mounts every few months. Look for cracks, rust, or loose bolts. Early detection helps avoid bigger damage. Use a flashlight and crawl under the vehicle safely. Replace mounts showing signs of wear immediately.
Avoiding Harsh Driving Conditions
Drive carefully on rough roads and avoid potholes. Hard impacts strain body mounts and cause faster wear. Slow down on bumps and avoid sharp turns. Smooth driving protects mounts and increases their lifespan.
Using Quality Replacement Parts
Choose high-quality body mounts for replacements. Cheap parts wear out quickly and may fail. Pick parts from trusted brands or OEM suppliers. Proper fit and durability ensure longer service and safer rides.
Frequently Asked Questions
Can Body Mounts Be Replaced?
Yes, body mounts can be replaced. Inspect for damage, remove old mounts, and install new ones using proper tools and safety measures.
How Much Is It To Replace Body Mounts?
Replacing body mounts typically costs between $150 and $400, depending on vehicle type and labor rates. Parts range from $50 to $150. DIY replacement saves labor costs but requires tools and experience. Always consider professional service for difficult access or extensive damage.
Can I Replace Engine Mounts Myself?
Yes, you can replace engine mounts yourself if you have mechanical skills and proper tools. Use a jack, jack stands, and torque wrench. Support the engine safely before removal. Some mounts may require removing other parts, so patience and care are essential.
What Happens If Body Mounts Are Bad?
Bad body mounts cause excessive engine movement, vibrations, and noise. They can damage the frame and affect vehicle handling. Replace mounts promptly to ensure safety and maintain ride quality.
Conclusion
Replacing body mounts improves vehicle stability and comfort. Check mounts regularly for cracks or wear. Use proper tools and support the engine safely. Take your time with hard-to-reach bolts and parts. Consider replacing all mounts on one side together. When unsure, seek help from a professional mechanic.
Following these steps keeps your vehicle safe and running smoothly.