Replace Tie Rod And Drag Link On Jeep JK & JL: Easy Guide
 Reading Time: 15 minutes
Replacing the tie rod and drag link on a Jeep Wrangler JK or JL is a manageable driveway repair for many U.S. owners with solid mechanical skills. The job involves removing the steering linkage, installing new parts, tightening each fastener to the correct factory specification, and checking the steering wheel and toe alignment.
This guide covers U.S.-market Jeep Wrangler models:
- JK: 2007–2018 Jeep Wrangler
- JL: 2018–present Jeep Wrangler
- 2-door and 4-door models
- Stock and many aftermarket steering-link designs
The exact torque values, part design, and installation steps can vary by model year, axle, trim, and replacement part. Always confirm the specifications in the factory service information for your VIN before driving the Jeep.

What the Tie Rod and Drag Link Do
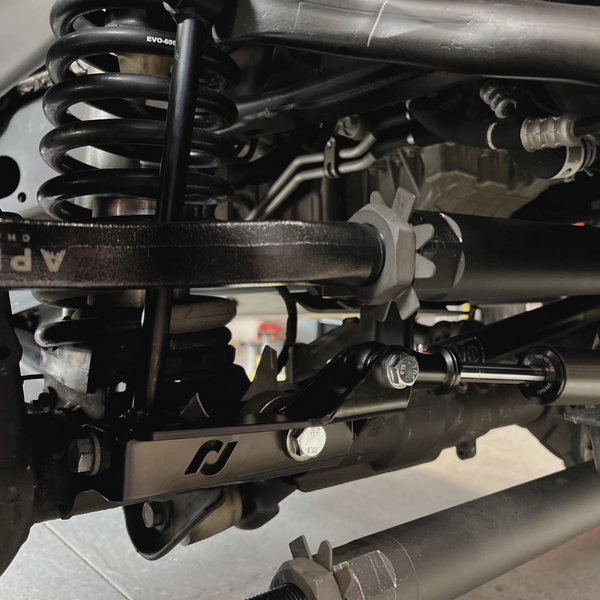
The tie rod connects the left and right steering knuckles. It controls how both front wheels turn together and sets the front toe angle.
The drag link connects the steering gear’s pitman arm to one front steering knuckle. It transfers movement from the steering wheel to the wheels.
In simple terms:
| Part | Main job | Common symptoms when worn |
|---|---|---|
| Tie rod | Connects both steering knuckles | Loose steering, toe change, tire wear |
| Drag link | Connects the pitman arm to a steering knuckle | Steering wander, dead spot, wheel shimmy |
| Tie-rod end | Allows the tie rod to move with the suspension | Play, clunk, torn boot |
| Drag-link end | Allows the drag link to pivot | Clunk, steering looseness, vibration |
A tie rod or drag link is not the same as a track bar. The track bar locates the axle from side to side. The steering links turn the wheels. Replacing the wrong part will not correct the problem.
JK and JL differences
The JK and JL use similar steering layouts, but the parts are not automatically interchangeable.
- A JK tie rod may not fit a JL knuckle.
- JL steering components can use different taper dimensions and joint designs.
- Aftermarket parts may use a different nut, cotter pin, or installation method.
- Some heavy-duty kits replace the factory drag link and tie rod with larger links or flipped joints.
- A 2018 Wrangler requires special attention because it can be either a JK or JL, depending on the vehicle.
Use the correct part number for the Jeep’s model, year, axle, and steering system. Do not identify a part by appearance alone.
When Should You Replace the Tie Rod or Drag Link?
Replace a steering link when it has measurable joint play, a damaged joint, bent tubing, severe corrosion, or damage from an impact.
Common warning signs include:
- Steering feels loose or vague.
- The Jeep wanders on a straight road.
- The steering wheel moves before the tires respond.
- You hear a clunk when turning or changing direction.
- The front tires show uneven or feathered wear.
- A steering joint has a torn or missing dust boot.
- The steering wheel is suddenly off-center.
- The Jeep developed a wobble after hitting a pothole or rock.
- A visual inspection shows a bent tie rod or drag link.
A torn boot does not always mean the joint has failed, but it allows water and dirt to enter. Check the joint for play before deciding whether the full link needs replacement.
How to check for looseness
- Park the Jeep on level ground.
- Set the parking brake.
- Keep the tires on the ground for an initial steering check.
- Ask a helper to move the steering wheel gently left and right.
- Watch each tie-rod and drag-link joint.
- Look for movement in the joint stud, not just normal movement of the link.
- Place a hand near the joint if needed, keeping fingers clear of pinch points.
The steering link should move the knuckle without visible looseness between the joint stud and the knuckle. Movement at the steering gear, ball joints, wheel bearings, or track bar can look similar, so inspect the whole front end.
Do not drive the Jeep if a steering joint has serious play, a loose nut, a missing retainer, or a cracked link.

Tools and Parts You Need
Gather the replacement parts and tools before taking the Jeep apart.
Parts
- Correct tie rod, drag link, or complete steering-link kit
- New cotter pins, if used by the replacement design
- New one-time-use nuts, if required by the factory manual or part maker
- Grease, if the replacement joints have grease fittings
- Anti-seize for approved threaded areas only
- Paint marker or measuring tape
Do not reuse a damaged cotter pin. Do not replace a locking nut with a standard nut.
Tools
- Floor jack
- Jack stands rated for the Jeep’s weight
- Wheel chocks
- Breaker bar
- Metric socket and wrench set
- Torque wrench with the required range
- Ball-joint or tie-rod separator
- Hammer
- Pliers for cotter pins
- Tape measure
- Pry bar
- Penetrating oil
- Wire brush
- Safety glasses and gloves
A ball-joint separator is usually better than striking the threads. If you use a hammer, strike the side of the steering knuckle near the tapered stud, not the threaded end.
Safety setup
Work on a flat, hard surface. Support the Jeep by the frame with jack stands, and keep the jack under the axle as a secondary support.
Never work under a Jeep supported only by a floor jack. Keep hands away from the area between the steering knuckle, link, and axle while someone turns the steering wheel.

Before Removing the Old Steering Links
Record the original adjustment before disassembly. This helps you get close to the original toe setting, but it does not replace an alignment.
Mark the parts
Use a paint marker to mark:
- The tie-rod sleeve position
- The drag-link adjustment sleeve position
- The exposed thread length
- The location of each link
- The direction of any bends or offsets
Measure the distance between the centers of the old joint studs. Also measure the exposed thread length on each end.
These measurements are useful only as a starting point. A bent or incorrectly adjusted old link can produce a bad measurement.
Compare the new parts
Before installation, compare the old and new parts side by side.
Check:
- Overall length
- Bend and offset
- Thread direction
- Stud size and taper
- Joint angle
- Grease-fitting location
- Nut type
- Cotter-pin hole location
- Clearance from the wheels and axle
The new part should not contact the differential cover, sway-bar links, wheels, shocks, axle housing, or steering-stop hardware through the full steering and suspension range.

How to Remove the Tie Rod and Drag Link
The order can vary, but removing the steering links one at a time makes the job easier to control.
1. Secure the Jeep
- Park on level ground.
- Set the parking brake.
- Place the transmission in Park or in gear.
- Chock the rear wheels.
- Loosen the front wheel lug nuts if wheel removal is needed.
- Raise the front axle or frame as appropriate.
- Place jack stands under strong frame or axle support points.
- Keep the front axle supported so the suspension does not hang unexpectedly.
You can often replace the links with the wheels installed, but removing the front wheels gives more working room.
2. Center the steering
Point both front wheels straight ahead. Keep the steering wheel centered.
Do not allow the steering wheel to spin freely after the drag link is disconnected. If the steering wheel moves, the steering-wheel clock spring can be damaged on some vehicles.
3. Remove the cotter pins or locking retainers
Remove the cotter pins from the tie-rod and drag-link nuts, if equipped.
If the replacement uses a different retention system, follow the instructions supplied with that part. A tapered steering stud must be secured with the correct nut and retainer.
4. Loosen the joint nuts
Break the nuts loose while the links are still supported. Do not remove the nuts completely until you are ready to separate the joints.
If the threads are rusty, clean them with a wire brush and apply penetrating oil. Avoid heating components near rubber boots, wheel bearings, brake hoses, or ABS wiring.
5. Separate the tapered studs
Use a suitable separator tool.
If you use a hammer:
- Leave the nut loosely installed to protect the threads.
- Strike the side of the steering knuckle where the tapered stud passes through.
- Do not strike the threaded stud.
- Do not hit the aluminum steering knuckle with excessive force.
- Protect brake lines and ABS wiring.
A sharp blow to the side of the knuckle can release the taper. Repeatedly hammering the threaded end can damage the stud and nut.
6. Remove the old tie rod
Remove the tie rod from both steering knuckles. If the tie rod has an adjustment sleeve, note how the jam nuts face before removal.
Some factory tie rods use a sleeve or center adjuster. Others use a single link with threaded ends. Aftermarket parts may use left-hand and right-hand threads to permit adjustment without removing the link.
7. Remove the old drag link
Remove the drag link from the pitman arm and the steering knuckle.
Support the link while removing it. Do not allow the pitman arm or steering gear to take a sharp side load. If the joint is stuck, use a proper separator rather than prying against the steering gear.

How to Install the New Tie Rod and Drag Link
Install the new links in the same general orientation as the original parts unless the manufacturer provides a different design.
1. Clean the mounting holes
Clean the tapered holes in the steering knuckle and pitman arm. Remove rust, dirt, and old grease.
Do not enlarge the holes. Do not use a grinder on the tapered seating surfaces.
2. Position the new links
Install the tie rod between the steering knuckles. Install the drag link between the pitman arm and steering knuckle.
Make sure:
- The bends point in the correct direction.
- The adjustment sleeves face the correct way.
- The joints are not at the end of their operating angle.
- The links have clearance from the axle and wheels.
- Grease fittings, if present, remain accessible.
- The tapered studs seat fully in their holes.
On some aftermarket systems, the drag-link joint may be installed from the opposite side of the knuckle. Follow the kit instructions, not the appearance of the factory part.
3. Start the nuts by hand
Thread each nut by hand. If a nut will not start easily, stop and inspect the threads.
Do not pull a tapered stud into place by tightening a cross-threaded nut. Do not use an impact wrench to force the nut into position.
4. Tighten to the correct specification
Tighten the tie-rod and drag-link fasteners with a calibrated torque wrench.
The correct torque depends on:
- JK or JL model
- Model year
- Joint location
- Factory or aftermarket hardware
- Nut and stud design
- Whether the part uses a cotter pin or locking nut
Use the Jeep factory service manual or the replacement manufacturer’s instructions for the exact value. Do not copy a torque value from a different Jeep generation.
The nut must reach the specified torque while the stud is fully seated. If a cotter-pin hole does not align after reaching the required torque, follow the service manual instruction. Never loosen a critical steering nut to align a cotter pin unless the manufacturer specifically permits that method.
5. Tighten the jam nuts
If the new link uses adjustment sleeves, tighten the jam nuts against the sleeves to the specified torque.
Make sure the jam nuts are fully seated and that the threads have enough engagement. A few visible threads do not prove that the joint is safely engaged.
6. Install retainers
Install new cotter pins where required. Bend the ends so the pin cannot slide out.
If the part uses a prevailing-torque nut, locking nut, or other retainer, use the supplied hardware. Do not add a cotter pin unless the part is designed for one.
7. Grease serviceable joints
Grease only joints that have grease fittings. Use a suitable chassis grease and stop when the boot begins to expand slightly.
Do not force grease until the boot tears. Sealed joints do not need drilling or added grease.

Set the Tie Rod and Drag Link Close to the Original Position
Initial adjustment helps the Jeep drive to an alignment shop, but it is not a final alignment.
Tie-rod adjustment
The tie rod controls toe. Measure between the front and rear edges of the front tires at the same height from the ground.
A simple comparison is:
- Measure the distance between the tire tread centers at the front.
- Measure the same distance at the rear.
- Compare the two measurements.
This home measurement can be affected by tire shape, tread blocks, wheel runout, and measuring error. Use it only to place the toe near its former setting.
Drag-link adjustment
The drag link affects steering-wheel center. If the Jeep tracks straight but the steering wheel is off-center after the repair, the drag-link adjustment may need correction.
Do not use the drag link to fix toe. Do not use the tie rod to center the steering wheel. Each link has a different job.
Important alignment rule
A steering-link replacement can change toe even when the replacement part has the same length as the original. Have the Jeep professionally aligned after the repair.
Ask the alignment technician to check:
- Front toe
- Steering-wheel center
- Steering linkage
- Track bar and suspension joints
- Ball joints
- Wheel bearings
- Steering gear mounting
- Tire condition and pressure

Final Inspection and Road Test
Complete a careful inspection before driving on public roads in the United States.
With the Jeep on stands
Check that:
- Every nut is tightened to the correct specification.
- All required cotter pins or retainers are installed.
- Jam nuts are tight.
- The steering links clear the axle and wheels.
- Brake hoses and ABS wires are not stretched or rubbing.
- The steering wheel remains near center.
- The joints move smoothly without binding.
- No tool or loose hardware remains near the axle.
Turn the steering wheel slowly from lock to lock. Keep the tires clear of people and objects. Watch for contact between the steering links, tires, wheels, axle, shocks, and sway-bar components.
On the ground
After lowering the Jeep:
- Torque the wheel lug nuts using the vehicle’s specified pattern and value.
- Start the engine and turn the wheel slowly.
- Listen for clunks or binding.
- Drive slowly in a safe area.
- Test braking and steering.
- Stop and inspect the parts again.
- Schedule a four-wheel alignment or front-end alignment as appropriate.
A short drive is not proof that the repair is correct. Steering parts can loosen or bind if the tapers did not seat properly.

Common Problems After Installation
The steering wheel is off-center
The drag link may not be adjusted correctly, or the toe may have changed. Do not ignore an off-center wheel if the Jeep pulls or the tires scrub.
Have the alignment checked. If the toe is correct but the wheel is still off-center, the shop can check the drag-link adjustment.
The Jeep still wanders
Possible causes include:
- Incorrect toe
- Loose track-bar bolts or joints
- Worn ball joints
- Wheel-bearing play
- Tire pressure mismatch
- A bent axle or steering link
- Loose steering gear mounting
- Incorrect lift geometry
Replacing the tie rod or drag link will not cure every steering problem.
The new joint will not seat
Check for:
- Dirt or rust in the tapered hole
- The wrong part
- A stud with the wrong taper
- A damaged knuckle
- A nut installed from the wrong side
- A joint installed upside down
Do not tighten harder to force an incompatible taper into place.
The cotter pin hole does not line up
First confirm that the stud is fully seated and that the correct nut is being used. Follow the service manual or part manufacturer’s instructions.
Do not remove material from the nut or stud. Do not leave out the retainer.
The link contacts another part
Stop driving and find the cause. Contact may result from:
- Incorrect link orientation
- A bent axle component
- Wrong wheel backspacing
- A lift or suspension modification
- An oversized aftermarket joint
- Incorrect installation
- A missing spacer
Turn the steering from lock to lock and cycle the suspension only after supporting the Jeep safely.
Factory Parts or Heavy-Duty Aftermarket Links?
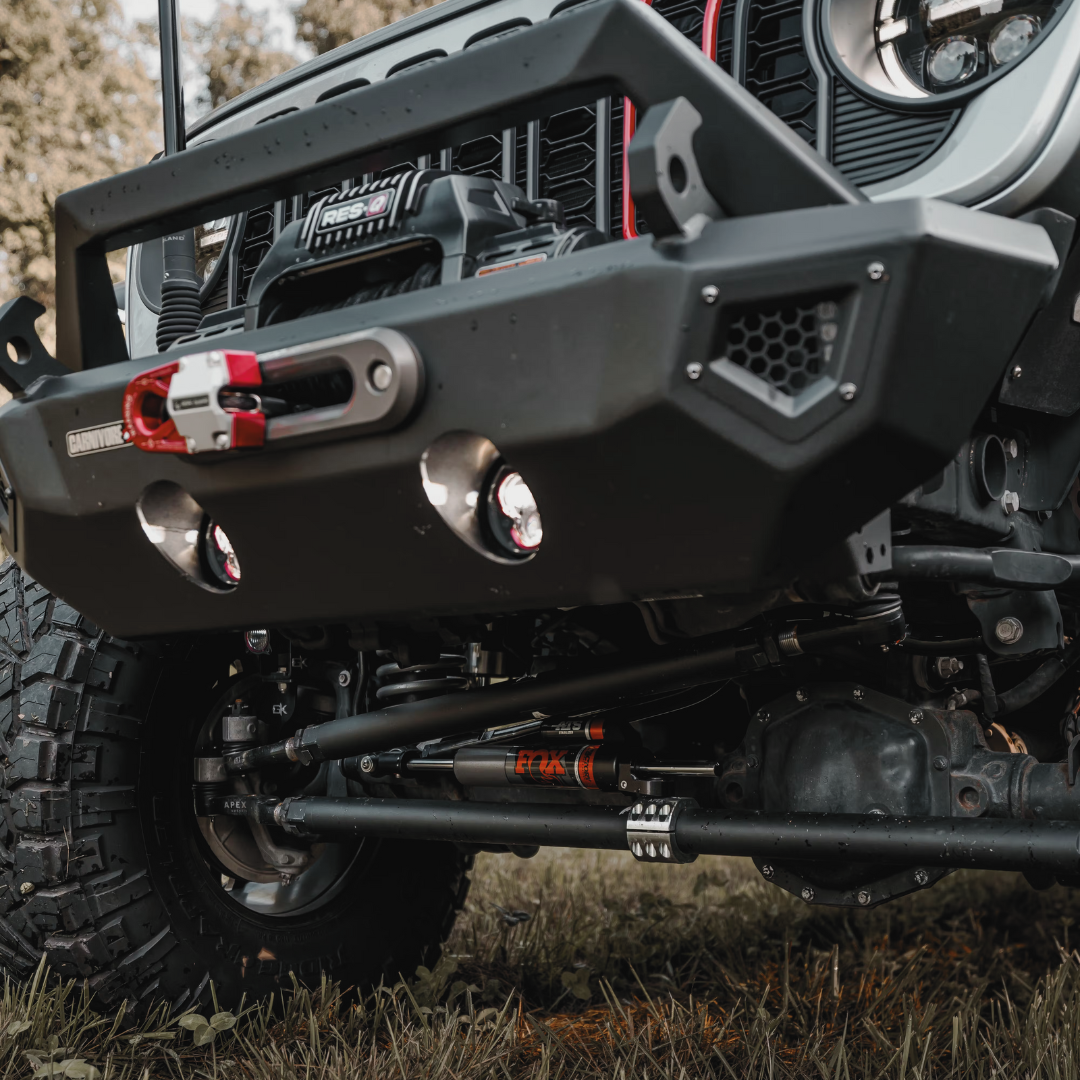
Factory-style replacement parts are often the simplest choice for a stock or lightly modified Jeep. They generally preserve the original layout and adjustment method.
A heavy-duty aftermarket tie rod or drag link may make sense for a Jeep with:
- Larger tires
- Frequent rock use
- Repeated steering-link impacts
- A lift that requires revised steering geometry
- A known weak or bent factory link
However, a larger link is not automatically better for every Jeep. The kit may require different hardware, a steering-stop adjustment, a raised steering joint, or additional alignment work.
Before buying, verify:
- JK or JL compatibility
- Two-door or four-door application
- Dana axle and knuckle compatibility
- Lift-height range
- Wheel clearance
- Joint taper
- Steering-stop requirements
- Hardware and torque instructions
- Warranty and replacement-joint availability
Never mix random tie-rod and drag-link parts from different kits unless the manufacturer confirms compatibility.

Key Takeaways
- The tie rod connects the two front steering knuckles.
- The drag link connects the pitman arm to a steering knuckle.
- JK and JL steering parts are different; confirm the exact application.
- Record the old adjustment before removal.
- Use a separator tool and protect the tapered studs.
- Torque every fastener to the specification for that Jeep and part.
- Install all required cotter pins or locking hardware.
- Check for clearance through the full steering range.
- A professional alignment is required after the repair.
- Do not drive a Jeep with loose steering joints or an unknown fastener condition.
Frequently Asked Questions
Can I replace only the tie rod end instead of the complete tie rod?
Yes, if the replacement joint is available and the tie-rod tube is straight and undamaged. Many owners replace the complete tie rod because it reduces the chance of mismatched threads, worn adjusters, or hidden damage. Use the correct joint and record the original length before removing it.
Do I need an alignment after replacing the drag link?
You should have the steering and alignment checked. The drag link mainly affects steering-wheel position, while the tie rod controls toe. Even so, removing and reinstalling steering links can change adjustment or reveal other looseness.
Can I use a pickle fork to remove the steering links?
You can, but a pickle fork often damages the dust boot and may destroy a reusable joint. A screw-type separator is usually preferable when you want controlled removal or plan to reuse the joint.
Should the Jeep be aligned before or after replacing the track bar?
Replace all known worn steering and suspension parts before the final alignment. Aligning the Jeep first and then replacing another loose joint can change the settings again.
How long does the repair take?
A straightforward replacement may take a skilled home mechanic a few hours. Rust, seized tapers, modified suspension parts, and incorrect replacement hardware can add significant time. The alignment is a separate step.
Conclusion
Replacing the tie rod and drag link on a Jeep Wrangler JK or JL requires more than removing two bars and tightening new nuts. The parts must match the Jeep, the tapered joints must seat correctly, the retainers must be installed, and the steering geometry must be checked afterward.
Use the factory service information for the exact torque values, measure the original adjustment before disassembly, and arrange an alignment after the repair. If you find looseness in the steering gear, track bar, ball joints, or wheel bearings, repair those issues before returning the Jeep to highway use.