
How To Replace Rear Wiper Motor: Cherokee DIY Guide
 Reading Time: 16 minutes
A failed rear wiper motor can leave the back glass dirty, limit your view, and stop the washer system from working correctly. On most U.S.-market Jeep Cherokee and Grand Cherokee models, the repair involves removing the rear wiper arm, taking off the liftgate or hatch trim, disconnecting the motor, and installing a matching replacement.
The exact motor, fastener size, trim clips, and access method depend on the Jeep’s year and body generation. This guide covers the common process for Jeep Cherokee models such as the XJ and KL, and Grand Cherokee models such as the ZJ, WJ, WK, WK2, and WL. Always confirm the part number and torque values for your specific vehicle before starting.
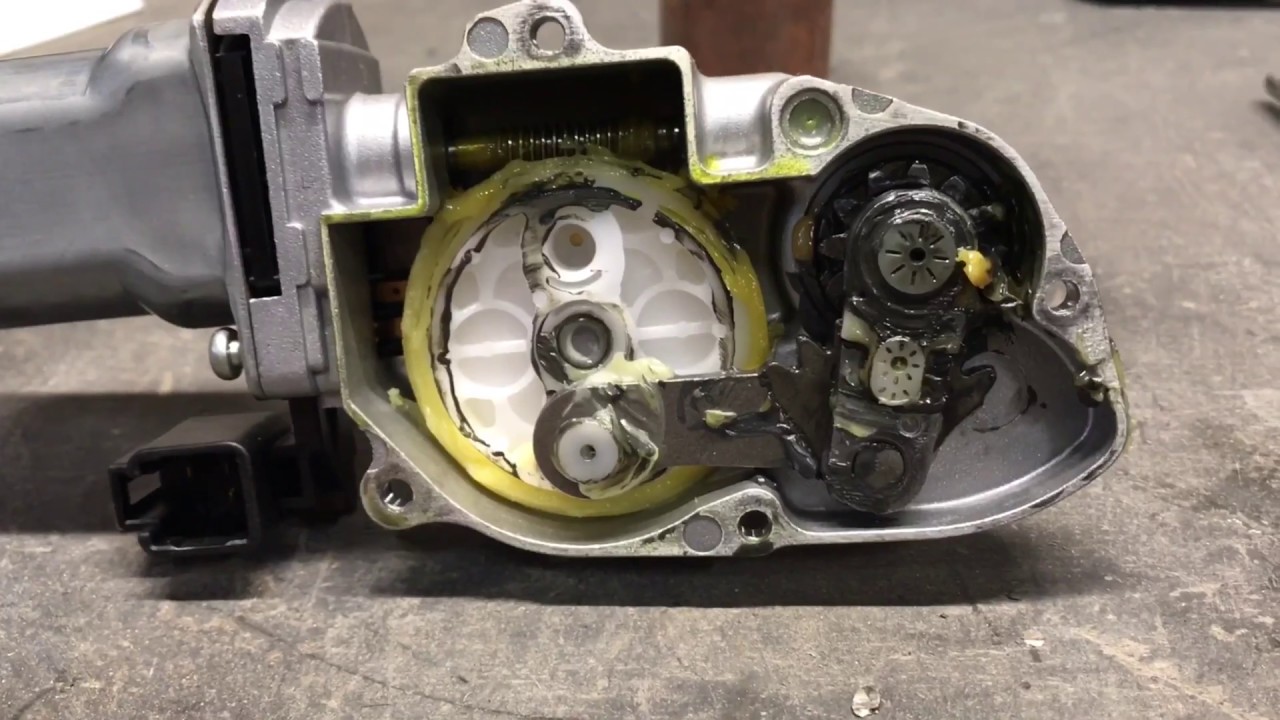
Before You Start: Confirm the Jeep Model and Motor Failure
The first step is to identify the Jeep’s model year and generation. A 1999 Cherokee XJ does not use the same rear wiper motor or trim method as a 2018 Cherokee KL. The same is true for Grand Cherokee models across different generations.
Use the vehicle identification number, or VIN, to confirm the correct replacement part. The VIN is usually found on the driver-side dashboard near the windshield and on the vehicle title or registration.
Common Jeep rear wiper generations
| Jeep model | Common U.S. generations | Rear wiper design |
|---|---|---|
| Cherokee | XJ, 1984–2001 | Rear hatch wiper on many models |
| Cherokee | KL, 2014–2023 | Liftgate-mounted rear wiper |
| Grand Cherokee | ZJ, 1993–1998 | Rear window or liftgate wiper, depending on equipment |
| Grand Cherokee | WJ, 1999–2004 | Liftgate-mounted rear wiper |
| Grand Cherokee | WK, 2005–2010 | Liftgate-mounted rear wiper |
| Grand Cherokee | WK2, 2011–2022 | Liftgate-mounted rear wiper |
| Grand Cherokee | WL, 2021 and newer | Different liftgate and electrical design |
Model-year overlap can occur. Check the VIN and the original motor before ordering.
Symptoms of a bad rear wiper motor
A defective motor may cause one or more of these symptoms:
- The rear wiper does not move when switched on.
- The wiper moves slowly, then stops.
- The motor runs, but the arm does not move.
- The wiper stops in the wrong position.
- The wiper moves only part way across the glass.
- The rear washer works, but the blade does not move.
- A fuse blows when the rear wiper is turned on.
- The motor makes a clicking, buzzing, or grinding sound.
These signs do not always prove that the motor is bad. A seized wiper pivot, damaged linkage, stripped arm splines, broken wiring, or a blown fuse can create similar symptoms.
Tools and supplies
Prepare these items before removing the old motor:
- Correct replacement rear wiper motor
- Ratchet and socket set
- Small flat screwdriver or trim tool
- Phillips screwdriver or Torx driver, as required
- Small pick or needle-nose pliers
- Masking tape
- Marker
- Clean cloth
- Plastic trim removal tools
- Digital multimeter, if testing the circuit
- Battery terminal wrench
- Replacement trim clips, if any break
- Torque wrench, if the factory service information specifies torque
Do not force liftgate trim with a metal screwdriver. The panel can crack, and the painted edge can be damaged.

Safety Steps Before Removing the Rear Wiper Motor
Park the Jeep on level ground and switch the ignition off. Keep the liftgate supported if it does not stay open by itself.
Disconnect the negative battery cable before unplugging the motor if the vehicle has powered liftgate functions, a rear camera, or wiring near the motor. Wait several minutes before working near connectors. This reduces the chance of an electrical short and prevents the wiper from moving unexpectedly.
Do not work on the rear glass if it is cracked or loose. The wiper arm is spring-loaded and can snap down against the glass when removed. Place a folded cloth over the glass while releasing the arm.
Protect the original wiper position
Before removing the wiper arm, place a small strip of masking tape on the glass or liftgate to mark the blade’s parked position. Add a second mark along the arm if needed.
This mark is useful because the motor has a park position. If the arm is installed too high or too low, it may strike the body, trim, spoiler, or another part of the glass.
Avoid a common electrical mistake
Do not test a suspected seized motor by repeatedly switching it on while the arm is stuck. A jammed pivot can overload the motor and blow the fuse.
Instead, inspect the arm and pivot first. If the arm is difficult to move by hand with the motor disconnected, the pivot may be seized. In that case, replacing only the motor may not solve the problem.
How to Replace the Rear Wiper Motor
The following procedure applies to many Jeep Cherokee and Grand Cherokee models. Fastener locations and trim details vary, so use the vehicle’s service information when a step does not match your Jeep.
1. Turn off the ignition and disconnect the battery
Place the transmission in Park and set the parking brake. Turn off the ignition and remove the key or keep the key fob away from the vehicle.
Disconnect the negative battery cable if the motor connector or liftgate wiring is accessible only after trim removal. Secure the cable so it cannot touch the battery terminal.
If the factory service information for your exact model does not require battery disconnection, electrical testing may be performed with the battery connected. Use care around moving parts and exposed connectors.
2. Mark the wiper arm position
Lower the rear wiper to its normal parked position if it still works. Place masking tape on the glass at the tip of the blade.
If the wiper does not move, use the position that appears to be the normal park location. Take a photo before removal. This simple step prevents much of the trial and error during reassembly.
3. Remove the wiper arm
Lift the small plastic nut cap from the base of the rear wiper arm. A trim tool or small flat screwdriver can help. Protect the paint with a cloth.
Remove the retaining nut. The size differs by model, so select a socket that fits tightly.
Lift the arm away from the glass and rock it gently from side to side. Many arms use a tapered, splined shaft and may be tight. Do not pry against the glass.
If the arm will not release, use a small wiper-arm puller. Avoid striking the shaft or bending the arm. Replace the nut cap if it becomes cracked.
4. Remove the liftgate or hatch interior trim
Open the liftgate and inspect the inner trim panel. Remove visible screws, push pins, or grab-handle fasteners.
Use a plastic trim tool to release the panel clips. Start near a corner and work around the edge. Support the panel as the last clips release.
Some Jeep liftgate panels include separate upper and lower sections. Remove only the section needed to reach the motor. If the panel will not move, look for a hidden screw rather than increasing force.
Keep the clips with the panel. Replace any clip that is bent, broken, or missing.
5. Locate and disconnect the rear wiper motor
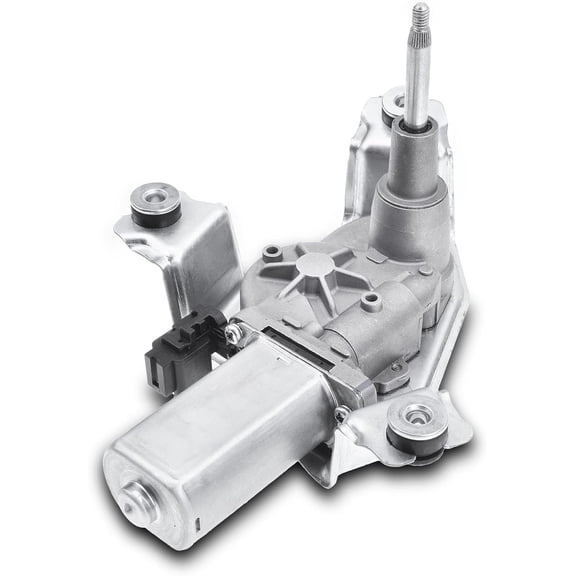
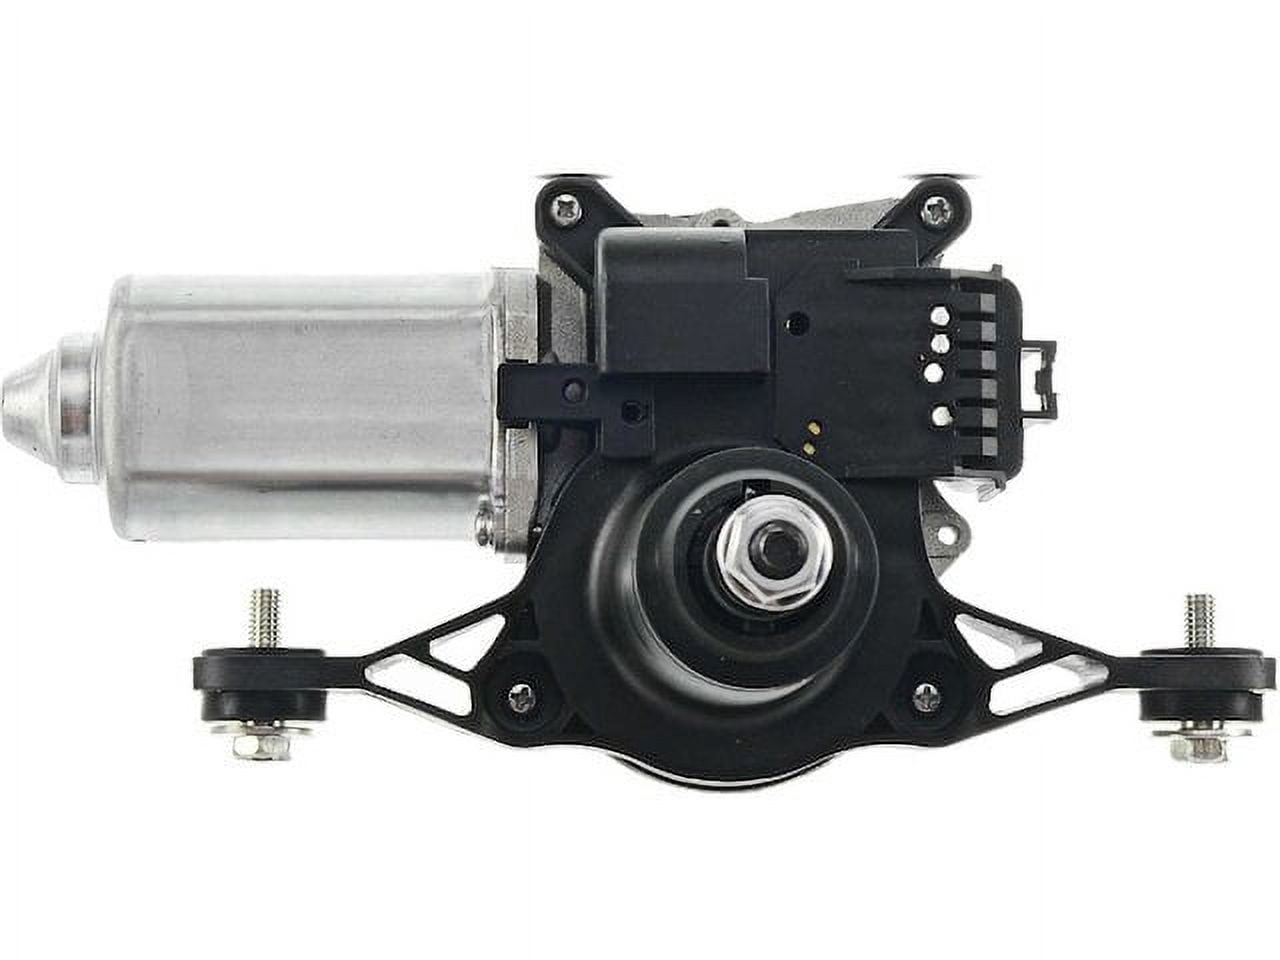
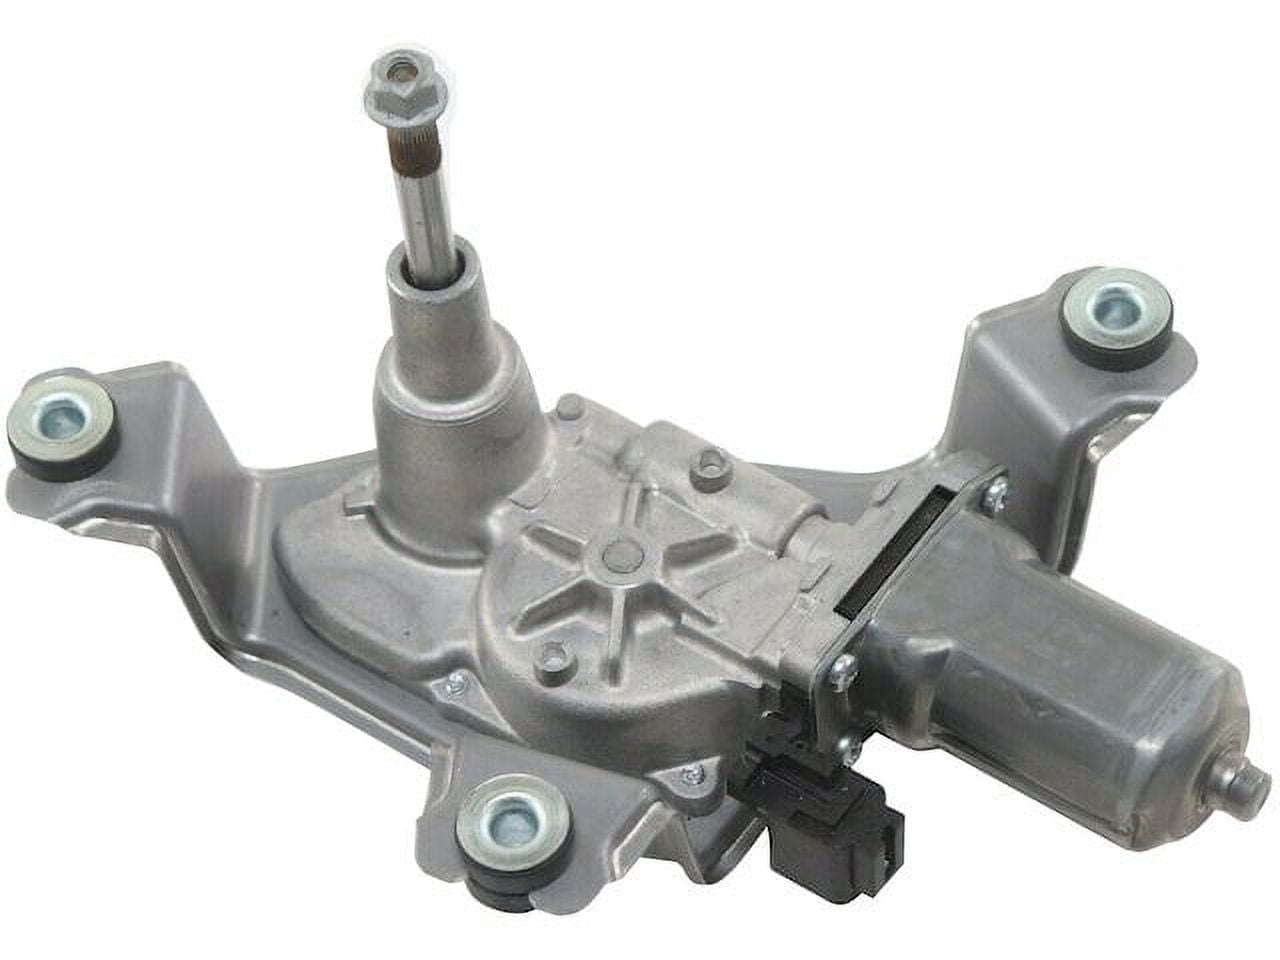
The rear wiper motor is usually mounted to the inside of the liftgate or hatch. It connects to the wiper shaft through a linkage or internal gear mechanism.
Before unplugging it, inspect the connector for:
- Water entry
- Green or white corrosion
- Burned terminals
- Loose wires
- Broken locking tabs
Press the connector lock and pull on the connector body, not the wires. If the connector is stuck, use a pick to release the lock. Do not pry hard against the terminal pins.
6. Remove the motor mounting fasteners
Remove the motor mounting bolts or nuts. Support the motor with one hand as the last fastener comes out.
On some models, the motor shaft passes through the liftgate and is sealed by a rubber gasket. Pull the motor straight away from the panel. Do not twist the shaft against the glass or bend the linkage.
Inspect the seal. A damaged seal can allow water into the liftgate, which may damage the new motor or nearby wiring.
7. Compare the replacement motor with the old one
Before installation, compare both motors side by side. Confirm that they have:
- The same connector
- The same shaft shape and length
- The same mounting-hole pattern
- The same linkage position
- The same rubber seal or gasket
- The same electrical configuration
A motor that physically fits may still have the wrong park circuit or connector. Do not install a part based only on appearance.
8. Set the replacement motor to its park position
If the replacement motor did not arrive in the correct park position, connect it temporarily and let it run through one cycle before attaching the wiper arm. Then switch it off and allow it to stop naturally.
This step is not needed if the motor is already in the correct park position according to the service instructions.
Do not hold the motor in your hand while it runs unless the connector and mounting method are secure. The linkage can move quickly.
9. Install the new motor
Place the gasket between the motor and the liftgate. Install the motor in the same orientation as the original.
Start all bolts or nuts by hand. Tighten them evenly. Use the factory torque specification for your model. Do not guess at a high torque value because the liftgate sheet metal can deform.
If the motor uses a linkage, confirm that the linkage is seated correctly before tightening the motor. A misaligned linkage can cause a short sweep, loud noise, or binding.
10. Reconnect the wiring
Push the electrical connector into the new motor until the locking tab clicks. Check that the harness is routed in its original position.
Keep the wires away from the linkage, motor gear, and sharp sheet-metal edges. Use the original clips or retainers where possible.
Reconnect the negative battery cable if it was removed.
11. Test the motor before reinstalling the trim
Keep your hands away from the linkage and shaft. Turn the ignition on and operate the rear wiper.
Check that the motor:
- Starts without hesitation
- Moves through a full sweep
- Returns to the marked park position
- Does not strike the trim or body
- Does not make a grinding sound
- Does not blow the fuse
Test the rear washer only if the washer hose was not disturbed. Watch for leaks around the motor seal and liftgate panel.
12. Reinstall the wiper arm
Turn the rear wiper off and confirm that the motor has returned to its park position.
Align the wiper arm with the mark made earlier. Press it onto the splined shaft without forcing it. Install the retaining nut and tighten it to the vehicle’s specified torque.
Snap the plastic nut cap back into place. Lower the arm carefully onto the glass and run another test.
13. Reinstall the liftgate trim
Position the trim panel and align its clips with the holes. Press around the panel until each clip seats.
Reinstall the screws, covers, and grab-handle hardware. Check that no trim is pinched and that the liftgate closes normally.

What to Do If the New Rear Wiper Motor Does Not Work
If the new motor does not run, do not immediately assume the replacement part is defective. Test the system in a safe order.
Check the fuse
A blown fuse can stop the motor. Use the fuse diagram in the owner’s manual or the fuse-box cover to identify the rear wiper circuit.
Replace a blown fuse only with one of the same amperage. If the replacement fuse blows again, stop testing. A short circuit, seized linkage, damaged wire, or incorrect motor may be present.
Never install a larger fuse to keep the wiper operating. That can damage the wiring and create a fire risk.
Check for power and ground
A multimeter can help determine whether the motor receives power.
With the wiring diagram for the exact Jeep model:
- Identify the motor power and ground terminals.
- Turn the ignition and rear wiper switch to the required position.
- Measure voltage at the motor connector.
- Test the ground circuit for excessive resistance.
- Compare the result with the service manual’s circuit description.
Some wiper systems use more than one power feed for the run and park functions. A single voltage check may not test the full circuit.
Inspect the wiper switch and body wiring
If power does not reach the motor, the fault may be in the:
- Rear wiper fuse
- Liftgate wiring harness
- Wiper switch
- Body control module
- Connector
- Ground point
- Washer or wiper relay, if equipped
A broken wire in the flexible harness between the body and liftgate is a known type of fault on many vehicles. Inspect the rubber harness boot for cracked insulation or stretched wires.
Check for a seized pivot
A seized pivot can overload a new motor. With the motor disconnected, check whether the wiper shaft or linkage moves as designed.
Do not apply excessive force to the shaft. If the pivot is corroded or frozen, it may need cleaning, lubrication, or replacement. A new motor will not correct a mechanically locked pivot.
Check the park position
If the motor runs but the blade parks incorrectly, the arm may have been installed in the wrong position. Remove the arm, allow the motor to complete a cycle, and reinstall the arm at the correct mark.
If the motor never parks, the motor’s park circuit, connector, wiring, or control module may be at fault.
Rear Wiper Motor Troubleshooting Table
Use this table to separate a motor problem from a related fault.
| Symptom | Likely causes | Useful next check |
|---|---|---|
| No sound and no movement | Blown fuse, no power, bad ground, failed motor, switch or module fault | Test fuse and connector voltage |
| Motor runs but arm stays still | Stripped arm splines, loose nut, disconnected linkage | Inspect arm and linkage |
| Wiper moves slowly | Seized pivot, damaged linkage, weak motor, low voltage | Disconnect motor and check pivot |
| Wiper stops in the wrong place | Arm installed incorrectly, failed park circuit, wrong motor | Reset park position and verify part |
| Fuse blows at once | Shorted wiring, seized pivot, incorrect motor | Stop replacing fuses and inspect circuit |
| Washer sprays but wiper does not move | Wiper motor circuit fault or mechanical binding | Test motor power and ground |
| Motor works only when liftgate moves | Broken wire in liftgate harness, loose connector | Inspect the flexible wiring boot |
| Loud clicking or grinding | Damaged gears, loose arm, binding linkage | Remove arm and inspect movement |
The most useful distinction is whether the motor makes noise. No noise often points toward power, ground, control, or motor failure. Noise without blade movement often points toward the arm, splines, linkage, or internal gears.

Cherokee and Grand Cherokee Variations to Expect
The replacement method changes with the body design, not just the Jeep name.
Jeep Cherokee XJ
The Cherokee XJ uses an older hatch design. Interior trim may have brittle clips, and the wiper motor may be mounted near the rear hatch glass. Rust around the motor shaft and hatch wiring is more likely on older vehicles.
Inspect the hatch metal around the motor seal. Water damage can affect both the motor and the wiring.
Jeep Cherokee KL
The Cherokee KL uses a newer liftgate and electronic body systems. The rear wiper motor may be controlled through the vehicle’s body electronics rather than a simple switch circuit.
Use the correct wiring diagram before applying power directly to the motor. Do not probe sealed connectors with oversized test leads.
Grand Cherokee ZJ and WJ
Older Grand Cherokee models may use simpler wiring, but aged plastic trim and corroded fasteners can make removal harder. Support the trim and liftgate carefully.
If the motor has been exposed to water, inspect nearby grounds and connectors before installing a new unit.
Grand Cherokee WK and WK2
These models may have tight liftgate trim, rear cameras, and additional wiring in the hatch. Remove panels slowly and avoid pulling on camera or harness connectors.
The motor’s park function and body-control wiring may require the correct vehicle-specific replacement part.
Grand Cherokee WL
The WL generation uses a newer liftgate design and may require more precise procedures. Check the official service information for trim removal, battery procedures, connector handling, and calibration requirements.
Do not assume a WK2 motor will fit a WL simply because the vehicles look similar.

Should You Replace the Wiper Motor or the Whole Wiper Assembly?
Replace only the motor when the arm, pivot, linkage, and wiring are in good condition and the motor has failed.
Consider replacing additional parts when inspection finds:
- Stripped arm splines
- A cracked arm
- A seized pivot
- Bent linkage
- Damaged motor gasket
- Corroded connector terminals
- Broken liftgate wires
- Water damage inside the liftgate
The correct repair may be a motor and pivot assembly rather than a motor alone. A new motor connected to a seized pivot can fail again.
OEM versus aftermarket motors
An original-equipment, or OEM, motor is usually the safest match when connector design, park position, and body-control compatibility matter. A reputable aftermarket motor may cost less, but verify the exact year, body style, connector, and warranty.
Do not select a part only by the phrase “fits Jeep Cherokee” or “fits Grand Cherokee.” Those names cover multiple generations with different electrical and mechanical designs.
Common Mistakes to Avoid
Avoid these errors during a rear wiper motor replacement:
-
Skipping the position mark
The arm may park too high, too low, or hit the body. -
Prying against the rear glass
The glass can crack under point pressure. -
Pulling on wires instead of connectors
This can separate wires from their terminals. -
Using a larger fuse
A higher-rated fuse can allow unsafe current through damaged wiring. -
Forcing a replacement motor into place
Misaligned linkage or the wrong part may damage the liftgate. -
Testing with a seized pivot
The new motor may be overloaded before the repair is complete. -
Overtightening the motor bolts
Excess force can deform the liftgate sheet metal. -
Reinstalling trim before testing
A second disassembly is needed if the motor is misaligned or the circuit still has a fault.

When Professional Repair Is the Better Choice
A home repair is reasonable when the motor is easy to access, the wiring is intact, and the replacement part matches the original.
Use a qualified technician when:
- The liftgate wiring is damaged.
- The vehicle has repeated fuse failures.
- The motor is controlled by a body module that needs diagnosis.
- The rear glass or liftgate has damage.
- The wiper linkage is seized inside the liftgate.
- You cannot confirm the correct part.
- The vehicle has a powered liftgate and you are unsure how to disable it safely.
A technician can use a wiring diagram, scan tool, and current test to find a circuit or module problem that a simple motor replacement will not fix.

Frequently Asked Questions
How long does it take to replace a Jeep rear wiper motor?
The mechanical work often takes about one to two hours for a first-time repair, but the time depends on the Jeep generation, trim access, rust, and electrical diagnosis. A simple motor swap may take less time, while a seized arm or damaged liftgate wiring can take much longer.
Can I replace the rear wiper motor without removing the liftgate trim?
Usually not. The motor is commonly mounted on the inside of the hatch or liftgate. The arm and exterior hardware can be removed from outside, but the connector and mounting fasteners normally require interior access.
Why does the rear wiper motor run but the blade does not move?
The wiper arm may have stripped splines, the retaining nut may be loose, or the linkage may be disconnected or broken. Remove the arm and inspect the shaft before replacing the motor.
Do I need to reset the rear wiper after installing a new motor?
Most mechanical systems do not require electronic programming. However, the motor must be in its park position before the arm is installed. Some newer Jeep models may require additional system diagnosis or calibration if a control module fault is present.
Can a bad rear wiper motor drain the Jeep battery?
A motor with an internal fault, a stuck park circuit, or a control problem may continue drawing power after the wiper is switched off. If the battery repeatedly goes dead, test for parasitic draw and inspect the wiper circuit rather than assuming the motor is the only cause.
Final Check After the Repair
After installing the motor, run the rear wiper several times with the glass wet. Confirm that the blade clears the intended area, returns to the correct park position, and does not touch the body or trim.
Check the motor seal and liftgate interior for water entry. If the wiper still fails, blows a fuse, or moves slowly, stop using it until the circuit, pivot, linkage, and wiring have been tested.
The most reliable repair is not simply installing a new motor. It is matching the correct part to the Jeep’s exact generation, setting the park position correctly, and finding any seized or damaged part that caused the original failure.