How To Draw A Jeep Car: Easy Step-By-Step Guide
 Reading Time: 11 minutes
 Introduction
To draw a Jeep-style car, start with a simple boxy body, add large rounded tires, sketch the upright windshield and seven-slot grille, then build depth with shading and perspective. This method works well for children, beginners, and anyone practicing vehicle drawing in the United States, whether the reference is a Jeep Wrangler on an American highway, a trail vehicle in a U.S. national park, or a customized 4×4 parked in a suburban driveway.
The easiest approach is to construct the vehicle from basic shapes instead of trying to draw every detail immediately. Use light pencil lines first, check the proportions, and darken only the outlines that look correct.
What You Need to Draw a Jeep
You can draw a convincing Jeep car with a few basic supplies:
- Pencil, preferably HB or 2B
- Clean drawing paper
- Eraser
- Ruler for checking straight body lines
- Black pen or darker pencil for final outlines
- Colored pencils, markers, or digital brushes for color
- A Jeep or Jeep-style vehicle reference photo
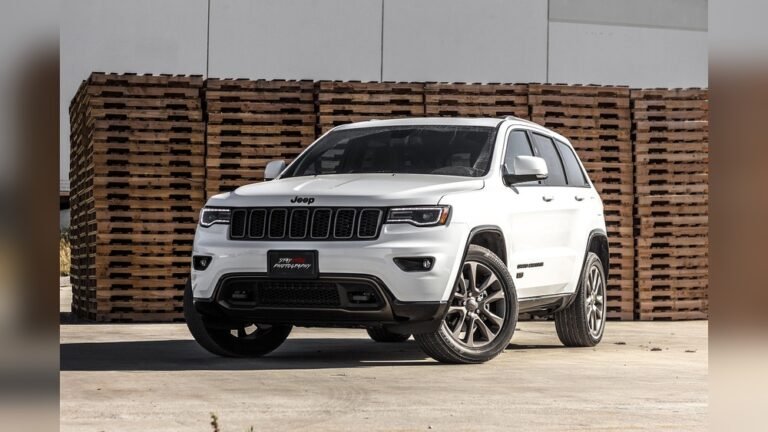
A reference image helps you understand proportions, lighting, wheel placement, and the relationship between the grille, hood, cabin, and tires. If you use a photograph, choose a clear side-view or three-quarter-view image with good lighting.
Choose a drawing angle
The angle determines which construction method will be easiest:
- Side view: Best for beginners because both wheels and the body profile are easy to place.
- Front view: Useful for practicing the grille, headlights, bumper, and wide stance.
- Three-quarter view: More realistic and dynamic, but it requires perspective.
- Off-road action view: Adds personality but is more difficult because the vehicle may be tilted or partly hidden.
For a first attempt, use a three-quarter front view only after practicing the side view. It shows the Jeep’s boxy shape and front details while still allowing you to create depth.
Step 1: Plan the Jeep’s Proportions
Begin by drawing a light horizontal ground line. This line shows where the tires will sit and prevents the Jeep from appearing to float.
Next, mark the vehicle’s overall width and height with a very light rectangle. The rectangle does not need to be perfectly accurate, but it gives you boundaries for the drawing.
Divide the vehicle into three main areas:
- Lower body: Frame, doors, fenders, wheels, and bumpers.
- Upper body: Hood, windshield, roof, and windows.
- Front or rear details: Grille, lights, spare tire, and exterior equipment.
For a side-view Jeep, the wheels should generally be similar in size and aligned along the same ground level. Leave enough space between the wheels for the doors and rocker panel.
A useful beginner proportion is:
- Wheel diameter: roughly one-third of the vehicle’s body height
- Hood height: slightly lower than the roof
- Windshield: tall and moderately angled
- Cabin: shorter and more upright than a sports car
- Body: wider and taller than a typical sedan
These are drawing guidelines rather than exact manufacturer dimensions. Different Jeep models and trim levels have different proportions.
Step 2: Draw the Main Body Shape
Use light, loose strokes to sketch the body. Avoid pressing hard because you will probably adjust the shape several times.
Start with the lower body as a long, slightly curved rectangle. Then add:
- A short front hood
- A taller cabin area
- A nearly upright rear section
- A raised fender area around each wheel
- A front bumper extending slightly beyond the grille
- A rear bumper at the opposite end
A Jeep-style vehicle usually has a recognizable upright and practical shape. Keep the roof relatively flat, the hood broad, and the body sides sturdy. Do not make the roof too low or the hood too long, or the drawing may begin to resemble a sports coupe.
Add the wheel openings
Place two large circles or ovals inside the lower body. These are construction guides for the tires. The wheel openings should overlap the body rather than sit entirely below it.
For a side view, the front and rear wheels should be close to the same size. If one tire is noticeably larger, the vehicle may look distorted unless you are intentionally using perspective.
Draw each wheel in layers:
- Light outer circle for the tire.
- Smaller inner circle for the rim.
- Central hub.
- Darker tire outline.
- Optional tread marks.
Keep the wheels round. A common mistake is to draw them as uneven ovals even in a direct side view.
Step 3: Build the Cabin, Hood, and Windshield
Once the main body is in place, draw the upper structure.
Draw the hood
The hood should extend forward from the windshield and remain broad rather than sharply pointed. Add a subtle line along the hood to show its top plane. If you are drawing a front three-quarter view, the hood should narrow slightly toward the front due to perspective.
Draw the windshield
Sketch the windshield as a large, slightly slanted shape. A Jeep windshield is generally more upright than the windshield of a sedan, but it should not be perfectly vertical unless you are drawing a simplified cartoon.
Divide the windshield from the side windows with a vertical or slightly angled pillar. Keep the window area large enough to make the cabin appear functional and open.
Add the roof
Draw a flat or gently curved roof above the windows. A removable-roof or open-air design can be suggested by showing:
- Roof panels
- A visible roll bar
- Thick roof supports
- Open space above the seats
- A folded soft-top structure
Do not overload the roof with details during the construction stage. The main goal is to make the cabin look correctly proportioned.
Shape the rear section
The rear of a Jeep-style vehicle is usually fairly upright. Add a rear door or tailgate, then leave room for a spare tire if the reference includes one.
Step 4: Add the Front Grille and Jeep Details
The grille is one of the most recognizable features of a classic Jeep-style front end. Draw it after the body proportions are stable.
For a front-facing or three-quarter drawing:
- Sketch a broad rectangular grille opening.
- Divide it into seven narrow vertical slots.
- Place round headlights on both sides.
- Add a front bumper below the grille.
- Include a lower air opening if the reference shows one.
- Add small turn signals or marker lights where appropriate.
The seven-slot grille is associated with Jeep vehicles, but the exact front-end layout varies by model and year. Use a reference when accuracy matters.
Add the fenders
Draw the front and rear fenders as raised arches over the tires. These arches should follow the curve of the wheels while remaining slightly outside the tire line.
A Jeep-style vehicle often has visually prominent fenders. They help communicate ground clearance and off-road design. Avoid making the fenders perfectly thin; a slightly wider shape gives the vehicle a more substantial appearance.
Add doors and handles
Use long, simple lines to show the doors. Make sure the door seams follow the body’s perspective. Add small handles near the upper-middle portion of each door.
If you are drawing a Wrangler-style vehicle, you can include:
- Exposed door hinges
- Removable door outlines
- Side mirrors
- Door-mounted handles
- Strong vertical door edges
Details should support the vehicle’s structure rather than cover every empty area.
Add bumpers and exterior equipment
Depending on the reference, you may include:
- Front and rear tow hooks
- Rock rails
- Side steps
- Spare tire
- Roof rack
- Recovery equipment
- Trail lights
- Mud flaps
Add these features only after the primary shape works. Accessories cannot fix incorrect proportions.
Step 5: Create Perspective in a Three-Quarter Jeep Drawing
A three-quarter view shows the front and side at the same time. It is one of the most useful angles for learning how to draw a Jeep car realistically.
Begin with the closest front wheel. Draw it slightly larger than the rear wheel because it is nearer to the viewer. The far side of the vehicle should appear narrower.
Use these perspective rules:
- Parallel body lines move toward the same vanishing direction.
- The near headlight appears larger than the far headlight.
- The near side mirror may hide part of the windshield edge.
- The far wheel may be partly hidden by the body.
- The grille narrows as it turns away from the viewer.
- The roof and hood should share the same perspective.
Do not make the front end excessively wide. If the grille is too large compared with the cabin, the Jeep will look cartoonishly short.
A simple way to check perspective is to lightly extend the hood, roof, beltline, and bumper lines. They should visually agree instead of pointing in unrelated directions.
Step 6: Add Tires, Rims, and Off-Road Texture
Large tires contribute strongly to the appearance of a Jeep-style vehicle. Use a thick outer tire ring and a smaller rim inside it.
For a basic tire:
- Draw the outer tire circle.
- Add the inner rim circle.
- Mark the central hub.
- Add five or six simple spokes.
- Darken the sidewall.
- Add limited tread blocks around the outer edge.
For an off-road tire, use larger and more widely spaced tread shapes. Keep the tread pattern consistent around the circumference. Random marks can make the tire look damaged or poorly constructed.
When drawing a front-facing tire in perspective, use an oval rather than a perfect circle. The more the wheel turns away from the viewer, the narrower the oval becomes.
Show ground clearance
Leave visible space between the bottom of the body and the ground, especially near the center of the vehicle. The tires and suspension should make the Jeep appear capable of traveling over rough terrain.
You can suggest suspension without drawing complex mechanical parts by adding:
- A dark inner wheel well
- A short shadow beneath the body
- A visible gap above the tire
- Slightly raised fenders
- A sturdy lower frame
Step 7: Ink, Shade, and Color the Drawing
Do not ink the drawing until the proportions, wheels, and perspective look correct. Use a black pen or darker pencil to trace the final lines selectively.
Use thicker lines for:
- Tires
- Bumpers
- Wheel wells
- Lower body
- Areas closest to the viewer
Use thinner lines for:
- Window divisions
- Door seams
- Grille slots
- Roof details
- Reflected light
Add simple shading
Choose one light source, such as the upper left. Then shade the surfaces that face away from it:
- Underside of the hood
- Bottom of the doors
- Inside of the wheel wells
- Lower bumper
- Tire sidewalls
- Shadow beneath the chassis
Windows can be shaded with a medium tone rather than solid black. Add a lighter diagonal highlight to make the glass appear reflective.
Choose realistic colors
Common Jeep colors include black, white, gray, silver, blue, green, red, tan, and orange. A limited palette usually looks more convincing than many competing colors.
For a simple colored-pencil approach:
- Apply a light base color.
- Add a darker version of the same color beneath the windows and along the lower body.
- Shade the tires with dark gray rather than pure black.
- Use pale blue or gray for the windows.
- Add small white highlights to the paint and glass.
Step 8: Finish the Background and Ground Shadow
A small amount of context can make the vehicle look grounded. You might add:
- A paved American road
- A gravel trail
- Desert terrain in the Southwest
- A wooded trail
- A driveway or parking area
- A simple horizon line
Keep the background less detailed than the Jeep so the vehicle remains the focal point.
The ground shadow should sit directly beneath the tires and chassis. Make it darker near the tires and softer at the edges. A shadow that is too far from the vehicle can make it appear to float.
Common Mistakes When Drawing a Jeep
Making the body too low
A low roof and narrow tires can make the vehicle resemble a compact car. Raise the cabin, enlarge the tires, and emphasize the upright windshield.
Placing the wheels too far apart
The wheels need enough room for the doors, but excessive spacing makes the body look stretched. Compare the distance between the axles with the vehicle’s total length.
Drawing a flat grille
A grille viewed at an angle should follow the front plane of the vehicle. Tilt or narrow it slightly in a three-quarter view.
Forgetting the wheel arches
Without clear fender arches, the tires may look pasted onto the body. Draw the body overlapping the upper portions of the tires.
Adding details too early
Door handles, roof racks, and tread marks cannot correct an inaccurate body shape. Work from large shapes to small details.
Using heavy outlines everywhere
Uniformly thick outlines can flatten the drawing. Vary line weight to show depth and lighting.
Ignoring the reference
Even experienced artists use references for unfamiliar vehicles. Model years, grille designs, headlights, bumpers, and roof shapes can differ substantially.
A Simple Jeep Drawing Practice Plan
If your first drawing does not look right, practice in stages rather than starting with a fully detailed illustration each time.
| Practice session | Main goal | What to draw |
|---|---|---|
| 1 | Proportion | Basic body rectangle and two wheels |
| 2 | Structure | Hood, roof, windshield, and doors |
| 3 | Front design | Grille, headlights, bumper, and fenders |
| 4 | Perspective | Three-quarter body with near and far wheels |
| 5 | Finish | Shading, tires, windows, and ground shadow |
Spend several minutes drawing each version. The goal is to improve observation and construction, not to produce a finished illustration immediately.
A useful exercise is to draw the same Jeep from three angles: side, front, and three-quarter view. Compare the wheel size, roof height, grille width, and windshield angle in each version.
How to Draw a Jeep Car for Kids
Children can use a simplified version of the method:
- Draw a large rounded rectangle for the body.
- Add two big circles for the tires.
- Draw a smaller rectangle for the cabin.
- Add two windows.
- Draw two round headlights.
- Add a simple seven-slot grille.
- Color the vehicle.
- Add a road, sun, trees, or mountains.
Encourage children to use light construction lines and focus on recognizable shapes rather than exact measurements. A cartoon Jeep can have oversized tires, a smiling grille, or exaggerated headlights as long as the main body remains clear.
How to Draw a Jeep in a Cartoon Style
For a cartoon Jeep, exaggerate selected features instead of every feature. Good options include:
- Oversized tires
- Rounded corners
- Large circular headlights
- Shorter body
- Taller roof
- Bold grille
- Thick black outlines
Keep the vehicle’s key identity consistent: boxy body, upright cabin, sturdy wheels, and recognizable front design. Excessive exaggeration can make it look like a generic truck.
Frequently Asked Questions
Is a Jeep easy to draw for beginners?
Yes. Its boxy body, upright windshield, large tires, and simple geometric grille make it a practical vehicle for beginners. Start with a side view before attempting a three-quarter perspective.
How do I draw a Jeep grille correctly?
Draw a broad front opening and divide it into seven narrow vertical slots for a classic Jeep-inspired design. Adjust the width and angle to match the model and viewing direction in your reference.
How do I make my Jeep drawing look realistic?
Focus first on proportion, wheel placement, and perspective. Then add consistent lighting, darker wheel wells, reflective windows, varied line weight, and a ground shadow.
What is the best pencil for drawing a Jeep?
An HB pencil works well for construction lines. A 2B pencil creates darker outlines and shading. Use a kneaded eraser or soft vinyl eraser to remove guidelines without damaging the paper.
How do I draw a Jeep from the front?
Begin with a wide, slightly rounded body shape. Add the windshield and roof above it, then place the seven-slot grille, headlights, bumper, and two front tires symmetrically. Use a ruler or centerline to keep both sides balanced.
Key Takeaways
- Start with basic rectangles, circles, and perspective guides.
- Establish the wheels and body proportions before adding details.
- Keep the windshield upright and the body relatively boxy.
- Use the grille, round headlights, sturdy fenders, and large tires to communicate Jeep styling.
- Add shading only after the structure is accurate.
- Practice side, front, and three-quarter views separately.
- Use a clear reference photo when drawing a specific Jeep model.
Conclusion
The most reliable way to learn how to draw a Jeep car is to build it from large shapes first and refine it in stages. Establish the ground line, body rectangle, cabin, wheels, and perspective before adding the grille, headlights, fenders, doors, and off-road accessories. With repeated practice, you can move from a simple cartoon Jeep to a shaded three-quarter illustration with convincing depth and detail.